You might feel nervous about rivet removal, especially if you want to protect the material. Stay calm and trust the process. With the right techniques, you can learn how to remove a rivet safely. Take your time and gather your tools before you start. Safety matters most. Always wear proper gear and work in a clean area. Careful steps help you avoid mistakes and keep your materials looking great.
Key Takeaways
- Get the right tools like sharp drill bits, rivet removers, chisels, pliers, and grinders before you start. Always wear safety gear like goggles, gloves, and dust masks to stay safe. Hold your workpiece tight so it does not move, and you can remove the rivet correctly. Drill out rivets slowly and use steady pressure. Pick the right drill bit size so you do not hurt the material. Use special rivet removal tools to keep holes round and protect the area around them. If you do not have power tools, you can use chisels, punches, and pliers by hand. Work slowly and carefully so you do not make mistakes like rushing, using the wrong bits, or pushing too hard. After you remove the rivet, check and clean the area to look for damage and get ready for new rivets.
Table of Contents
Tools and Safety
Before you start removing rivets, you need to gather the essential tools for rivet removal and set up your workspace. Using the right equipment helps you work faster and keeps your materials safe.
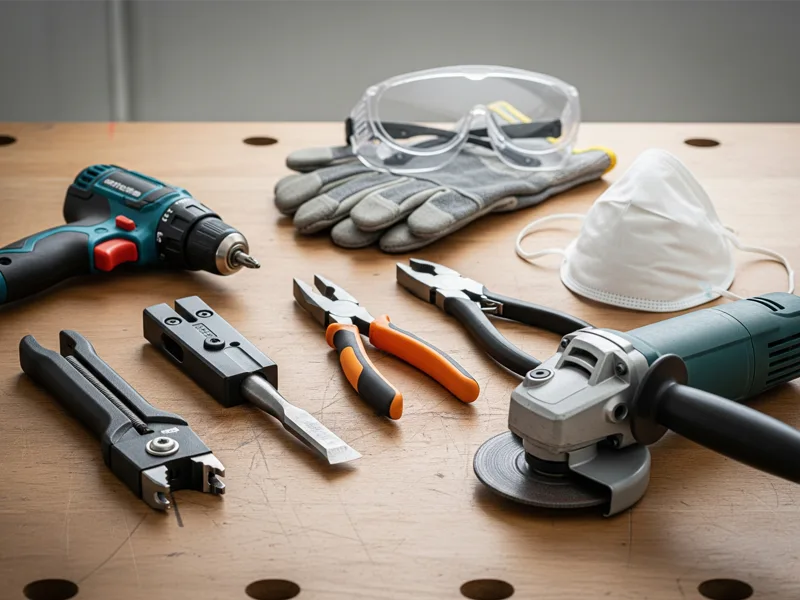
Essential Tools
Drill Bits
You need sharp drill bits to remove rivets cleanly. Choose a bit that matches the size of the rivet head. Many professionals use cobalt or high-speed steel (HSS) bits because they last longer and cut through metal easily. Some rivet removal kits include special bits and guides to help you drill straight and avoid slipping.
Rivet Remover
A rivet removal tool makes the job much easier. This tool centers the drill bit on the rivet head, so you do not scratch or damage the surrounding material. Brands like Gage Bilt and Bayfast offer kits that attach to power drills. These kits let you remove rivets quickly and keep the holes round for reuse. The Vintage Trailer Supply rivet removal tool, for example, drills out only the rivet head and protects the metal underneath. You can adjust the depth to avoid making the hole too large.
Tip: Using a dedicated rivet removal tool helps you avoid ovaling holes and keeps your work neat.
Chisel
A chisel can help you remove stubborn rivets. Place the chisel under the rivet head and tap it with a hammer. This method works best for older or rusted rivets but may risk damaging the surface if you are not careful.
Pliers
Use pliers to grip and pull out the rivet shaft after you remove the head. Needle-nose pliers work well for small or tight spaces.
Grinder
A grinder can cut off rivet heads quickly. Use this tool if you have many rivets to remove or if the heads are too tough for a drill. Always move slowly to avoid overheating the metal.
Safety Gear
Eye Protection
Wear safety goggles to protect your eyes from flying metal shavings and sparks. Even a small piece of metal can cause serious injury.
Gloves
Put on gloves to protect your hands from sharp edges and hot metal chips. Choose gloves that fit well and allow you to grip your tools.
Dust Mask
A dust mask keeps you from breathing in metal dust and fumes. Work in a well-ventilated area to stay safe.
Safety First: Always read the instructions for each tool. Wear tight-fitting clothing and keep long hair tied back to avoid accidents.
Workspace Prep
Secure Material
Clamp your workpiece to a sturdy surface. This step keeps the material from moving while you use a rivet removal tool or other equipment. A secure setup helps you drill straight and prevents slips.
Organize Tools
Lay out all your tools before you begin. Keep everything within reach so you do not have to stop and search for what you need. Check that your drill bits are sharp and your safety gear is ready.
A well-prepared workspace helps you work faster and reduces mistakes. Take a few minutes to set up before you start removing rivets.
How to Remove Rivets
Learning how to remove a rivet without damaging your material starts with the right techniques and tools. You can follow this step-by-step guide to make the removal process safe and effective. Below, you will find the best method to remove a rivet using drills and specialized rivet removal tools.
Drilling
Drilling out rivets is the most common way to remove them. You need to follow each step carefully to protect your workpiece.
Mark Center
Start by marking the center of the rivet head. Use a center punch to create a small dimple. This mark keeps your drill bit from slipping and helps you stay accurate.
Tip: Always use a punch that fits the rivet shank. This prevents damage to the surrounding material.
Select Drill Bit
Choose a sharp drill bit that matches the rivet size. Split point or cobalt bits work best for steel rivets. For 1/8″ rivets, a #30 bit is recommended. If you want to avoid enlarging the hole, pick a bit slightly smaller than the rivet’s mandrel.
- Split point drill bits cut cleanly and reduce wandering.
- Jobber bits are shorter and less likely to break.
- Titanium bits with cutting oil help keep temperatures down.
Low Speed
Set your drill to a low speed. Drilling out the rivet slowly prevents heat buildup. High speeds can weaken the material and cause damage. You want to keep the drill bit cool and centered.
Note: Lubricate the drill bit with cutting oil for smoother drilling and less friction.
Steady Pressure
Hold the drill steady and apply gentle pressure. Drill straight into the center punch mark. Do not rush. Increase pressure slightly as you move through the rivet body. Stop drilling when the rivet head separates from the shaft.
- Secure your workpiece with clamps to prevent movement.
- Back up the material around the rivet shop head to avoid distortion.
Remove Head
Once you drill deep enough, the rivet head will loosen. Use a drift punch or the blunt end of a drill bit to pop off the head. Tilt the punch gently to snap the head away.
Tip: If the drill bit drifts off center, use a cold chisel to make a new mark and guide the bit back.
Push Shaft
After removing the head, insert a pin punch into the relief hole. Tap it with a hammer to stretch the rivet lengthwise. This shrinks the diameter and makes it easier to push the shaft out. Use pliers to pull out any remaining pieces.
For tough angles, use clecos as visual guides to keep your drill aligned.
Use Rivet Remover
A rivet removal tool can make the job easier and safer. You can choose between manual and pneumatic options depending on your needs.
Manual Tool
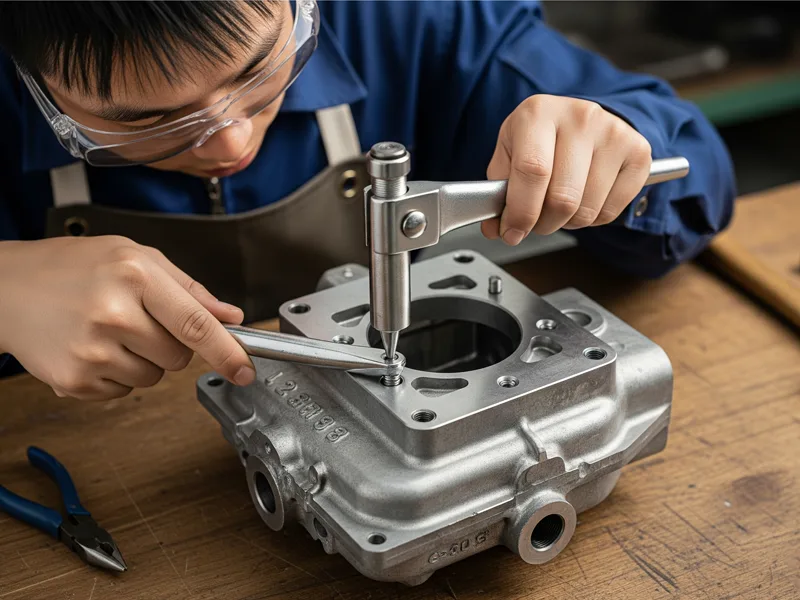
Manual rivet removal tools center the drill bit and protect the surrounding material. You place the tool over the rivet head, then drill through the guide. This keeps the hole round and prevents slipping.
- Dedicated rivet-removal tool kits often include depth stops.
- These tools help you avoid ovaling holes and keep your work neat.
Tip: Always check the centering after the first drilling step to ensure accuracy.
Pneumatic Tool
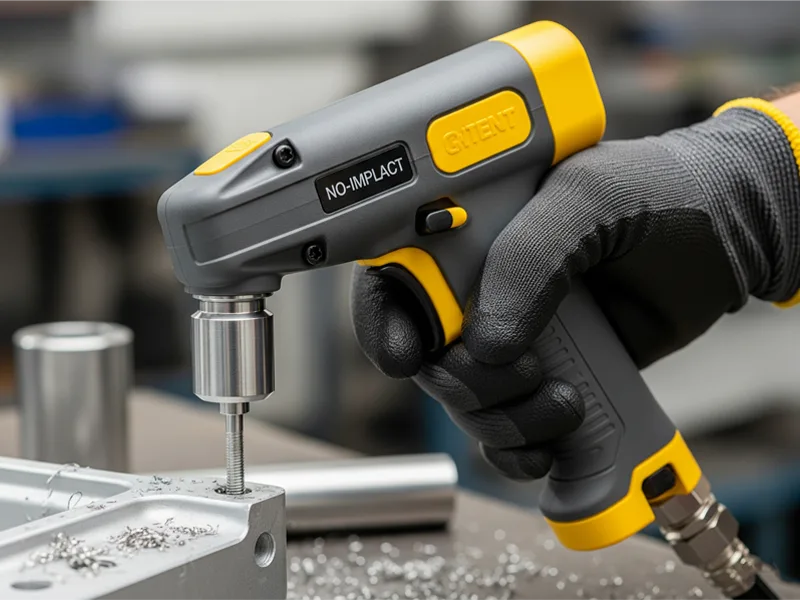
Pneumatic rivet removal tools work faster and reduce fatigue. These tools use air pressure to grip and rotate the rivet, prying it out with minimal risk of distortion. You get consistent power and precise results.
- Pneumatic tools are lightweight and ergonomic.
- Features like adjustable air intake and noise reduction improve comfort.
- Shockless design and self-locking heads make removal safer.
Using a pneumatic rivet removal tool increases productivity and keeps your hands comfortable during long jobs.
Techniques for Success
You can use several techniques to improve your results when drilling out rivets or using a rivet removal tool.
- Always secure your material before starting.
- Use sharp, high-quality drill bits for clean cuts.
- Drill slowly and apply steady pressure.
- Lubricate the bit to reduce heat and friction.
- Back up the material to prevent distortion.
- Check alignment often and adjust as needed.
The best method to remove a rivet depends on your tools and the material. Practice these techniques to find what works best for you.
By following these steps, you will master how to remove a rivet without damaging your project. Whether you use a drill or a dedicated rivet-removal tool, careful technique and patience lead to the best results.
Remove Rivets Without a Rivet Tool
You may not always have access to power tools or specialized equipment. In these cases, you can still remove rivets without a rivet tool by using simple hand tools and a careful approach. These manual removal methods work well in places where electricity is not available or when you need to work in tight spots.
Manual Methods
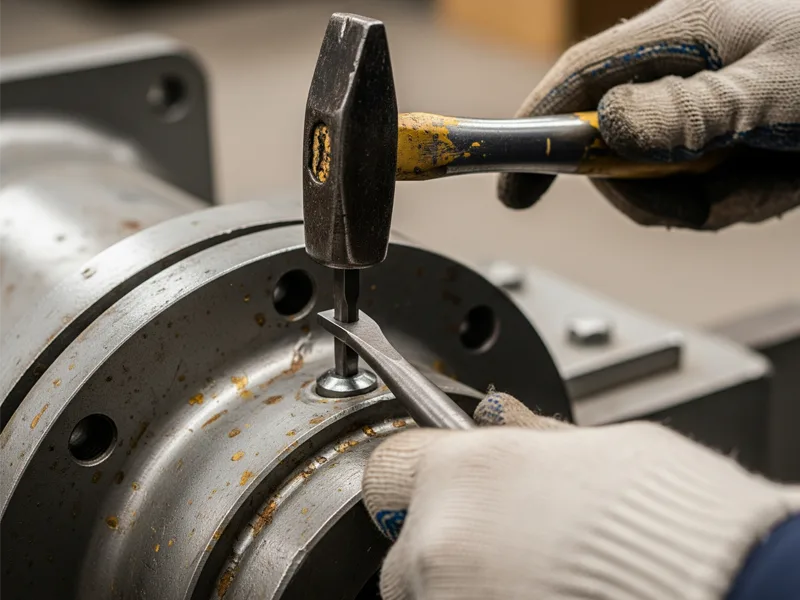
Chisel and Hammer
A chisel and hammer can help you remove rivets without a rivet tool. Place the sharp edge of the chisel under the rivet head. Tap the chisel gently with a hammer to cut off the head. This method takes time and effort, but it works when you do not have power tools. You must use precision to avoid damaging the material around the rivet. If you work on thin sheet metal, support the back of the material with a block or bucking bar. This support helps prevent dents or stretched holes. Be careful, as using a chisel and hammer can sometimes cause the rivet to slip or the hole to become misshapen.
Tip: Use a woodworking chisel or a flat screwdriver if you do not have a metal chisel. Keep the chisel sharp for better control.
Punch and Hammer
You can also use a punch and hammer to remove rivets. First, center the punch on the rivet head and tap it with the hammer. This action loosens the head. Next, use the punch or a small screwdriver to push the rivet body out of the hole. This method works best for soft materials like aluminum or plastic. It does not require power tools, so you can use it in the field or in places with no electricity.
Pliers
Pliers help you grip and pull out the rivet shaft after you remove the head. Choose needle-nose pliers for small or tight spaces. Some pliers, like trim clip removal pliers, give you a strong grip and let you work in delicate areas without harming the surrounding material. Use slow, steady pressure to avoid bending or scratching the surface.
Alternative Methods
Grinder
A grinder can quickly remove rivet heads, especially on larger or solid rivets. Use an angle grinder for big jobs or a rotary tool for smaller spaces. Move the grinder slowly and keep it cool to avoid overheating the metal. Always wear safety goggles and gloves when using a grinder.
Dremel Tool
A Dremel tool with a cutting disc or carbide burr works well in tight or recessed areas. The small size lets you reach rivets that are hard to access with bigger tools. Use light pressure and short bursts to avoid damaging the material. Dremel tools are great for shaping and smoothing after you cut the rivet.
Wire Cutters
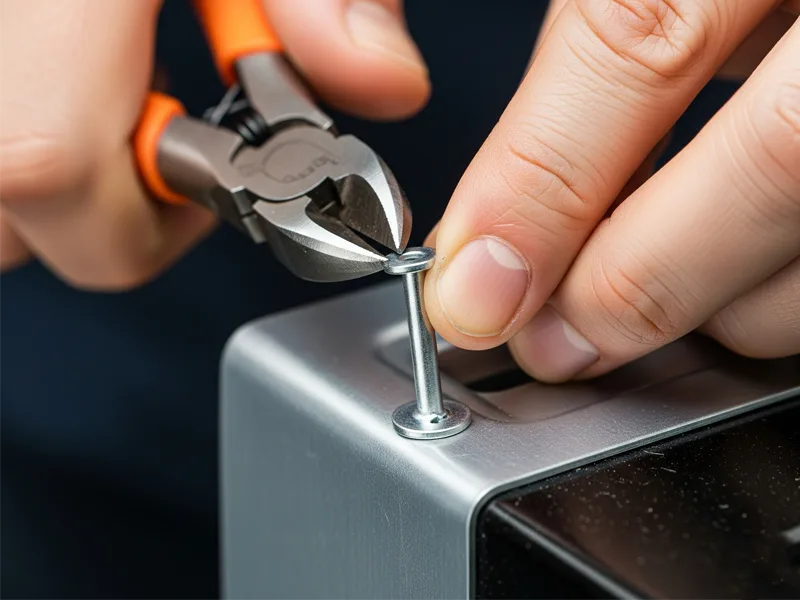
Wire cutters or flush-cutting snips can cut through small aluminum or hollow rivets. Place the jaws around the rivet shaft and squeeze to cut it off. This method is quick and clean for soft materials.
Heat
Sometimes, you can use heat to loosen stubborn rivets. Apply a heat gun or small torch to the rivet for a few seconds. The metal expands and breaks the bond. Be careful not to overheat the area, as too much heat can damage paint or warp thin materials. Always test on a scrap piece first.
Note: Always work slowly and check your progress often. Support thin materials from behind to prevent bending or stretching.
You can use these rivet removal methods when you need to remove rivets without a rivet tool. Choose the method that fits your project and the tools you have. Take your time, and you will protect your materials while getting the job done.
Preventing Damage
When you remove rivets, you want to avoid any risk of damaging your materials. Careful planning and the right techniques help you keep your project safe and looking good. Follow these best practices and learn about common mistakes to prevent damage.
Best Practices
Test First
Before you start on your main project, always test your rivet removal method on a scrap piece. This step lets you see how your tools work and helps you avoid surprises. Testing first also lowers the risk of damaging valuable materials. You can use painter’s tape over the rivet head to stop it from spinning and protect the surface. Try less aggressive methods first, like using a punch or screwdriver, before moving to drills or grinders.
Work Slowly
Working slowly gives you better control over your tools. When you rush, you increase the risk of damaging the material. Use low drill speeds and steady pressure. This approach keeps the drill bit centered and prevents overheating. If you use a grinder, hold it vertically and move it gently along the rivet. Careful, step-by-step removal helps you avoid slips and keeps your work neat.
Use Right Tool
Choosing the right tool for the job makes a big difference. Use torque-adjustable drills to control force. For soft materials like plastic or aluminum, use manual tools with low force. Add washers or backing plates to protect surfaces from scratches and vibration. Secure your workpiece with clamps to stop it from moving. Lubricate drill bits with cutting oil for smoother drilling and less heat.
Pro Tip:
Check the table below for strategies that help prevent damage during rivet removal.
| Strategy/Technique | Description |
|---|---|
| Controlling tool force | Use adjustable drills and avoid high speeds to reduce risk of damaging base material |
| Use of washers/backing plates | Protect surfaces and absorb vibration |
| Handling soft materials | Use gentle, manual tools to avoid thermal and mechanical damage |
Common Mistakes
Rushing
If you rush, you lose control and increase the risk of damaging your project. Fast drilling or grinding can cause gouges or cracks. Always take your time and check your progress often.
Wrong Bit
Using the wrong drill bit size can cause big problems. A bit that is too small might break inside the rivet. A bit that is too large can enlarge the hole and damage the surrounding area. Always match the bit to the rivet size and start with a bit just larger than the rivet center hole. Mask the area around the rivet to prevent slips.
Excessive Force
Applying too much force can deform the hole or even collapse the material. Forceful hammering or pulling with pliers can cause permanent damage. Use firm but gentle pressure. If a rivet does not move, try a different method instead of forcing it.
After Removal
Inspect Material
After you remove the rivet, inspect the area closely. Look for cracks, dents, or hidden damage around the hole. Check nearby parts, wiring, or components for any signs of harm. If you find corrosion, clean it and treat the area to prevent future problems. Make sure the hole is not enlarged or misshapen before you install a new rivet.
Clean Up
Clean up any metal shavings or dust from the work area. Use a soft brush or vacuum to remove debris. If you see scratches or small gouges, use sanding tools to smooth the surface. Treat and protect the area to keep your project strong and free from future damage.
There are lots of safe ways to take out rivets. You can drill them out, use a grinder, or try a chisel and hammer. These methods work well if you use the right tools and go slowly. Pick the best way for your rivet type. Use guides or special tools to protect your material. Many people say that getting ready and being patient helps stop mistakes. 🛠️ Always wear safety gear and do not hurry. Use these tips for your next project and tell us your questions or stories in the comments!
FAQ
You should match the drill bit to the diameter of the rivet head. Start with a bit slightly smaller than the rivet’s center. This helps you avoid making the hole too large.
Yes, you can reuse the hole if you remove the rivet carefully. Check the hole for damage or enlargement. If the hole stays round and clean, you can install a new rivet in the same spot.
Tip:
Place painter’s tape over the rivet head. This gives extra grip and keeps the rivet from spinning. You can also use a center punch to make a deeper mark before drilling.
You can use heat for stubborn rivets, but you must work carefully. Too much heat can damage paint or warp thin materials. Always test on scrap first and use short bursts of heat.
- Cover the area with masking tape.
- Use backing plates or washers.
- Work slowly and check your progress often.
These steps help you avoid scratches and dents.
You can use hand tools like a chisel, hammer, punch, or pliers. These tools work well for soft rivets or small jobs. Manual methods take more time, but you can still remove rivets safely.
Yes, you can. Use gentle pressure and sharp tools. Support the plastic from behind. Drill slowly and avoid too much force. This helps you keep the plastic from cracking.


