
Passivation is to form a dense oxide film (passivation film) on the metal surface, which makes the metal surface lose its original activity, thereby preventing the metal from further reacting with the corrosive medium. Passivation surface treatment usually adopts chemical methods, immersing the metal in a chemical solution containing an oxidant, such as citric acid, nitrate, and other solutions, so that the metal surface undergoes a chemical reaction to form a passivation film. The passivation film is usually thin, with a thickness of nanometers, and has good corrosion resistance and insulation, but the adhesion is relatively poor, and it is easy to fall off. It mainly improves the corrosion resistance and aesthetics of the metal.
Key Takeaways
- Passivation cleans metal parts. It makes a thin, invisible oxide layer. This layer helps stop rust and corrosion. The process works best on stainless steel. It removes free iron from the surface. This helps chromium make a strong shield. Passivation makes metal parts last longer. It does not change their size, shape, or look. Using safer acids like citric acid is better. It keeps workers and the environment safe during passivation. Cleaning the metal before passivation is very important. It helps the protective layer form the right way. Many industries use passivation. These include medical, aerospace, food, and chemical processing. Passivation keeps metal parts clean and safe. Testing and checking after passivation is needed. It makes sure the metal is clean and protected. Following industry rules and best practices is important. This gives good and steady passivation results.
Metal Parts Passivation Process
Table of Contents
What Is Passivation
Passivation is a special way to clean metal parts using chemicals. It takes away free iron and other things from the metal’s surface. This helps the metal make a thin, invisible oxide layer. The layer protects the metal from rust and corrosion. Even though the layer is very thin, it is strong. It keeps out water and chemicals.
The metal parts' passivation process works best for stainless steel. It can also be used for metals like titanium. For stainless steel, you clean the part first. Then you put it in a bath with nitric or citric acid. The acid takes away free iron. It helps the chromium in the metal react with oxygen. This makes a chromium oxide layer. This layer is why stainless steel does not rust easily.
Note: The passivation process is not a coating. It does not put anything new on the metal. It changes the surface so the metal fights corrosion better.
Here are the main chemical reactions during the passivation of metal:
- Acid treatment takes away free iron and stops small rust spots.
- Nitric acid reacts with chromium to make a chromium oxide (Cr2O3) layer.
- Citric acid gets the surface ready for natural passivation in air and helps make a thicker oxide layer.
- The chromium oxide layer stops harmful things from reaching the iron.
- Cleaning before passivation is important because dirt or oil can stop these reactions.
Why Use Passivation
You want your metal parts to last longer and stay clean. The passivation process helps you do this. When you use passivation of metal, you take away harmful bits and make a shield. This shield keeps out water, salt, and other things that cause rust.

Passivation of stainless steel is very important. Stainless steel has chromium, which makes a self-healing oxide layer. If you skip passivation, free iron or other things can break this layer and cause rust. The passivation treatment fixes or makes the oxide layer better. This makes your parts stronger.
Here are some reasons to use passivation techniques:
- Passivation makes a thin oxide layer that stops rust but does not change how the part looks or fits.
- It helps metal parts last longer and saves money on repairs.
- The process is good for prototypes, so they can pass hard tests and look nice for showing.
- In medical tools, passivation makes them safer and easier to clean.
- Passivation of metal surfaces is easier and costs less than plating or anodizing for many uses.
Passivation is used in many industries. The table below shows some common examples:
| Industry | Reason for Passivation Use | Example Applications |
|---|---|---|
| Medical and Pharmaceutical | Keeps things clean, stops rust, and helps keep germs away | Tools and equipment for handling electronic parts |
| Aerospace | Protects parts from tough conditions and rust | Fasteners, landing gear, fuel systems |
| Food and Beverage | Helps keep things clean and safe from rust | Processing equipment, storage tanks, utensils |
| Semiconductor & Electronics | Keeps things pure and stops dirt in sensitive places | Tools and equipment handling electronic parts |
| Chemical Processing | Stops damage from strong chemicals and helps equipment last longer | Tanks, pipes, valves, reactors |
Passivation of metal surfaces works because the oxide layer acts like a shield. This layer keeps water and chemicals away from the metal. If the layer gets scratched, chromium moves to the spot and fixes the oxide film. This self-repairing feature makes passivation techniques work so well.
When you pick the metal parts passivation process, your parts get cleaner, safer, and last longer. You also meet tough rules for quality and safety.
How Passivation Works
Chemical Steps
You begin by cleaning the metal parts. This step takes away grease, oil, and iron bits that can cause rust. Clean parts help the next steps work better. After cleaning, you rinse the parts with water. This washes off any leftover cleaner.
Next, you put the parts in an acid bath. The kind of acid depends on what you need. Nitric acid is often used for stainless steel. It has worked well for many years. Citric acid is another choice. It is safer for people and the planet. Both acids remove free iron and help make a strong passive layer.

Here is a table that lists the main chemicals used in the passivation process:
| Chemical Agent | Description & Use | Characteristics & Applications | Safety & Environmental Considerations |
|---|---|---|---|
| Phosphoric Acid | Used mostly to smooth stainless steel before passivation. | Weaker acid can work as well or better than nitric acid at higher heat; grabs free iron. | Safer than nitric acid; used as a first step. |
| Nitric Acid | A common and old passivating agent for stainless steel. | Strong oxidizer; works on most stainless steel types. | Very corrosive; needs careful handling and disposal. |
| Citric Acid | An organic acid that is becoming more popular; used in ASTM A967. | An organic acid that is becoming more popular, used in ASTM A967. | Safer and better for the environment; easier to get rid of. |
| Sodium Dichromate | Sometimes added to nitric acid baths to help make more chromium oxide. | Strong oxidizer; makes passivation better. | Toxic and bad for the environment; often not used. |
| Sodium Hydroxide | Used in some steps of multi-step passivation. | Alkaline cleaner and neutralizer; removes leftover acids and dirt. | Needs care when using; stops acids and protects the surface. |
You control the heat and time for each step. For example, nitric acid passivation takes about 20 to 30 minutes at 70°F to 140°F. Citric acid passivation can take only 4 minutes and works at room temperature or up to 160°F. These steps follow rules like ASTM A967.
The steps for stainless steel usually go like this: 1. Clean and degrease the metal. 2. Rinse with water. 3. Put in an acid bath (nitric or citric acid) at the right heat and time. 4. Rinse again to wash off the acid. 5. For some types, use sodium hydroxide to neutralize. 6. Rinse and dry the parts.
Each step helps build a strong passive film on your metal. The acid takes away iron and other dirt. The rinse steps make sure nothing blocks the passive layer from forming. When you finish, your parts have a clean, rust-resistant surface.
Tip: Citric acid is safer for you and the earth. It does not make toxic fumes and is easier to use than nitric acid.
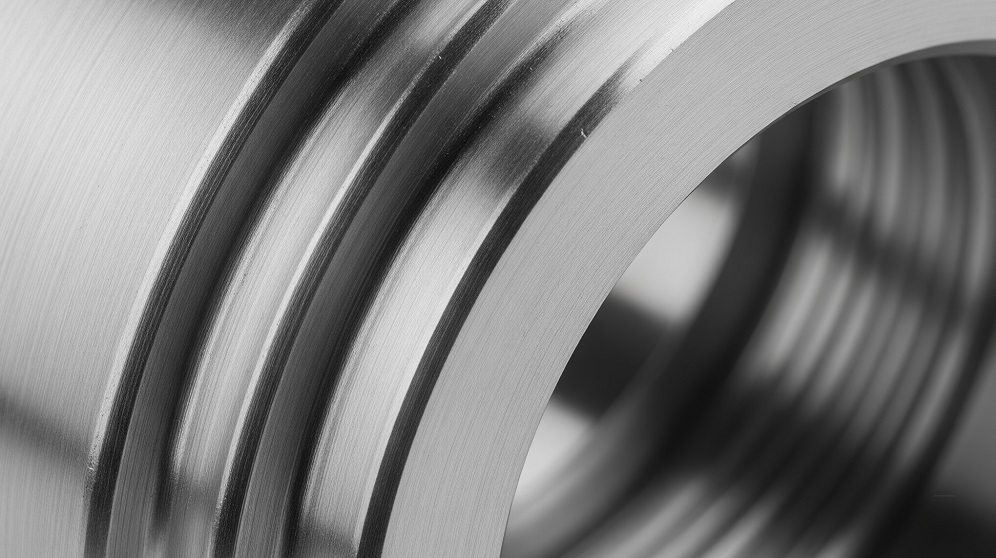
Protective Oxide Layer
The main goal of passivation is to make a passive layer on your metal. This layer is very thin but very tough. On stainless steel, the passivation process forms a chromium oxide film. This film acts like a shield. It keeps water, air, and chemicals away from the metal.
How thick the passivation layer is depends on the process. Nitric acid can make a layer about 10 nanometers thick. Citric acid usually makes a layer about 2 nanometers thick. Even though these layers are tiny, they help a lot. They stop rust and slow down corrosion.
The passive layer is not just a simple coating. It is a chemical shield made of metal oxides. On stainless steel, you get a layer full of chromium oxide. On other metals, like aluminum or titanium, the layer has its oxides. This protective layer covers the whole surface, even small cracks and holes.
The passive film can fix itself. If you scratch the surface, chromium in the stainless steel reacts with oxygen in the air. It quickly makes a new passive layer. This self-healing feature helps your metal parts last longer.
The passive layer gives your metal long-lasting strength. It protects against tough places, wetness, and chemicals. You can use passivated parts in planes, medical tools, and food equipment because the passive film keeps them safe and clean.
Note: The passivation layer cannot be seen, but it is your best shield against rust. You do not need extra coatings or paint when you have a strong passive film.
Passivation of Stainless Steel

Stainless Steel Properties
You often choose stainless steel for its strength and clean look. This metal stands out because it forms a thin, clear layer of chromium oxide when it meets oxygen. This layer acts as a shield that protects the steel from rust and damage. The passivation process helps you make this shield even stronger.
Here are some unique properties that make stainless steel perfect for passivation:
- Stainless steel forms a natural chromium oxide (Cr2O3) film that is clear and smooth.
- The oxide layer repairs itself if scratched or damaged, keeping the surface protected.
- This passive film gives stainless steel excellent resistance to corrosion, even in tough environments.
- The protective layer stays stable at high temperatures, so you can use stainless steel in hot places.
- The film keeps the steel shiny and smooth, which helps it look good and stay clean.
- Passivation removes free iron and dirt, making the chromium oxide layer even stronger.
- The passive layer also acts as an electrical insulator and affects how water touches the surface, which matters for some uses.
Chromium plays a big role in the passivation of stainless steel. When you have more chromium in the steel, the protective oxide layer gets thicker and stronger. This layer blocks water and air from reaching the metal underneath. Even if you scratch the surface, the chromium reacts with oxygen to fix the layer. This self-healing feature makes stainless steel last longer and resist rust better.
Passivation Process for Stainless Steel
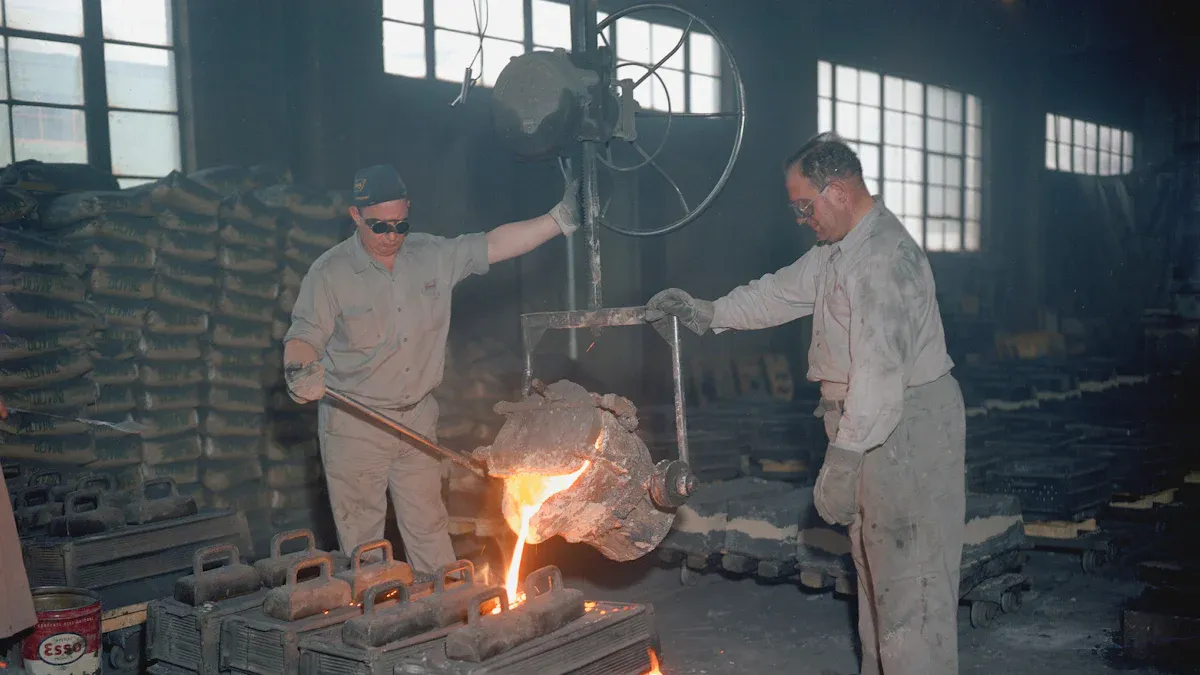
You need to follow careful steps to get the best results from the passivation of stainless steel. The process starts with cleaning. You must remove oils, grease, and dirt from the surface. If you skip this step, the passivation will not work well.
Next, you place the parts in an acid bath. You can use nitric acid or citric acid. These acids remove free iron from the surface but leave the chromium-rich layers untouched. This step lets oxygen form a strong chromium oxide layer, which boosts the corrosion resistance of stainless steel.
Here is a simple list of the main steps you should follow to passivate stainless steel parts:
- Clean the parts with detergents or alkaline cleaners to remove all oils and dirt.
- Immerse the parts in an acid bath with the right concentration and temperature.
- Limit the treatment time based on the type of steel and acid.
- Rinse the parts with pure water to wash away any leftover acid.
- Test the surface, often with a copper sulfate test, to check if all free iron is gone.
- Follow standards like ASTM A967 to make sure you did the process right.
Tip: Always use tools and machines made just for stainless steel. This helps you avoid adding new contaminants during the passivation process.
You should also monitor the acid bath and rinse water to keep them clean. Adjust the process for different grades of stainless steel to get the best results. When you passivate stainless steel parts, you create a strong, self-healing barrier that keeps your parts safe from rust and damage. This process extends the life of your equipment and reduces how often you need to do maintenance.
The passivation of stainless steel gives you a reliable way to protect your metal parts. You get a surface that resists rust, stays clean, and looks good for a long time. The passivation film you create acts as a durable shield, making your parts last longer and perform better in many industries.
Step-by-Step Passivation Process

Cleaning
You begin by cleaning your metal parts very well. This is a key step. If oil or dirt stays, passivation will not work. You use special soaps or alkaline cleaners to get rid of all dirt. Sometimes, you need ultrasonic cleaning or steam for tiny spaces. Every part must be super clean before the next step.
At AFI Industrial, quality is very important. Their team checks all materials and uses strong cleaning methods. They make sure no part has any dirt left. This careful work helps you get great results from passivation.
Tip: Always pick tools and cleaners that do not add new iron or dirt.
Acid Treatment
After cleaning, you do the acid treatment step. This is the main part of passivation. You put metal parts in a bath with chemicals. The most used are nitric acid or citric acid. The acid takes away free iron but leaves chromium. This lets your metal make a strong, invisible oxide layer.
You must watch the bath’s heat and time. ASTM A967 and AMS 2700 give rules for this step. ASTM A967 lets you use different acids and times if you pass tests. AMS 2700 gives exact acid strength, heat, and time. Both help you keep the passivation process safe and good.
Here is a table that shows how ASTM A967 and AMS 2700 are different:
| Standard | Passivation Methods | Verification Tests | Notes |
|---|---|---|---|
| ASTM A967 | Nitric and citric acid methods with flexible parameters if tests are passed | Water immersion, high humidity, salt spray, copper sulfate, potassium ferricyanide-nitric acid | Needs cleaning before passivation; covers many types of parts |
| AMS 2700 | Strict nitric and citric acid methods with set parameters; includes electrochemical passivation | High humidity, water immersion, copper sulfate, salt spray | Focuses on batch processing of small parts; does not include cleaning/descaling steps |
You should follow these rules to protect your metal parts best.
Rinsing and Drying
After the acid bath, rinse your parts with clean water. This step washes off any acid left on the surface. If you skip rinsing, acid can keep working and hurt your parts. You may rinse more than once to get every part clean.
Next, dry the parts right away. You can use warm air, soft cloths, or special dryers. Drying stops water spots and keeps the oxide layer strong. At AFI Industrial, the team checks each part after drying. They use quality checks and final looks to find problems early.
Note: Always use pure water for rinsing. Tap water can leave minerals that harm the passivation layer.
By doing these steps, you make sure your passivation process gives you clean, rust-proof metal parts every time.
Testing and Inspection
After you finish rinsing and drying your metal parts, you need to check if the passivation process worked. Testing and inspection help you make sure your parts are clean, safe, and ready for use. You want to find any problems before your parts go to the next step or to your customer.
You start with a passivation test. This test checks if the protective oxide layer formed on your metal. It also shows if any free iron or dirt remains on the surface. You can use different passivation test methods, depending on your part and the industry standard you follow.

Here are some common passivation test methods:
- Water Immersion Test: You soak your part in water for a set time. If you see rust or stains, the passivation did not work.
- Copper Sulfate Test: You put a copper sulfate solution on the metal. If you see copper spots, free iron is still on the surface.
- Salt Spray Test: You spray salt water on your part. If rust appears, the passive layer is weak.
- High Humidity Test: You keep your part in a humid place. Rust or stains mean the passivation layer is not strong.
Tip: Always follow the rules in ASTM A967 or AMS 2700 when you do a passivation test. These standards tell you how to run each test and what results to expect.
At AFI Industrial, you get a full inspection at every stage. Their team checks incoming materials, watches the process, and reviews finished parts. They use passivation test methods that match ISO 9001 and SGS standards. This helps you get parts that meet strict quality rules.
You can use a table to track your inspection steps:
| Inspection Stage | What You Check | Test Used | Standard Followed |
|---|---|---|---|
| Incoming Material | Cleanliness, surface quality | Visual, material test | ISO 9001 |
| After Cleaning | No oil, dirt, or grease | Visual, wipe test | ASTM A967 |
| After Passivation | Strong oxide layer, no free iron | Passivation test | ASTM A967, AMS 2700 |
| Final Inspection | No stains, rust, or defects | Visual, passivation test | ISO 9001, SGS |
You should always record your passivation test results. This helps you prove your parts meet customer needs and industry standards. If a part fails a passivation test, you can repeat the process or fix the problem before shipping.
Note: Good testing and inspection keep your parts safe, strong, and ready for tough jobs.
Benefits and Limitations
Benefits
When you use passivation, your metal parts get many good things. This process helps your equipment stay strong and work well for a long time. Here are some main benefits:
- Passivation takes away dirt and free iron from the surface. This stops rust from starting in those spots.
- The process makes a stable passivation layer. This layer blocks water and air. It gives your parts strong protection from rust.
- Your metal parts stay safe from rust and damage. They last longer and look clean.
- Passivation does not change the size or shape of your parts. Your parts still fit and look the same.
- You save money because passivation means fewer fixes and fewer new parts. Your equipment works longer without stopping.
- If the passivation layer gets scratched, it can fix itself. This keeps your metal safe for a long time.
- You can use passivation on many metals like stainless steel, titanium, cobalt, and nickel alloys.
- Passivation helps you follow strict rules in medical, airplane, and food jobs.
Tip: Passivation is an easy way to protect metal parts. You do not need extra coatings or to change how your parts look.
Limitations
Passivation gives strong rust protection, but it has some limits. Not all metals or jobs work well with this process. Here are some things to remember:
- You can only use passivation on metals that make a natural passivation layer. These include stainless steel, aluminum, and titanium. Other metals do not get as much help.
- The passivation layer can wear off if you rub or scratch it a lot. You might need to do passivation again to keep your parts safe.
- Passivation does not make the metal smoother or fix deep scratches. You still need to get the surface ready before you start.
- The process takes time. You must clean, treat, rinse, and dry each part. This adds more steps to your work.
- Passivation may not protect metal parts in very harsh places, like strong acids or bases. The layer can break down in these spots.
- You might pay more for big or tricky parts. The process uses special chemicals and tools.
- Some passivation methods, like using nitric acid, need careful handling. This keeps you safe and healthy.
Note: Always follow the right steps and safety rules. This helps you get the best results from passivation and keeps your metal parts safe for a long time.
When to Use Passivation
Applications
Passivation helps metal parts last longer and prevents them from rusting. Many businesses use this process to keep their equipment safe and clean. Passivation helps you follow strict rules and saves money on repairs. Here are some places where passivation is used:
- In pharmaceutical factories, passivation keeps tanks, pipes, and tools clean. It stops rust and keeps things safe from germs.
- In semiconductor work, passivation keeps tools and machines clean. This helps stop problems in tiny chips and circuits.
- The fine chemical industry uses passivation to protect tanks and reactors from strong chemicals.
- Car makers use passivation for fuel lines and exhausts. This helps cars run well and stay safe.
- Airplane companies use passivation for parts like landing gear and fasteners. These parts need to be strong and safe in hard conditions.
- Water treatment plants use passivation for stainless steel pipes and tanks. This stops rust and keeps water clean.
- Oil and gas companies use passivation for pipelines and storage tanks. This helps stop leaks and keeps equipment working.
Tip: Passivation is not just for big companies. You can use it for any metal part that needs to fight rust and stay strong.
Stories from customers show why passivation matters. In drug factories, passivation is used on fill lines and shipping containers for special liquids. Wastewater plants use passivation on pipes to stop rust and keep things working well.
Signs Passivation Is Needed
You can tell when your metal parts need passivation by looking for certain clues. These clues show the protective layer is weak or gone. If you see these problems, you should fix them soon.
- Free iron or iron oxide shows up as small spots or stains.
- Rust stains or color changes appear. You might see yellow, brown, or rainbow marks.
- The copper sulfate test makes a copper layer in six minutes. This means free iron is still there.
- The ferroxyl test turns blue in 30 to 60 seconds. This shows iron is on the surface.
- Rust or early damage happens during salt spray or humidity tests. These tests copy real-life conditions.
- Gray films or heat colors may show up after welding or cleaning with chemicals.
- Dark spots or uneven color after treatment mean passivation did not work well.
Note: You can use special testers like the Koslow Passivation Tester to check for free iron. These tests help you find problems before they get worse.
If you see any of these clues, you should do passivation soon. This keeps your parts safe, clean, and ready for tough jobs.
Passivation vs. Other Processes
Pickling
You might wonder how passivation and pickling are different. Both use acids, but they do not do the same thing. Pickling takes off rust, scale, and heavy dirt from metal. It uses strong acids like hydrofluoric or nitric acid. Pickling makes the metal surface rough and dull. This step gets metal ready for more treatments. If you skip passivation after pickling, the metal can rust faster.
Passivation uses weaker acids like nitric or citric acid. It removes free iron and small bits of dirt. Passivation does not take away any metal. It helps make a thin, strong chromium oxide layer. This layer keeps your metal safe from rust. Passivation keeps the metal looking the same and gives it a shield that can fix itself.
Here is a table to show the main differences:
| Aspect | Pickling | Passivation |
|---|---|---|
| Purpose | Removes rust, scale, chromium-depleted layers, and embedded contaminants | Removes free iron and minor contaminants; promotes formation of protective chromium oxide layer |
| Chemicals Used | Strong acids (e.g., hydrofluoric acid, nitric acid) | Milder acids (e.g., nitric acid, citric acid) |
| Process Steps | Acid treatment to dissolve surface layers and contaminants; etching effect; surface cleaning | Acid treatment to remove free iron; rinsing; formation of chromium oxide layer; surface cleaning |
| Effect on Metal Surface | Removes surface layers, leaving a dull/matte finish; etches surface | Does not remove metal; maintains original appearance; forms thin protective oxide layer |
| Outcome | Prepares metal surface for further treatment; temporarily more corrosion-prone if untreated | Enhances corrosion resistance by forming a stable, self-repairing oxide layer |
| Environmental Impact | Generates hazardous waste; requires careful handling and disposal | Produces less hazardous waste; safer and more environmentally friendly |
| Safety Considerations | Requires stringent safety measures due to strong acids | Safer to handle due to milder acids |
| Typical Usage | Cleaning heavily contaminated surfaces; preparation for coatings or passivation | Protective treatment to improve corrosion resistance; often used after pickling |
| Surface Finish | Dull or matte finish due to etching | Maintains original metal appearance |
Tip: You often do passivation after pickling to give metal parts better protection.
Anodizing
You may also hear about anodizing when learning about metal care. Both anodizing and passivation make oxide layers, but they are not the same. Passivation is a chemical process for stainless steel. It takes away free iron and dirt. This makes a thin, clear oxide layer that stops rust.
Anodizing uses electricity and acid to make the oxide layer thicker. It works mostly on aluminum and titanium. The anodized layer is much thicker and has tiny holes. You can add color or seal the layer for more protection or looks. Anodizing can change the size of your part a little. Passivation does not change the size.
- Passivation is best for stainless steel and makes a thin, strong oxide layer.
- Anodizing is for aluminum and titanium and makes a thick, holey oxide layer.
- Passivation keeps your part’s look and size the same.
- Anodizing can add color and make the part harder to wear out.
- Passivation cleans and makes the surface stable to stop rust.
Note: If you want a colorful or thicker layer, pick anodizing. If you want to keep your part’s size and look, use passivation.
Plating
Plating is another way to protect metal parts. Plating puts a new metal layer, like nickel or zinc, on your part. This layer blocks rust and can change how your part looks or feels. Plating can make your part shiny or harder.
Passivation does not add a new layer. It changes the surface by making a thin, strong oxide film. This film sticks tightly to the metal and does not change how it looks or feels. Passivation lasts because the oxide layer can fix itself. Plating depends on how well the new layer sticks. If plating cracks or peels, the part can rust.
Passivation is usually easier, faster, and costs less than plating. You often use passivation at the end or in the middle to make metal stronger against rust. Plating is good if you need extra hardness, a special color, or a thick shield.
Tip: Pick passivation if you want a natural, long-lasting shield and do not want to change your part’s size or look.
Standards and Best Practices
Industry Standards
You must follow special rules when you do passivation. These rules help keep your metal parts safe and strong. The main rules are ASTM A967, AMS 2700, and ISO 9001. ASTM A967 tells you how to passivate stainless steel. AMS 2700 is for airplane parts and other tough jobs. ISO 9001:2015 shows a company cares about doing good work and making customers happy.
If you make medical devices, you also need to follow FDA rules and ISO 13485. These rules make sure your parts are safe for people and work well in hard places. Always check that your passivation follows these rules. This helps you avoid mistakes and keeps your customers pleased.
AFI Industrial has ISO 9001:2015 certification. This means they use a good system to check quality. Their team looks at every step of the passivation process. They also have SGS certification, which means they meet world safety and quality rules. If you pick a company with these certificates, your parts will meet the best standards.
Note: Always ask to see certificates before you let a company do your passivation.
Best Practices
You get the best passivation results by using smart steps. First, clean your metal parts very well. Use ultrasonic or rough cleaning to take off all oil and dirt. This helps the passivation work better.
Choose the right passivation solution for your metal. Watch the heat, time, and how strong the solution is. This helps you make a strong oxide layer to protect your parts. Do the process the same way each time for good results.
Set up good checks and tests. Use salt spray, copper sulfate, and look at the parts to make sure passivation worked. Write down every step and result. This helps you find and fix problems fast.
You should also:
- Passivate new, fixed, or changed stainless steel parts to stop rust.
- Check your equipment for rust and do passivation again if needed.
- Keep stainless steel away from iron and other metals while working.
- Use pure water to rinse and dry parts fast so dirt does not stick.
- Change your passivation method for each type of stainless steel.
AFI Industrial uses these smart steps all the time. Their team checks new materials, watches the process, and looks at finished parts. They use ISO 9001 and SGS rules to make sure your passivation is always great.
Tip: Keeping good records and checking often helps your passivation stay strong and your parts safe.
| Best Practice | Why It Matters |
|---|---|
| Clean parts | Takes off dirt and oil for better results |
| Control process time and temperature | Makes a strong oxide layer |
| Test and inspect every batch | Finds problems early |
| Use certified suppliers | Makes sure you get safe, high-quality parts |
By following these rules and smart steps, you make sure your passivation gives you safe, clean, and long-lasting metal parts.
Passivation helps stop your metal parts from rusting and keeps them strong. First, you must clean each part very well. Then, pick the right chemicals for the job. You need to watch each step closely. Passivation works best if you follow rules like ASTM A967. Do not put different stainless steel types in the same bath. Always use safe tools and check your work with good tests. If you want passivation you can trust, ask experts like AFI Industrial. Passivation helps you save money and time. For special jobs, make sure you use the right rules. Passivation makes your parts last longer.
Remember: Passivation has two main steps—cleaning and acid treatment. If you skip a step, your parts may not be protected well.
FAQ
Metals that can be passivated include stainless steel, titanium, and some nickel alloys. Aluminum and copper can only be treated with other oxidation methods. Before treatment, always check whether a natural oxide layer has formed on the metal surface.
Passivate parts after you machine or weld them, or if you see rust. For important equipment, make passivation part of your regular care plan.
Passivation does not change the color, shine, or size of your part. The process keeps your part looking the same but helps stop rust.
You should not do passivation at home. The process uses strong acids and needs special care. Always let experts handle it to keep things safe.
You can test your part with water, copper sulfate, or salt spray tests. If you do not see rust or stains, the passivation worked. Experts use these tests to check if the job was done right.
Yes, passivation is safe for food and medical tools. The process takes away dirt and helps meet strict cleaning rules. Always use certified services for these jobs.
Passivation changes the metal’s surface by making a thin oxide layer. Coating puts a new material on top. Passivation does not add thickness or change how your part looks.