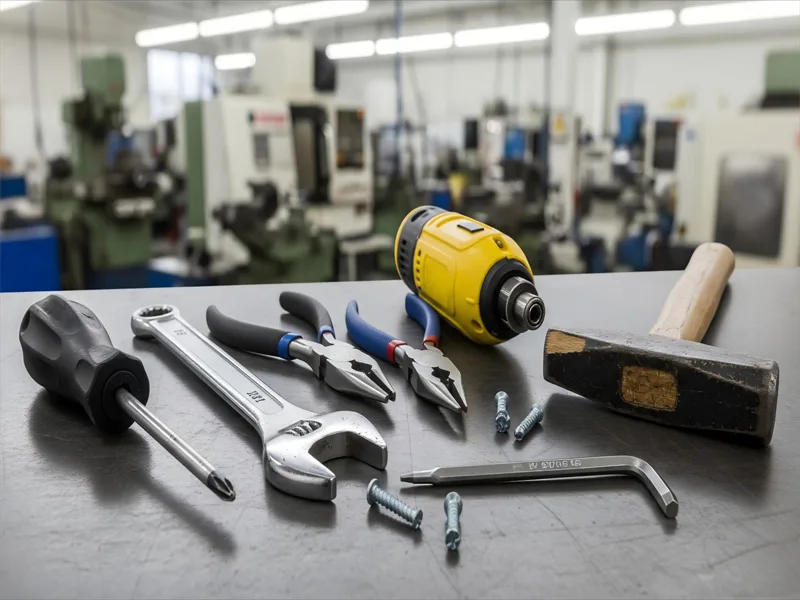
You get better quality and work faster when you learn metal parts assembly techniques. The right way and tool can help you work with metal. You will make fewer mistakes and your products will look the same if you use advanced assembly techniques. Effective tools and smart working methods help you save time, spend less money, ... Read more
You get better quality and work faster when you learn metal parts assembly techniques. The right way and tool can help you work with metal. You will make fewer mistakes and your products will look the same if you use advanced assembly techniques.
Effective tools and smart working methods help you save time, spend less money, and use fewer resources. Automation and real-time monitoring give you more control and keep you safer during assembly. AFI Industrial Co., Ltd. uses careful machining and strong quality checks to help you get good results every time you assemble metal.
Picking the best assembly method depends on your design. It also depends on the metal type, part size, and how many pieces you need.
Table of Contents
Metal Parts Assembly Overview
Key Techniques
When you put metal parts together, you use many ways to join them. There are several common methods you can pick from. Here are some of the main ones:
Mechanical fastening uses nuts, screws, and rivets to hold parts. You can take these joints apart or keep them together forever.
Welding melts metal parts so they stick together. You might use spot welding, arc welding, or laser welding for strong joins.
Riveting connects parts with rivets. This makes strong joints, especially for sheet metal.
Soldering and brazing use melted filler metals to join parts. These work well for small or delicate metal pieces.
Tongue and groove joints fit one part into another for a tight grip.
Adhesive bonding uses special glue to stick metal parts together.
Hemming folds the edges of sheet metal to join parts without fasteners.
Snap fits use spring force to lock parts in place.
Clinching presses two pieces of sheet metal together to make a button-like joint. 10. Tabs are punched into one part and bent to hold other parts in place.
Sheet metal assembly often uses many of these ways. Each method helps you make strong and reliable products.
Importance in Manufacturing
You need good assembly methods to make sure metal parts work well and last long. Using the right ways helps you make fewer mistakes and waste less. You also save time and money. Quality control is very important in metal parts assembly. Careful checks at every step help you find problems early. This means you throw away fewer parts and spend less time fixing mistakes. Good quality control also keeps your customers happy and protects your company’s reputation.
AFI Industrial Co., Ltd. is known for its focus on precision machining and assembly. The company uses advanced tools like CNC machining, laser cutting, and robotic assembly lines. These tools help you make complex parts with tight tolerances. Automated systems and fast assembly cells let you handle big orders quickly and safely. With AFI’s skills, you get reliable sheet metal assembly and other metal parts assembly services that meet strict industry standards.
Threaded Fastening
Method
Threaded fastening joins metal parts with screws, bolts, or nuts. This is a very common way to put metal together. There are different ways to do it. Tapped threads are good for medium or thick metal. You make threads in a hole and then use a screw or bolt. For thin metal, you use threaded inserts. These inserts, like self-clinching or rivet nuts, make strong threads that last a long time.
Sometimes, you make a raised ring around a hole before adding threads. Welded studs and nuts help make strong, permanent joints in thin metal. Each way helps you make a safe connection for your project.
Tools
You need the right tools for good threaded fastening. First, use drilling tools to make small holes in the metal. Then, use tapping tools to cut threads in these holes. For inserts, you need special tools like piloted drivers, pliers, or presses. Piloted drivers help keep the insert straight and stop it from slipping. Tightening tools, like wrenches or pliers, help you make the fastener tight. These tools help you work faster and make fewer mistakes.
Applications
Threaded fastening is used in many fields. Cars, planes, buildings, and farms all use this way to join metal. Appliance makers use it to join thin metal sheets or different metals. Threaded fasteners are good for strong or removable joints. You see them in electronics, big machines, and even small metal parts. Self-clinching fasteners and blind inserts are used a lot in appliances. These ways can replace riveting or welding when you want a joint you can take apart.
– Work well if things are not very clean – Easy and fast to put in – Strong and last long
– Not very exact – Not good for small changes
Fine Threads
– Very strong in pulling and cutting – Good for small changes – Work well in thin or hard metal
– Can get stuck easily – Need more thread to hold – Easier to break
Tip: Threaded fasteners make strong, adjustable, and reusable joints. You can take them out and put them back for repairs. But you must be careful not to cross the threads when you put them in. Some types cost more and take longer to use than other ways.
Welding
Method
Welding joins metal parts by melting their edges. Filler material is added to make the bond strong and permanent. There are different welding techniques for metal assembly.
TIG welding uses a tungsten rod and filler. It makes clean welds and is great for thin metals or detailed work.
Stick welding uses a coated rod. You can use it outside and on thick metal. Spot welding joins two sheets at small points. Seam welding makes a long, unbroken joint. You pick the welding method based on the metal, the joint, and how fast you need to finish.
Highly effective for thin metals like stainless steel and aluminum
Adjustable current, clean welds, minimal spatter
Oxy-Acetylene Torch
Good for delicate assembly and brazing softer metals
Fine flame control, suitable for small or ornate metal parts
Measuring Tools
Essential for accurate welding sheet metal and assembly
Includes calipers, rulers, and marking tools
Welding Clamps & Magnets
Hold metal pieces tightly for accurate welding sheet metal assembly
Various shapes, hold at angles like 90°, 45°, and 60°
These tools help you weld metal parts so they fit well and stay strong.
Applications
Welding is used in many metal projects. It helps build supports, brackets, and machine frames. Welding sheet metal makes panels and covers for protection. You also use welding to join pipes and tubes for moving liquids or gases. Custom frames and supports often need welding for special shapes. Car makers, builders, and machine shops all use welding for strong metal assembly.
Produces clean, smooth seams in welding sheet metal
Needs skilled workers and careful setup
Waterproofing
Creates airtight and watertight seals
Can be time-consuming
Versatility
Works with many metals and complex shapes
Uses a lot of energy
Tip: Welding gives you strong, lasting joints, especially for sheet metal. Always check for heat problems and use the right tools for the best results.
Riveting
Method
Riveting joins metal parts by putting a rivet in holes. You then change the shape of the rivet to lock the parts. This makes a joint that will not come apart. There are different ways to do riveting. Each way has its good points.
You push a round rivet in and hit it to make a head on the other side. This is good for making many parts quickly and gives a tight hold.
Riveting Method
Description
Advantages
Disadvantages
Blind Riveting
Inserted from one side, mandrel pulls to form joint
Easy installation, versatile
Limited strength, permanent
Swaged Pin Assembly
Lockbolts passed through holes, strong and vibration-resistant
Durable, strong
Needs precise holes, special tools
Self-Piercing Riveting
Rivet pierces sheets, no pre-drilled holes needed
High strength, reliable
Tool dependent, permanent
Impact Riveting
Rivet deformed by force to form head
Fast, cost-effective
Needs access to both sides
Tools
You need the right tools to do good riveting. Rivet guns push or set the rivets in place. Bucking bars hold the rivet from the back to help make a tight joint. Rivets and hammers shape the rivet head. Sometimes you use steel blocks or strong cutters. Special 3-in-1 tools work for some rivets. If you use wire rivets, simple jeweler’s tools can help. Picking the right tool makes your work strong and safe.
Rivet guns
Bucking bars
Rivet sets
Riveting hammers
Steel blocks
3-in-1 riveting tools
Tip: Always use a rivet gun that fits your rivet size. This helps you get the best results.
Riveting has many good points for metal work. It makes strong joints that can take shaking and stress. Riveting works well with machines, so you can work faster. You can use it for tricky shapes and many parts at once. But riveting may not work for very big or odd-shaped parts. The tools can cost more at first, but you save time later.
Benefits
Explanation
High-strength connection
Riveting forms strong, durable joints for demanding assembly needs.
Design flexibility
You can place connectors precisely for flexible assembly design.
Automation compatibility
Riveting fits well with automated assembly lines.
Complex structure suitability
Allows you to join multiple parts in one assembly step.
Limitations
Explanation
Not ideal for large or unique parts
Some assemblies may be too big or oddly shaped for standard riveting.
Higher initial equipment cost
You may need to invest in advanced riveting tools for your assembly.
Note: Riveting gives you a strong and lasting way to put metal parts together. Always think about your part size and how many you need to make before you pick this method.
Adhesive Bonding
Method
Adhesive bonding joins metal parts without using heat or fasteners. You use special glues like epoxies, acrylics, or urethanes. First, clean and dry the metal surfaces. Then, spread the adhesive on the metal. Press the parts together so they stick. The adhesive cures and makes a strong hold. This method works for the same or different metals. You do not need to drill holes, so the metal stays strong. It also helps stop rust. Adhesive bonding makes smooth joints that look neat.
Tools
You only need a few simple tools for adhesive bonding. Use a brush, roller, or dispenser to put on the glue. For tapes, press them down with a roller or your hand. Sometimes, you need clamps or jigs to hold the parts while the glue dries. Cleaning tools like wipes or solvents help get the metal ready. Good cleaning is important for strong bonding. You do not need big machines, so you can set up fast.
Applications
Adhesive bonding is used in many jobs because it is quick and easy. You see it in:
Tip: Always follow the glue instructions and clean the metal well. This helps you get the best results for your project.
Sheet Metal Assembly Techniques
Sheet metal assembly techniques help you join sheet metal parts quickly and safely. You can use these methods to make strong products with neat edges. Many industries, like automotive and appliances, rely on these techniques for assembling sheet metal. AFI Industrial Co., Ltd. uses advanced sheet metal fabrication and strict quality checks to make sure every part fits perfectly.
Hemming and Folding
Hemming and folding let you bend the edge of one sheet metal part over another. You often see this in car doors or appliance panels. This method gives you a smooth, safe edge and locks the parts together. You use a press brake or special tools to fold the metal. Hemming works well for thin sheet metal parts and gives a clean look. You can combine hemming with welding or adhesives for extra strength. This technique is fast and cost-effective, making it a favorite in sheet metal assembly.
Tip: Hemming not only makes the edge safe but also helps prevent sharp corners on sheet metal parts.
Tab and Slot
Tab and slot assembly uses tabs on one sheet metal part that fit into slots on another. You push the tabs through the slots and bend or weld them to lock the parts. This method helps you line up sheet metal parts quickly and reduces mistakes. You often use tabs and slots in electronics, enclosures, and custom metal boxes. It speeds up assembling sheet metal and cuts down on extra tools. You get a semi-permanent joint that holds well and keeps your assembly accurate.
Assembling Sheet Metal Clinching
Clinching joins two or more sheet metal parts by pressing them together until they lock. You do not need heat, rivets, or screws. A special tool squeezes the metal, making a button-like joint. Clinching works well for coated or painted sheet metal parts because it does not damage the surface.
You see clinching in HVAC ducts, cabinets, and car bodies. This method is fast, saves money, and works for different metals. However, clinching may not be as strong as welding, but it is perfect for many sheet metal assembly jobs.
AFI’s sheet metal fabrication team uses these sheet metal assembly techniques to make sure every sheet metal part meets high standards. You get reliable, safe, and cost-effective assemblies for your projects.
Soldering and Brazing
Method
Soldering and brazing join metal parts without melting the main metals. Soldering uses lower heat, under 450°C. Brazing uses more heat, over 450°C, but not as much as welding. There are many ways to do both:
Torch brazing uses a gas flame to heat the joint. Induction brazing uses special fields to heat the metal. Both ways make strong and safe joints. You pick the method by the part size and what you need to build.
Tip: Soldering and brazing can join different metals. They use less heat than welding, so they protect small or weak parts.
Tools
You need the right tools for soldering and brazing. For soldering, you use:
Solder as the filler metal
Soldering iron, which can be pencil-style or have temperature control
Soldering wick to take away extra solder
Magnifying glass to see small parts
Wire cutters to trim wires
For brazing, you use a torch that you hold in your hand. You also need holders to keep parts still while heating and cooling. These holders help the filler metal flow into the joint. Holders are often made from stainless steel or ceramics because they can take the heat.
Electrical wiring splices wires and adds connectors.
Artistic projects join stained glass and mosaics.
Brazing is used in cars, planes, HVAC, and building work. It helps make air conditioners, jet engines, and satellites. Soldering is best for electronics and plumbing, where you need careful, low-heat joins.
Pros and Cons
Soldering and brazing have many good points for metalwork. Both use a filler metal that melts before the main metal does. This means you do not melt the main parts like in welding. Here is a table to compare:
Low, under 840°F or 450°C, best for careful, small joins
Joint Strength
Very strong, sometimes stronger than the main metal
Medium strength, good for electronics and light repairs
Heat Resistance
Great, stands up to high heat
Not as good, joints can break if too hot
Material Flexibility
High, joins many different metals
Medium, mostly for metals that are alike
Precision
Medium, not for very tiny work
Great, perfect for small and careful joins
Ideal Applications
HVAC, cars, plumbing, and building work
Electronics, jewelry, and careful plumbing work
Note: Soldering and brazing let you control heat better than welding. You can join different metals and keep small parts safe. But if you need the strongest or most heat-safe joints, welding might be a better choice.
Press Fitting
Method
Press fitting joins metal parts by pushing one part into another. You use force to press a shaft, pin, or bushing into a hole. The hole is a bit smaller than the part you put in. This makes the parts hold together tightly. You do not need glue or heat for this method. The connection is strong and will not come apart easily. You must control the force so you do not break the parts.
Good press fitting needs the right part shape and size. The parts should line up straight. Pick materials that work well together. Sometimes, the edges are sloped or rounded to help the parts slide in. Lubrication can help the parts go in more easily and prevent scratches. But you only use it if you need to.
Here is a table that shows what you need for good press fitting:
Use sloped or rounded edges; keep sizes very close (0.0005–0.002 inch).
Lubrication
Makes sliding easier and stops damage; use only when needed.
Material Compatibility
Pick materials that are alike; do not use ones that are too different in hardness.
Joint Strength
Add grooves or bumps for better grip; glue can make it even stronger.
Equipment Selection
Choose manual, air, oil-air, or electric presses for your job.
Quality Control
Watch the force and how far you press to make sure it is done right.
Part Alignment
Use the right tools to keep parts straight and stop mistakes.
Tip: Always check that the parts fit and line up before you press them together. This helps you avoid problems and get a strong joint.
Tools
You use different presses for press fitting jobs. Air presses are common and work for most metal parts. These presses can push with 4 to 56 kilonewtons of force. You can also use oil-air, electric, or hand presses if you need to. Air presses let you control the force better than toggle presses.
Good tools keep the parts lined up and help stop mistakes. Sometimes, you add sensors to the press. These sensors watch the force and how far you press. This helps you make sure every part is made right. You do not always need lubrication, but it can help stop parts from sticking or getting scratched.
Applications
Press fitting is used in many places. Car makers use it to put in gears, bearings, and bushings. Electronics companies use it to put pins and connectors into boards. Appliance makers use it to join shafts and pulleys. You also see it in bikes, motors, and medical tools. Press fitting is good for making lots of parts fast. It works for both small and big metal parts.
Do not use too many press-fit pins in one part to avoid stress.
Pick materials that grow and shrink the same way with heat.
Try other ways to join parts if the press fitting does not work.
Pros and Cons
Press fitting gives you a strong joint without glue or welding. You can put parts together fast and very accurately. This method is good for machines that build lots of parts. You do not need extra things like screws or rivets. But you must control the force and line up the parts just right. If you use too much force, you can break the parts. Press fitting works best with parts that are made to fit closely and use similar materials.
Pros
Cons
Strong, permanent joints
Needs careful force control
Fast and can be repeated
Parts can break if not lined up
No extra fasteners needed
Only works with some materials
Good for machines and automation
Needs parts made to close sizes
Note: Press fitting helps you make strong and reliable parts, but always check your part design and how you put them together for the best results.
PEM Fasteners & Stud Insertion
Method
You can use PEM fasteners and stud insertion to make your metal assembly stronger and easier. These fasteners press into sheet metal and lock in place. You push the fastener into a hole in your metal parts. The fastener has special grooves or knurls. When you press it in, the metal flows around these grooves. This locks the fastener so it will not spin or fall out. Stud insertion works similarly. You press a threaded stud into your parts. This gives you a strong place to attach other components during assembly.
Tools
You need the right tools for PEM fasteners and stud insertion. Most people use a press machine. This machine pushes the fastener or stud into the metal parts with steady force. Some presses use air, others use electricity. You can also use hand tools for small jobs or repairs. Special anvils and punches help you line up the fastener and keep your assembly accurate. Always check that your tools match the size and type of fastener you use.
Applications
You see PEM fasteners and stud insertion in many industries. Electronics makers use them to build enclosures and panels. Car factories use them for dashboards and brackets. Appliance makers use them to join thin metal parts. These fasteners help you speed up assembly and make your products stronger. You can use them in any project where you need to attach parts quickly and keep your assembly neat.
Pros and Cons
PEM fasteners and stud insertion give you many benefits. You get strong, reusable threads in thin metal parts. You do not need to weld or tap threads, so you save time. The assembly process becomes faster and more reliable. You can use these fasteners in automated assembly lines. However, you must use the right hole size and press force. If you do not, the fastener may not hold well. Always test your assembly before making many parts.
Tip: Use PEM fasteners when you want a clean look and strong joints in your metal assembly.
Modular & Electromechanical Assembly
Method
Modular assembly lets you build big things from smaller parts. You put together modules that are already made. Each module has a few parts that work together. You join these modules with fasteners, connectors, or wires. You can test each module before putting everything together. If one module breaks, you can change it without taking apart the whole thing. This way saves time and makes fixing things easier.
Electromechanical assembly means adding electrical parts to metal pieces. You might add motors, switches, sensors, or wire bundles. These parts connect to the main frame during assembly. This method helps you make things like control panels, robots, or machines that move.
Tools
You need different tools for this kind of assembly. Use screwdrivers, wrenches, and pliers to join the modules. For electrical work, use wire strippers, crimpers, and soldering irons. Multimeters help you check if wires are connected correctly. Jigs or holders keep parts steady while you work. Good lights and strong tables help you work safely and easily.
Tip: Always put labels on wires and parts as you work. This helps you not mix things up and makes repairs easier later.
Applications
Many industries use modular and electromechanical assembly. Electronics companies use it for computers and control boxes. Car makers use it for dashboards and wiring. Appliance makers use it for washing machines and ovens. Robotics companies use it to build machines with moving parts. This way is good for products that need both metal and electrical parts.
Pros and Cons
Pros
Cons
Easy to fix and upgrade
Needs careful planning
Faster to put together
Modules can cost more
Good for making complex things
Takes up space to store modules
Easy to change designs
Needs workers with special skills
Note: Modular and electromechanical assembly helps you make strong products. You can fix or upgrade parts without starting over.
Comparison Table
This table lets you see how each metal assembly technique is different. It helps you pick the right way for your project. You can check what tools you need, what each method is good at, and what problems you might have.
Tip: Welding makes a joint that will not come apart. If you want to fix things later, use threaded fastening or modular assembly. Always pick tools and methods that fit your material and design.
Choosing Assembly Techniques
Picking the best assembly technique helps you get strong results. You should think about a few key things before you decide how to put your parts together.
Pick the right metal type and thickness, like steel or aluminum.
Make sure holes are the right size and in the right place.
Check what your factory can do so you do not waste money.
Use features like tabs or sloped ends to make assembly easier.
Every technique is good for different reasons. Welding makes a joint that will not come apart, but it can bend the metal and needs skilled workers. Riveting gives a tough joint that is great for parts that get a lot of force. Clinching joins metal sheets without heat, so the metal stays the same. Adhesive bonding spreads out the force and keeps water out, but you must clean the parts well.
If you want to make a lot of parts, you should think about using machines. Machines can help you work faster and make better products, but they cost more and need trained workers.
To get the best results, you need a partner who knows what you need. AFI Industrial Co., Ltd. can help you from design to final assembly. Their team helps you pick the best way for your project, metal, and how many you need to make. With AFI’s help, you get good advice, modern machines, and careful checks. This support helps you avoid mistakes and finish your work faster.
Tip: Always pick assembly techniques that fit your project’s job, material, and how many you need to make. The right choice saves time, costs less, and makes your product better.
You now know the best ways and tools to put metal parts together. Choosing the right way helps you make strong and dependable products. Every project needs good quality and to be done quickly. If you work with experts like AFI Industrial Co., Ltd., you get help from smart people and modern machines.
Want to make your assembly better? Talk to AFI for advice and answers that work for you.
FAQ
You should look at your project needs, the type of metal, and how many parts you need. Think about strength, speed, and if you want to take things apart later. Ask experts if you feel unsure.
You need to measure each part carefully. Use the right tools for cutting and shaping. Always check your work before you start assembly. Good planning helps you avoid mistakes.
You can use snap fit assembly for some metal parts, but it works best with plastics. If you want to try it with metal, use thin, flexible pieces and test the fit first.
Quality control helps you find problems early. You can fix mistakes before they become bigger issues. This saves you time and money. It also keeps your products safe and reliable.