To get accurate micrometer measurements, it’s essential to understand how to use a micrometer properly by following these important steps. First, pick the right tool for your job. Then, get your micrometer ready and check its calibration. Knowing how to use a micrometer correctly means measuring each time with the proper technique. Avoid common mistakes and take good care of your micrometer. Studies show that following every step, from preparation to calibration checks, can improve your measurements by reducing errors and uncertainty. Paying close attention and practicing how to use a micrometer regularly will help you achieve the best accuracy. If you want to master how to use a micrometer, focus on each step for reliable and precise results.
Key Takeaways
- Pick the correct type and size for your job. This helps you get the most accurate measurement.
- Always wipe it and the object before you measure. This stops mistakes from dirt or oil.
- Check and set your micrometer to zero before you use it. This makes sure it gives the right reading and good results.
- Hold the micrometer and the object still with both hands. Keep the object straight and lined up with the measuring faces.
- Use the ratchet stop to press gently and evenly. Do not squeeze too hard, or you might break the tool or the object.
- Learn how to read the micrometer scale the right way. Look at the sleeve, thimble, and vernier scale, if there is one. This helps you measure exactly.
- Keep your micrometer in a clean, dry case away from heat and water. This keeps it safe from harm and rust.
- Clean, oil, and check your micrometer often. This keeps it working well and accurately for a long time.
Table of Contents
Basics
What Is a Micrometer
A micrometer is a tool that measures small things very accurately. You use it when you need to know the exact size of something, like how thick a metal sheet is or how wide a small rod is. The micrometer works by turning a screw. This screw moves a spindle closer to a fixed anvil. You put the object between the anvil and the spindle. Then you read the size on the scale.
Here is a table that lists the main parts of a standard micrometer and what each part does:
| Component | Function |
|---|---|
| Anvil & Spindle | These are two surfaces that hold the object. The anvil does not move, but the spindle does. |
| Sleeve (Barrel) | This is the part that stays still and shows the main scale with whole and half numbers. |
| Thimble | You turn this to move the spindle. It also shows smaller measurement numbers. |
| Ratchet Stop | This part makes sure you use the same pressure every time. It helps you get accurate results. |
| Vernier Scale | This scale lets you read even smaller numbers for more exact measurements. |
A micrometer gives you more exact results than most other measuring tools. The screw lets you move the spindle in tiny steps. This helps you measure even very small changes in size. That is why people pick the micrometer when they need very exact measurements.
Tip: Always make sure your micrometer is clean and set right before you use it. This will help you get the best results.
Why Use Precision Measuring Tools
Precision measuring tools like the micrometer are important in science, engineering, and making things. You need these tools when you want parts to fit together just right or meet strict rules. A precision measurement instrument can find tiny size differences that a ruler or tape measure might miss.
Let’s look at how a micrometer compares to another tool, the caliper:
| Feature | Micrometers | Calipers |
|---|---|---|
| Accuracy | Measures up to 0.0001 inches (0.0025 mm) or 0.001 mm; great for very exact measurements | Measures about 0.001 inches (0.01 mm); not as exact but good for many jobs |
| Versatility | Usually measures one kind of size (mostly outside) | Can measure outside, inside, and depth sizes with one tool |
| Operability | Needs skill to use; uses ratchet stop for even force; old models need you to read the scale | Easier to use, especially digital ones that show numbers right away |
| Applications | Best for jobs that need very exact measurements in machine work, engineering, and checking quality | Good for general jobs like woodworking and fixing cars |
| Measurement Stability | Gives steady and exact measurements of small parts because of its design and ratchet stop | Can do more things but is not as steady for very tiny measurements |
You should use a micrometer when you need the most exact measurement. This tool can measure up to ten times more accurately than a caliper. Calipers are easier to use and can do more things, but they are not as exact as a micrometer. If you work with small parts or need to check if something meets tight rules, a micrometer is the best precision measurement instrument to use.
Types and Selection
Types
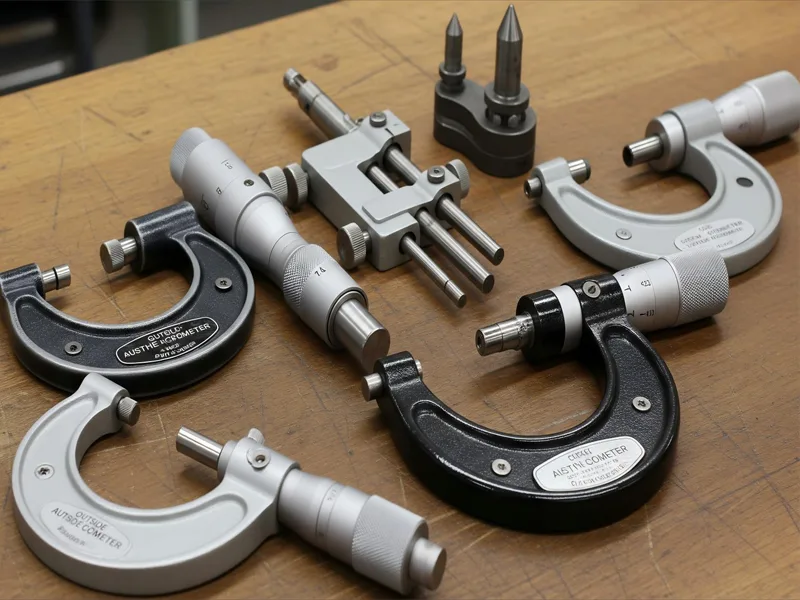
When you are measuring small objects, you should know the types of micrometers. Each type is made for a certain shape or part. Here are the main types you will see:
- Outside micrometer: This type measures the outside of things, like how thick or wide a rod is. It is the most common kind. You can get it as a mechanical or digital tool. There are special subtypes like rotating disc, point, tube, non-rotating disc, spline, and blade micrometers. These help you measure special shapes or surfaces.
- Inside micrometer: This type checks the inside size of holes, tubes, or pipes. Some have caliper arms, and others use rods or tubes. They help you see if a hole is the right size.
- Depth micrometer: This type measures how deep a hole, slot, or step is. It comes with rods you can change for different depths.
Note: Most micrometers measure in steps of 25 mm, like 0 to 25 mm or 25 to 50 mm. Pick a micrometer that matches what you want to measure for the best accuracy.
Outside
An outside micrometer checks the outside size of things. It works well for measuring sheets, wires, or rods. Many people use this tool in shops and labs because it gives very exact results.
Inside
An inside micrometer checks the inside size of holes, pipes, or tubes. It helps you make sure the inside is the right size. Some have rods or caliper arms to fit different shapes.
Depth
A depth micrometer checks how deep a hole or slot is. It has a flat base that sits on the surface and rods that go into the hole. You can switch rods to match the depth you need.
Choosing the Right Tool
To pick a micrometer, think about what you need to measure and how exact you want to be. The table below shows what to look for:
| Criterion | Explanation |
|---|---|
| Type of micrometer | Choose the type based on what you want to measure: outside (external), inside (internal), or depth (holes/slots). |
| Measuring range | Make sure the micrometer covers the size you need. Most have ranges like 0-25 mm or 25-50 mm. |
| Precision & resolution | Higher resolution gives more accurate measurements. Look for fine graduations or digital displays. |
| Measuring system | Choose metric (mm) or imperial (inches) based on what you use most. |
| Zeroing capability | Check if you can set the zero point for calibration or to fix wear. |
| Display type | Digital displays are fast and easy to read. Analog (vernier) types are tough and do not need batteries. |
| Ergonomics | Pick a tool that feels good in your hand, especially if you use it a lot. |
| Price | Balance the cost with the features and precision you need. |
You might need special types for certain jobs. Ball-end micrometers help you measure curved surfaces. Blade micrometers work for grooves or tricky shapes. Tube micrometers check pipe wall thickness. Digital micrometers give quick readings and can switch between units. Analog types last longer and do not need batteries.
Tip: Always pick the micrometer type and range that fits your job. This helps you get the most exact results.
High-Precision Measurement
If you want the best accuracy, use a micrometer. Good micrometers can measure as close as 0.0001 inch (0.0025 mm). Some digital ones go even finer, down to 0.00005 inch (about one micron). This is much better than what calipers can do. The ratchet stop helps you use the same force each time, so your results stay steady.
You need high-precision measurement for jobs in engineering, machining, or quality control. These jobs need tight tolerances. A micrometer helps you know your parts will fit and work right. Calipers are good for many jobs, but they are not as exact or steady as a micrometer.

Remember: For the most exact results, always use a micrometer that fits your job and check its calibration before you start.
Preparation
Cleaning
You need to clean your micrometer and workpiece before measuring. Dirt or dust can make your results wrong. Take a few minutes to get ready.
Wipe Measuring Faces
- Wipe the anvil and spindle with a clean, lint-free cloth.
- If you see oil or sticky stuff, use a little solvent on the cloth.
- Make sure the measuring faces are dry before you go on.
Remove Dust and Debris
- Look for dust, chips, or grease on the workpiece.
- Wipe the surface with a clean cloth.
- Check both the micrometer and workpiece to make sure nothing is left that could mess up your measurement.
Tip: Cleaning both the tool and the object helps you avoid mistakes and keeps your micrometer working well.
Zeroing and Calibration
You have to check that your micrometer reads zero when it is closed. This is called zeroing out. If you skip this, your measurements might be wrong. Do these steps to get your micrometer ready:
- Look at the micrometer for damage, like dents or bent parts.
- Make sure the spindle moves smoothly from one end to the other.
- Clean the measuring faces again before you zero out.
- Close the micrometer gently with the ratchet stop. The reading should show zero. If not, adjust the sleeve until it does.
- Do the zeroing out steps a few times to make sure it works every time.
- For better accuracy, use certified gauge blocks to check the micrometer at different points.
- If you measure special sizes a lot, add those points to your calibration routine.
Note: Zeroing and calibration often help you trust your measurements every time.
Temperature Considerations
Temperature can change the size of your micrometer and workpiece. If one is too hot or cold, you might get a wrong reading. Always let both reach room temperature before you measure.
- Keep your tools and parts in the same room for at least an hour before measuring.
- Try to measure at a steady temperature, about 20°C (68°F), which is the standard for most labs.
- Do not touch the measuring faces with your hands for too long. Body heat can change the reading.
Keeping everything at room temperature helps you avoid mistakes from things getting bigger or smaller with heat or cold.
How to Use a Micrometer
Handling and Positioning
Hold the Object Securely
You need to hold both the micrometer and the object steady to get accurate measurements. If the object moves, your results will not be reliable. Start by placing the object carefully between the anvil and the spindle. Make sure the object sits flat and does not tilt. For small or round parts, use your fingers to keep the object from slipping. If you measure a thin sheet or a small rod, hold it close to the measuring faces. This helps you avoid bending or twisting the object.
Tip: Clean the object and the micrometer with a lint-free cloth before you start. Dirt or oil can affect your measurement and lower your accuracy.
Use Both Hands Properly
Using both hands gives you better control and helps you follow correct usage. Hold the micrometer frame in your palm and wrap your little finger around it. Use your thumb and index finger to turn the thimble. This grip keeps the tool steady and lets you move the spindle smoothly. Always handle the micrometer by its insulated grip. This prevents heat from your hands from changing the tool’s size and affecting precision.
Here is a simple step-by-step guide for handling and positioning:
- Place the object between the anvil and the spindle.
- Hold the micrometer frame in your palm.
- Use your thumb and index finger to turn the thimble.
- Keep the object steady and make sure it does not move.
- Allow both the micrometer and the object to reach room temperature before taking measurements.
Alignment
Keep Object Parallel
Proper use of a micrometer means keeping the object parallel to the measuring faces. If the object tilts, you will not get accurate measurements. Align the object so that its surface matches the anvil and spindle. For a round object, make sure the spindle and anvil are perpendicular to the object’s axis. This helps you measure the true diameter.
- Always check that the measuring faces are clean.
- Make sure the micrometer is zeroed before you start.
- Align the tool so the faces are parallel to the object’s surface.
Ensure Flush Contact

You need to make sure the object touches both the anvil and the spindle evenly. If there is a gap or the contact is uneven, your measurement will be off. Gently rotate the micrometer as you close the spindle. This helps the measuring faces settle flat against the object. Double-check the placement before you read the scale.
Note: Take several measurements and average them if you want the best accuracy. This reduces random errors and improves precision.
Applying Pressure
Use Ratchet Stop
The ratchet stop is a key part of correct usage. It helps you apply the same pressure every time you measure. Turn the ratchet stop slowly until you feel it slip. This means you have reached the right pressure. The ratchet stop prevents you from squeezing too hard, which could change the object’s shape and affect measuring accuracy.
- Hold the micrometer frame in your palm.
- Use your thumb and index finger to turn the thimble.
- Rotate the ratchet stop until it clicks or slips freely.
- The spindle should gently touch the object, not press into it.
Avoid Over-Tightening
Over-tightening is a common mistake when learning how to use a micrometer. If you use too much force, you can deform the object or the tool itself. This leads to smaller readings and poor accuracy. Always use gentle, steady pressure. The ratchet stop helps you avoid this problem by limiting the force you apply.
Applying too much pressure can damage the micrometer and give you unreliable measurements. Use the ratchet stop for every measurement to keep your results consistent.
Correct usage of a micrometer means handling the tool with care, aligning it properly, and applying the right pressure. These steps help you achieve high precision and reliable results every time you measure.
Reading the Scale
Thimble and Sleeve
When you want to get an exact measurement, you need to know how to read the micrometer scale. The micrometer has two main parts for reading: the sleeve (also called the barrel) and the thimble. You start by looking at the sleeve. Each big number on the sleeve stands for 0.100 inches. The smaller lines between the numbers show 0.025 inches each. Find the last line you can see on the sleeve. This gives you your base measurement.
Next, look at the thimble. The thimble has numbers from 0 to 24. Each mark on the thimble means 0.001 inches. Turn the thimble until the spindle touches the object gently. Make sure you use the ratchet stop so you do not press too hard. Find the number on the thimble that lines up with the center line on the sleeve. Add this number to your sleeve reading.
For example, if the sleeve shows 0.225 inches and the thimble lines up at 22, you add 0.022 inches. Your total measurement is 0.247 inches. Always lock the spindle before you read the scale. This keeps your measurement steady.
Tip: Practice reading the scale a few times with different objects. This helps you get faster and more accurate.
Vernier Scale
Some micrometers have a vernier scale. This extra scale lets you read even smaller measurements. The vernier scale sits next to the sleeve. It helps you find the exact spot between two marks on the thimble.
Here is how you use the vernier scale:
- Check if your micrometer uses the imperial or metric system.
- Read the sleeve for the main number and half marks.
- Read the thimble for the smaller marks.
- Add the sleeve and thimble readings together.
- Look at the vernier scale. Find which line on the vernier matches up best with a line on the thimble.
- Add this tiny extra value to your total. This step lets you measure even smaller differences, sometimes as small as 0.0001 inches.
The vernier scale works by showing you which mark lines up best. This lets you see measurements that are even smaller than the thimble can show. Using the vernier scale gives you more detail and less uncertainty in your results.
| Step | What to Do | Why It Matters |
|---|---|---|
| 1 | Read the sleeve | Gives you the main measurement |
| 2 | Read the thimble | Adds fine detail to your measurement |
| 3 | Use the vernier scale (if present) | Adds even more detail and accuracy |
Using the vernier scale helps you get the most precise results when you learn how to use a micrometer. This step is important for jobs that need very high accuracy.
If you follow these steps, you will become skilled at reading the micrometer scale. You will also understand how to use a micrometer for the best results.
Use Tips
Consistent Pressure
You get better results when you use the same pressure each time. Using steady pressure helps you measure the same way every time. Here are some easy tips to help you keep your pressure the same:

- Pick a ratcheting micrometer and turn the ratchet until you hear two clicks. This makes sure you use the same pressure for every measurement.
- After using the ratchet, lock the spindle so your reading does not change.
- Gently rock the micrometer back and forth along the workpiece. This helps the spindle and anvil touch the object evenly.
- Always check that the workpiece is in the center before you lock the tool.
- Do not slide or move the micrometer across the object. Trust the tool to give you the right answer.
- Keep your micrometer clean and check its calibration often. Store it in a dry place to keep it safe.
- Practice holding and using the micrometer the right way. This helps you get the same results every time.
Tip: The ratchet stop keeps you from pressing too hard and helps your measurements stay correct.
Avoiding Errors
You can stop mistakes by following some simple steps. Most errors happen when you rush or skip important checks. The table below shows mistakes and how to stop them:
| Common Error | Prevention Method |
|---|---|
| Applying excessive pressure | Use the ratchet stop for gentle, even pressure. |
| Zeroing errors | Always reset the micrometer to zero before you measure. |
| Misreading the scale | Look straight at the scale and double-check your reading. |
| Misalignment of the object | Place the object squarely between the anvil and spindle. Rotate it slightly for even contact. |
| Thermal expansion effects | Let both the micrometer and object reach room temperature first. |
| Dirt or debris on surfaces | Clean the anvil and spindle before each use. |
| Neglecting calibration | Calibrate your micrometer with gauge blocks on a regular schedule. |
You can also stop mistakes by checking the battery in digital micrometers. Keep the tool oiled and store it safely. Clean parts and careful alignment help you get the best results.
Troubleshooting
If your micrometer gives wrong or different readings, you can fix most problems with a few steps. Try these tips to solve issues:
- Make sure the object is between the anvil and spindle the right way.
- Use the ratchet stop for even pressure every time.
- Let the micrometer and object warm up to room temperature before you measure.
- Wipe the anvil and spindle to get rid of dust or oil.
- Check the zero setting before you use the micrometer, especially if it is digital.
- Look straight at the scale so you do not make reading mistakes.
- Test your micrometer with gauge blocks to check if it is still correct.
- Store and handle your micrometer carefully so it stays accurate.
If you still have problems, look for worn threads or faces. Sometimes, small mistakes mean your micrometer needs fixing or replacing. Checking your tool often and using good habits helps you keep it ready for careful work.
Maintenance and Storage
Cleaning After Use
Always clean your micrometer after you use it. This keeps it working well for next time. Start by wiping it with a soft, lint-free cloth. This gets rid of dirt that can cause damage. If you see sticky grime, use a little rubbing alcohol on the cloth. Do not use compressed air because it can push dirt inside and break the tool.
Follow these steps to clean your micrometer:
- Wipe every part with a soft, lint-free cloth.
- Use rubbing alcohol for sticky spots you cannot wipe off.
- Put a thin layer of light machine oil on bushings, shafts, and gear teeth. This stops rust and helps the micrometer move smoothly.
- Do not tighten spring-loaded parts too much. This keeps the spring safe and the tension right.
- If you take the micrometer apart, put it back together carefully. The dial face might move a little when you snap the cover on.
- If the parts feel stuck, hold the micrometer and tap the back gently with a plastic screwdriver handle. This can help loosen stuck parts.
- Check for rust or damage often. When you finish, store your micrometer in a case to protect it.
Cleaning your micrometer after each use helps you avoid mistakes and makes the tool last longer.
Storage Conditions
Storing your micrometer the right way keeps it safe and accurate. Always put your micrometer in a case to keep out dust and water. Store the case in a cool, dry place. Humidity can cause rust, so put silica gel packets in the case to soak up water. Air conditioning or a dehumidifier helps keep the storage area dry.
- Keep your micrometer away from heat, like sunlight or heaters. Heat can make the tool change size and mess up accuracy.
- Do not stack micrometers or let them hit other tools. Use dividers or padded cases to keep them apart.
- Store the micrometer with moving parts lightly oiled. Do not use heavy oils or sprays like WD-40.
- Keep the storage area still and free from shaking. This helps keep the tool calibrated.
- Do not put your micrometer near magnets.
Some people store micrometers with the anvils a little open to stop stress from heat changes. Sometimes, companies ship them closed with oil paper between the faces. Pick the way that works best for you.
Storing your micrometer the right way stops rust, damage, and keeps it measuring right.
Regular Calibration
You need to check your micrometer often to keep it measuring correctly. How often you check depends on how much you use it, where you use it, and how exact you need to be. Many companies say to start with their suggested schedule. You might check it every month, every three months, or once a year. If you work in places like airplane or medical factories, you may need to check it more often.
- Change your check schedule if you use your micrometer a lot or need very exact results.
- Once a year is good for most people.
- If you do not use your micrometer much or do not need it to be super exact, you can check it less often.
Checking and caring for your micrometer helps it last longer and stay correct. This saves you time and money by stopping mistakes and tool problems. Keeping notes about checks and care also helps you follow the rules for your job.
Taking care of your micrometer and checking it often gives you good measurements and a tool that lasts many years.
Protecting Precision Measuring Tools
Precision measuring tools like micrometers need special care. You want your tools to last a long time and give you accurate results. If you protect your micrometer, you save money and avoid mistakes in your work.
Here are some key ways to protect your precision measuring tools:
- Handle with Care:
Always pick up your micrometer gently. Never drop it or bang it against hard surfaces. Even a small bump can knock the tool out of alignment. - Keep Tools Clean:
Wipe your micrometer after every use. Use a soft, lint-free cloth. Remove any oil, dust, or metal shavings. Dirt can scratch the measuring faces and affect accuracy. - Avoid Moisture:
Water and humidity can cause rust. Store your micrometer in a dry place. Use silica gel packs in your storage case to absorb moisture. If you work in a humid area, check your tools often for signs of rust. - Use Protective Cases:
Always store your micrometer in its case when you are not using it. The case protects it from dust, moisture, and accidental drops. Never leave your tool out on a workbench. - Limit Exposure to Chemicals:
Keep your micrometer away from strong chemicals, solvents, or acids. These can damage the metal and the finish. If you spill something on your tool, clean it right away. - Check for Wear and Damage:
Inspect your micrometer regularly. Look for worn threads, chipped faces, or loose parts. If you find damage, fix it before you use the tool again. - Avoid Extreme Temperatures:
Do not leave your micrometer in direct sunlight, near heaters, or in freezing places. Extreme heat or cold can change the size of the tool and affect your measurements.
Tip: Always use two hands when moving or adjusting your micrometer. This gives you better control and helps prevent accidents.
Common Mistakes and How to Avoid Them
| Mistake | How to Avoid It |
|---|---|
| Leaving tool out overnight | Always return it to its case |
| Using dirty or oily hands | Wash hands before handling |
| Storing in damp locations | Use dry, cool storage with silica gel |
| Ignoring small signs of rust | Clean and oil tool at first sign |
| Using tool as a clamp or lever | Only use for measuring, never as a tool |
You should treat your micrometer like a valuable instrument. If you follow these steps, your tool will stay accurate and last for many years. Good habits now will save you time and trouble later.
Remember: Protecting your precision measuring tools is just as important as using them correctly. A well-cared-for micrometer gives you the best results every time.
You can get very exact measurements if you follow clear steps with your micrometer. Always clean and check the tool before you use it. Be gentle when you hold it and use the same pressure each time you measure. Wipe and oil your micrometer often to keep it working well and lasting longer. Practice using it so you make fewer mistakes and get better at measuring. These good habits help you do careful work and make sure your results are right for the job.
FAQ
Check your micrometer’s calibration at least once a year. If you use it every day or need high accuracy, check it every month. Always follow your company’s calibration rules.
First, clean the measuring faces and the object. Use the ratchet stop for even pressure. Let the tool and object reach room temperature. If it still gives different readings, look for damage or ask an expert to check it.
Yes, you can measure soft materials. Use gentle pressure and always use the ratchet stop. Too much force can change soft materials and give a wrong reading.
A digital micrometer shows numbers on a screen. You can read it fast and easily. A mechanical micrometer has a scale and thimble. You read the numbers yourself. Both types can be very accurate.
Temperature can make metal parts get bigger or smaller. If your micrometer or the object is hot or cold, you might get a wrong measurement. Always let both reach room temperature before you measure.
Keep it in its case. Store it in a cool, dry place. Use silica gel packs to stop rust. Do not leave it out on a workbench or near heat.
Dry it right away with a soft cloth. Put it in a warm, dry spot. Add a little oil to the moving parts. Check for rust before you use it again.
You need different micrometers for inside and outside measurements. Use an outside micrometer for thickness or width. Use an inside micrometer for holes or tubes. Pick the right tool for your job.


