You want to learn how to clean brass fast and well. Get lemon juice, vinegar, baking soda, or ketchup from your kitchen. These can help you see quick results. Store-bought cleaners also work great. Before cleaning, find out if your brass is solid, plated, or lacquered. Solid brass can handle natural products. Plated and lacquered brass need gentle cleaning. Try easy tests—scratch the surface or see if it sticks to a magnet—to know your type. Pick the effective ways to clean brass and watch your items shine in minutes.
Key Takeaways
- Check if your brass is solid, plated, or lacquered before you clean it. This helps you pick the safest way to clean it.
- Try natural cleaners like lemon juice, baking soda, vinegar, or ketchup. These clean brass gently and work well.
- Test any cleaner on a small, hidden spot first. This helps you make sure it will not damage or change the color.
- Do not use harsh chemicals, steel wool, or rough pads. These can scratch and hurt your brass.
- Rinse your brass well after cleaning. Dry it fully to stop new tarnish and water spots.
- Use commercial brass cleaners only if there is heavy tarnish. Always follow safety instructions when you use them.
- Dust and polish your brass often with a soft cloth. This keeps it shiny and means you do not need deep cleaning as much.
- Keep brass in dry places. Put on protective coatings like wax or lacquer to stop tarnish and help it last longer.
Table of Contents
Identify Brass Type
Solid vs Plated
You need to know if your item is solid brass or just brass-plated. This step saves you from making costly mistakes. Solid brass is strong and can handle deeper cleaning. Brass-plated items have a thin layer of brass over another metal. They need gentle care. Use the table below to spot the differences quickly:

| Characteristic | Solid Brass | Brass-Plated Brass |
|---|---|---|
| Color | Consistent golden yellow; polishes back to original shine | May show different metal color if plating wears off |
| Magnetism | Non-magnetic; magnets do not stick | Magnetic if base metal is steel or iron |
| Surface Scratches | Scratching reveals shiny yellow brass | Scratching reveals different metal beneath plating |
| Signs of Wear | Maintains brass look even with wear | Shows wear or corrosion exposing base metal |
| Weight | Heavier due to solid brass | Lighter due to base metal core |
| Finish Removal | Lacquer can be polished off to reveal brass | Plating cannot be polished off to reveal brass underneath |
Tip: If you see a different color under a scratch or worn spot, your item is likely brass-plated.
Testing Brass
You can use simple tests at home to check your brass. Try these:
- Magnet Test: Hold a magnet to your item. If it sticks, you have brass-plated metal. Solid brass does not attract magnets.
- Weight Comparison: Pick up your item. Solid brass feels heavy for its size. Brass-plated items feel lighter.
- Look for Wear: Check for spots where the finish has worn away. If you see a different metal underneath, it is brass-plated.
- Visual Inspection: Solid brass has a rich, golden color. Brass-plated items may look dull or uneven.
- Ask an Expert: If you are not sure, a jeweler or antique dealer can help you identify your brass.
Why It Matters
You want your brass to shine without damage. Solid brass can handle stronger cleaning methods. You can use commercial cleaners or homemade pastes like lemon and baking soda. Brass-plated items need gentle cleaning. If you use harsh products or scrub too hard, you can remove the thin brass layer. This exposes the base metal and ruins the look. Always test your item first. Choose the right cleaning method to keep your brass beautiful and long-lasting.
How to Clean Brass
Lemon and Baking Soda
Application Steps
You want to know how to clean brass with items you already have at home. Homemade brass cleaners of Lemon and baking soda make a powerful team. Lemon contains citric acid that breaks down tarnish, while baking soda acts as a gentle scrubber. You can mix these two to create a paste that removes stains without damaging your brass.
Follow these steps for the best results:
- Squeeze fresh lemon juice into a small bowl.
- Add baking soda. Use either equal parts (1 teaspoon each) or two parts baking soda to one part lemon juice. Stir until you get a medium yellow, slightly wet paste.
- Apply the paste to your brass item using a soft cloth or your fingers.
- Gently rub the paste over the tarnished areas. Avoid scrubbing too hard.
- Let the paste sit for 5–10 minutes.
- Rinse the brass under warm water.
- Dry the item completely with a clean towel to prevent water spots.

Tip: Always rinse and dry your brass right after cleaning. This stops new tarnish from forming.
Best Uses
You should use the lemon and baking soda method for delicate brass pieces, antiques, or items with light tarnish. This technique works well for jewelry, picture frames, and small decorative objects. You avoid harsh chemicals and keep your brass safe. Many experts recommend this method because it combines chemical and physical cleaning. Lemon juice dissolves tarnish, and baking soda lifts it away. You get a shiny finish without scratches.
Vinegar and Salt
Paste Recipe
Vinegar and salt create another effective solution for how to clean brass. Vinegar contains acetic acid that attacks tarnish, and salt boosts the reaction. You can make a paste by mixing these ingredients with flour.
Here’s a simple recipe:
- Mix 1/2 cup vinegar with 1 teaspoon salt.
- Add enough flour to make a thick paste.
- Spread the paste over your brass item.
Let the paste sit for 10 minutes. Rinse off with warm water and dry thoroughly.
Usage Tips
You should use the vinegar and salt paste for brass items with heavy tarnish or stubborn stains. This method works well for hardware, candlesticks, and larger pieces. The acetic acid in vinegar breaks down oxidation, while salt speeds up the cleaning process. Flour helps the paste stick to the brass, so you get even coverage.

Note: Always test the paste on a small area first. Some brass-plated items may react differently. Avoid leaving the paste on for too long.
A cleaning expert recommends this ratio for the best results. You get a reliable way to restore shine without buying expensive brass cleaners.
Ketchup Method
How It Works
Ketchup offers a quick, no-mix solution for how to clean brass. The acids in ketchup, mainly vinegar and tomato, dissolve tarnish. You simply cover your brass item with a layer of ketchup and let it sit.
Steps to follow:
- Spread ketchup over the brass surface.
- Leave it for 20–30 minutes.
- Wipe off with a soft cloth.
- Rinse and dry the item.
Many home improvement experts suggest this method for small items or when you need a fast fix.
Pros and Cons
You get convenience with ketchup. You do not need to mix anything. Ketchup works well for light tarnish and small brass pieces. It is safe for most brass, but you should test on a hidden spot first.
Pros:
- Easy and quick
- No mixing required
- Uses a common household item
Cons:
- May not remove heavy tarnish
- Can leave residue if not rinsed well
- Not as strong as other brass cleaners

Regular polishing with car wax after cleaning helps protect your brass and keeps it shiny longer.
Commercial Cleaners
When to Use
You want fast, powerful results when homemade solutions do not work. Commercial brass cleaners give you that edge. These products contain strong chemicals and abrasives. They break down heavy tarnish and restore shine quickly. You should reach for commercial cleaners if your brass has thick, stubborn oxidation or dark spots that natural methods cannot remove.
- Commercial brass cleaners often include tarnish inhibitors. These protect your brass from future dullness.
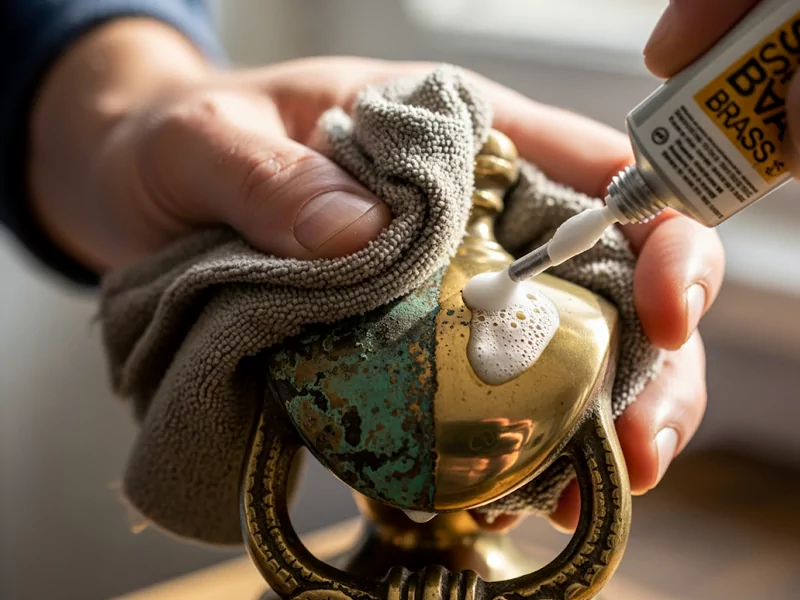
- Products like Brasso Metal Polish work well on heavy tarnish and oxidation. They also leave a protective layer to slow down new tarnish.
- You get the best results when you follow the instructions on the label. Shake the bottle, apply with a soft cloth, rub in circles, let it sit, then buff to a shine.
- Use commercial cleaners sparingly on delicate or antique brass. Too much can strip away the natural patina or damage thin brass-plated items.
- Always test the cleaner on a small, hidden spot first. This helps you avoid unwanted damage.
Homemade methods like lemon juice, vinegar, or baking soda are safer for light to moderate tarnish. They cost less and protect your health and the environment. Choose commercial products only when you need extra cleaning power.

Tip: If you want to know how to clean brass with the least risk, start with natural solutions. Move to commercial brass cleaners only if you see no improvement.
Safety
You must protect yourself and your home when using commercial brass cleaners. These products contain harsh chemicals that can irritate your skin, eyes, and lungs. Take these steps to stay safe:
- Wear rubber or nitrile gloves to keep chemicals off your hands.
- Use safety goggles to shield your eyes from splashes.
- Open windows or use a fan for good ventilation. This keeps fumes away from your face.
- Cover your work area with towels or drop cloths. This prevents spills and stains on furniture or floors.
- Organize your tools and materials before you start. Secure your brass item so it does not move or tip over.
- Never mix cleaning products. Some combinations, like ammonia and bleach, create dangerous gases.
- If you get cleaner on your skin, wash it off right away with soap and water.
- Store brass cleaners out of reach of children and pets.
Note: Always read the label and follow all safety instructions. Your health and the beauty of your brass both matter.
You can achieve a brilliant shine and lasting protection with the right cleaner and careful handling. Choose wisely, use safely, and enjoy your sparkling brass.
Natural Ways to Clean Brass
You want your brass to shine without harsh chemicals. Choose natural ways to clean brass for a safer home and a healthier environment. These methods use gentle, non-toxic ingredients that protect your brass and your family.
Citric Acid
Soaking Brass
Citric acid offers a powerful yet gentle solution for cleaning brass. You can find food-grade citric acid in most grocery stores. Mix about 2 teaspoons of citric acid powder with one quart of hot water. This creates a 5% solution, which experts recommend for safe and effective cleaning. Place your brass item in the solution and let it soak for 10–15 minutes. The citric acid dissolves mineral deposits and light tarnish, making your brass look bright again. After soaking, rinse the item with clean water and dry it completely.
Tip: Use a plastic or glass container for soaking. Metal pots can react with citric acid and damage your brass.
The pH value of citric acid is mild, and it will not cause corrosion during cleaning. It is gentle on brass and can be safely used even on utensils that come into contact with food. It is affordable, versatile in use, and unlike strong acids, it is less likely to leave harmful residues.

Safety Tips
Always handle citric acid with care. Wear gloves to protect your skin. Rinse your brass thoroughly after soaking to remove any leftover acid. Dry your item well to prevent water spots or new tarnish. Avoid using higher concentrations unless you have experience, as stronger solutions can cause minor surface etching.
Citric acid is nontoxic, antibacterial, and safe for use around children and pets. It is a balanced choice for cleaning brass, especially when you want to avoid harsh chemicals.
Flour Paste
Recipe
You can make a simple flour paste at home to clean brass. Mix equal parts flour, vinegar, and a little water until you get a thick paste. The vinegar breaks down tarnish, while the flour absorbs dirt and grime.
Application
Spread the paste over your brass item. Let it sit for 10–15 minutes. The acid in vinegar works on the tarnish, and the flour lifts away the dirt. Once the paste dries, wipe it off with a soft cloth. Rinse and dry your brass to reveal a brighter shine.
Note: The flour paste is mild in nature and safe for most brass items. It is an excellent choice for environmentally friendly cleaning.
superfine fiber cloth
Daily Care
Clean the brass every day with a clean microfiber cloth. This will remove dust, grease and stains that could cause the brass to lose its luster. The microfiber cloth is soft in texture and will not scratch the brass.
- Wipe brass after each use.
- Put on gloves to prevent the oil on your hands from getting onto your skin.
- Avoid harsh chemicals or water-based cleaners.

Preventing Tarnish
Regular dusting with a microfiber cloth keeps your brass looking new. You prevent tarnish from building up and avoid the need for deep cleaning. Microfiber cloths trap dirt and oils, so your brass stays shiny longer.
Choose natural ways to clean brass for a safer, greener home. You protect your health, your family, and the planet while keeping your brass beautiful.
Step-by-Step Guide
Preparation
Dust Removal
Start your cleaning process by removing all dust and loose dirt from your brass items. You want to make sure nothing interferes with the cleaning solution. Use a soft, dry microfiber cloth to wipe the surface gently. For intricate details or hard-to-reach spots, grab a soft-bristle toothbrush. This step prevents scratches and helps you see the true condition of your brass.
Tip: Always inspect your brass before cleaning. Look for manufacturer stamps, check the color, and feel the weight to confirm you have genuine brass.
Protecting Surfaces
Protect your workspace before you begin
Cleaning Process
Applying Solution
Select the right cleaning solution for your brass. You can use a homemade paste of lemon juice and baking soda, or mix vinegar, salt, and flour for tougher tarnish. Apply the solution with a soft cloth or toothbrush. Spread it evenly over the brass, making sure to cover all areas. Let the solution sit for 5 to 30 minutes, depending on the level of tarnish. This waiting period allows the acids to break down stains and oxidation.
Note: Always test your cleaning method on a hidden spot first. This helps you avoid damage, especially if your brass is plated or lacquered.
Rubbing or Soaking
Gently rub the brass with your cloth or brush. Use circular motions to lift away tarnish without scratching the surface. For heavily tarnished items, you may need to soak them in your cleaning solution. Place the brass in a bowl with the solution and let it sit for up to an hour. After soaking, use a soft brush to clean crevices and details.
Rinsing and Drying
Water Spots
Rinse your brass thoroughly with warm water. You want to remove all traces of cleaning paste, soap, or acid. If you leave any residue, you risk new tarnish or water spots. Dry the brass immediately with a soft, lint-free cloth. Air drying can leave spots and speed up oxidation, so always use a towel.
- Wet cleaning methods can cause oxidation if you do not dry brass properly.
- Rinsing with clean water removes all soap and acid residues.
Buffing
Finish your cleaning by buffing the brass. Use a clean, dry cloth and polish in circular motions. This step brings out the shine and helps protect the surface. For extra protection, apply a small amount of olive oil or a natural polish. Buff again until the brass gleams.
Tip: Polishing not only makes your brass look great, but also helps prevent future tarnish.
Mistakes to Avoid
Common Errors
When you clean brass, you want to avoid common mistakes that can ruin your items. Many people make these errors, but you can prevent them with a little care.
Abrasives

Brass looks tough, but it scratches easily. If you use abrasive cleaners, steel wool, or rough pads, you will damage the surface. Scratches make brass look dull and worn. You might think scrubbing harder will remove tarnish faster, but it only harms your brass.
Tip: Always use a soft cloth or a gentle brush. This keeps your brass smooth and shiny.
Overuse of Acid
You may believe that more acid means better cleaning. This is not true. Too much lemon juice, vinegar, or other acids can eat away at the brass. Over time, this causes pitting and weakens the metal. Acid can also strip away protective coatings, leaving your brass exposed to tarnish.
- Use acids in small amounts.
- Rinse your brass well after cleaning.
- Never soak brass for too long.
Preventing Damage
You want your brass to last for years. Follow these steps to protect your items every time you clean.
Test First
Before you use any cleaner, test it on a hidden spot. This simple step saves you from big mistakes. If the cleaner causes discoloration or damage, you will see it before it ruins the whole piece. Experts recommend this for all cleaning solutions, especially if you do not know if your brass is solid, plated, or lacquered.
- Dab a small amount of cleaner on an out-of-sight area.
- Wait a few minutes.
- Check for any changes in color or texture.
Note: Testing first gives you peace of mind and keeps your brass safe.
Avoid Harsh Chemicals
Harsh chemicals like ammonia or strong commercial polishes can cause permanent damage. They may create pits, remove the finish, or even cause the brass to corrode. You should also avoid using dishwashers for brass items. The heat and detergents can ruin the surface.
- Choose gentle, natural cleaners whenever possible.
- Wear gloves to protect your skin from irritation.
- Work in a well-ventilated area to avoid breathing in fumes.
Regular, gentle cleaning keeps your brass looking its best. You do not need strong chemicals or rough tools. With the right care, your brass will shine for years and stay free from damage. Take these steps every time, and you will enjoy beautiful, long-lasting brass in your home.
Maintenance Tips
Regular Cleaning
Frequency
You want your brass to look bright every day. Cleaning often helps keep it nice. Dust your brass once a week with a soft cloth. This removes dirt and oils before tarnish starts. Here is a table to help you remember:
| Brass Type | Weekly Action | Monthly Action | Deep Clean (Every 2–12 months) |
|---|---|---|---|
| Lacquered Brass | Dust with microfiber cloth | Wipe with damp cloth for fingerprints | Deep clean and reapply lacquer if needed |
| Unlacquered Brass | Wipe with clean cloth | Use brass-safe cleaner for brightness | Deep clean and buff to prevent over-tarnish |
Cleaning your brass often keeps it shiny. It also saves you time later.
Quick Touch-Ups
You can fix fingerprints and smudges quickly. Use a dry cloth for fast cleaning. For things you touch a lot, clean them when you see marks. This stops tarnish from forming. If you see dull spots, wipe with a cloth and warm water. Do not use harsh chemicals or rough pads.
Prevent Tarnish
Storage
Storing brass the right way stops tarnish. Wrap each piece in a soft cloth before putting it away. Keep brass in a dry place with a steady temperature. Use silica gel packets to soak up moisture. Small items do well with anti-tarnish cloths or papers in boxes.
- Do not keep brass in damp places like basements.
- Wear gloves when you handle brass to avoid skin oils.
Protective Coating
A protective coating helps brass last longer. Pick the best coating for your item:
| Coating Type | Best For | Benefits |
|---|---|---|
| Lacquer | Indoor décor, light use | Prevents oxidation, keeps shine |
| Epoxy | Outdoor, high-wear items | Strong barrier, resists corrosion |
| Acrylic | Decorative pieces | Easy to apply, clear finish |
| Beeswax/Paste Wax | Antiques, indoor items | Soft layer, easy to reapply, preserves luster |
After cleaning, apply a thin layer of wax or paint. This can prevent air and water from coming into contact with the surface, thereby slowing down the formation of rust. Regularly inspect the coating. If any peeling or dark spots are found, apply another layer.
Using high-quality coatings means less cleaning work. You can have more time to enjoy the brass products.
You can keep your brass looking new. Clean it often, store it well, and use coatings. These steps stop tarnish and make care easy. Start now and enjoy shiny brass for a long time!
Special Items
Clean Brass Jewelry
Gentle Methods
You want your jewelry to shine without risking damage or skin irritation. Choose gentle methods every time you clean brass jewelry. Start with warm water and a drop of mild dish soap. Use your fingers or a soft toothbrush to remove dirt. Rinse well and dry with a soft cloth.

For deeper cleaning, try these safe options:
- Soak your jewelry for 30 seconds in a mix of equal parts white vinegar and water. Rinse and buff with a soft cloth. Skip this step if your jewelry has delicate stones.
- Dab a little ketchup on tarnished spots. Let it sit for one minute, then gently wipe off and rinse. Be careful with stones, as acids can harm them.
- Mix lemon juice and baking soda into a paste. Apply it gently with a soft cloth, then rinse and dry. This works well for small pieces.
- Avoid harsh chemicals, perfumes, and lotions. These can cause skin irritation and damage your jewelry.
- Store your jewelry in a cool, dry place. Use a soft pouch or lined box to prevent scratches.
Tip: For heavily tarnished or delicate pieces, let a professional handle the cleaning. You protect your jewelry and your skin.
Rinsing and Drying
After you clean brass jewelry, rinse it under warm water. Make sure you remove all cleaning products. Dry your jewelry right away with a soft, lint-free cloth. Moisture can cause tarnish and skin irritation. Never leave your jewelry wet. Always store it dry and separate from other pieces.
Lacquered Brass
Identification
You need to know if your brass has a lacquer coating before you clean it. Lacquered brass looks glossy and has a smooth, even finish. It feels slick to the touch and does not show signs of tarnish or oxidation. The coating protects the brass from air and moisture, so it stays shiny longer.
| Identification Method | Description |
|---|---|
| Appearance | Glossy, uniform finish with a clear coating |
| Touch Test | Smooth feel, no oxidation or discoloration |
| Durability | Resists tarnishing and moisture |
Look for a light-gold color and a clear, shiny surface. If your brass feels smooth and shows no patina, it is likely lacquered.
Cleaning Tips
Lacquered brass needs only gentle care. Wipe it with a soft, dry cloth to remove dust and fingerprints. For sticky spots, use a cloth dampened with mild soap and water. Dry the surface right away. Never use abrasive pads or harsh cleaners. These can scratch or strip the lacquer, exposing the brass underneath.
If you see the lacquer peeling or dull spots, consider reapplying a protective coating. Waxing offers an easier option for ongoing care, but lacquer gives longer-lasting protection if applied well.
Always test any cleaner on a hidden area first. Protect the lacquer to keep your brass looking new.
You can keep your brass shiny for many years with easy steps. Use natural cleaners like lemon juice and baking soda. These help protect your brass and avoid strong chemicals. Taking care of your brass often keeps it looking nice and saves you time.
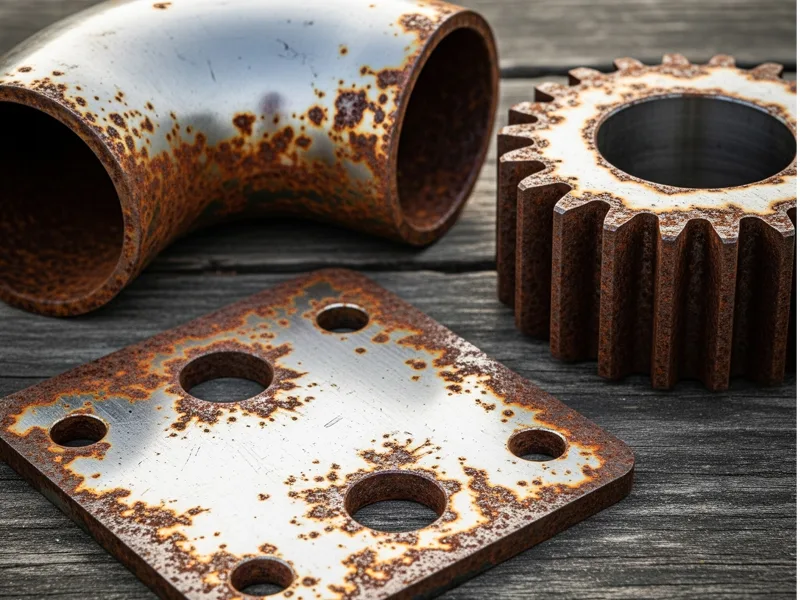
- Brass does not rust and stays strong.
- Gentle cleaning keeps the finish safe and stops harm.
- Storing brass in dry spots helps stop tarnish.
| Benefit | Why It Matters |
|---|---|
| Easy Cleaning | Mild cleaners work the best |
| Lasting Shine | Polishing keeps brass bright |
| Durability | Brass can last a long time |

Start now and enjoy having shiny brass in your home!
FAQ
You should clean brass every month for the best shine. Regular care prevents heavy tarnish. Quick touch-ups with a soft cloth keep your brass looking new. Consistent cleaning saves you time and effort.
Yes, you can use non-gel toothpaste as a gentle cleaner. Apply a small amount with a soft cloth. Rub lightly, then rinse and dry. Toothpaste removes light tarnish and gives a quick shine.
Never use steel wool, harsh chemicals, or abrasive pads. These can scratch or damage your brass. Always test cleaners on a hidden spot first. Protect your brass by choosing gentle methods.
Vinegar works well for solid brass. Mix it with salt or flour for better results. Do not use vinegar on brass-plated or lacquered items. Always rinse and dry your brass after using vinegar.
- Store brass in a dry place.
- Use anti-tarnish cloths or silica gel.
- Apply a thin layer of wax or lacquer after cleaning.
- Wipe with a microfiber cloth often.
These steps help you keep your brass bright and beautiful.
Yes, you can use mild dish soap, lemon juice, or baking soda for brass jewelry. Clean gently with a soft brush. Rinse and dry well. Avoid harsh chemicals to protect your skin and your jewelry.
Ketchup gives you a quick fix. Spread a thin layer, wait 10 minutes, then wipe and rinse. For a deeper clean, use lemon juice and baking soda paste. Both methods deliver fast, shiny results.