To anneal copper, you start by cleaning the metal until it shines. Next, you use a torch to heat the copper until it glows a dull red. Let it cool in the air or dip it in water. This simple method for annealing helps you soften copper, making it easier to bend or shape. Always wear gloves and goggles when you anneal copper to avoid burns or injuries.
Key Takeaways
- Ensure that the copper is clean before annealing. This removes dirt, oil, and tarnish. Clean copper heats more evenly.
- Heat the copper until it glows a dull red color. This is about 400 °C (752 °F). This will make the copper soft.
- Use a blow torch for small copper pieces. Use induction heating for bigger jobs. This helps you control the temperature better.
- Let copper cool slowly in air or a furnace. This keeps copper soft and stops cracks or brittleness.
- Always wear heat-resistant gloves, safety goggles, and protective clothes. This keeps you safe from burns and injuries.
- Do not overheat or heat copper unevenly. This can cause cracks, discoloration, or warping.
- Check the copper after annealing. Make sure it is soft, has even color, and no cracks before shaping.
- Be patient and stay safe. This will help you get better at annealing and make copper strong and flexible every time.
Table of Contents
Annealing Copper Basics
What Is Annealing
Annealing is a way to heat metal and change how it acts. When you anneal copper, you heat it up and then let it cool down. This makes the metal softer and easier to use. If copper gets hard from bending or hammering, annealing can fix it.
When you heat copper, its inside structure changes. New grains start to grow inside the metal. These new grains take the place of old, damaged ones. Scientists learned that heating copper at lower temperatures makes cube-shaped grains. These grains help copper become softer and bend more easily. The process also makes twin boundaries, which are lines where the inside structure changes direction. These changes help copper bend and shape without breaking.
Tip: You can tell copper is annealed if it glows dull red when hot and feels softer after it cools.
Why Anneal Copper
You should anneal copper to make it soft again and stop it from cracking. When you bend or hammer copper, it gets harder and less bendy. If you try to shape it more, it might crack. Annealing makes copper soft again so you can work with it.
Annealing also makes copper better. Studies show that annealing removes defects and makes copper stronger and more bendy. For example, copper alloys get denser and break less after annealing. The process makes copper stronger and easier to bend. This means you can twist or roll copper into new shapes without it snapping.
Here are some reasons to anneal copper:
- You want copper to bend or form more easily.
- You need to fix copper that is too hard.
- You want to stop cracks when shaping copper.
- You want copper to be stronger and more flexible.
Remember: Annealing copper is important for many metalworking jobs. It helps you get good results and avoid problems.
Tools for Annealing Copper
Essential Tools
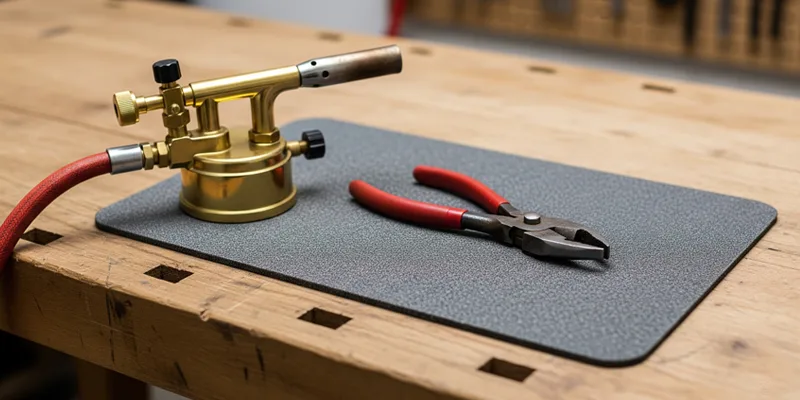
You need special tools to anneal copper the right way. For small jobs, a blow torch, tongs, and a fireproof surface are enough. These tools help you heat copper and move it safely. If you work with big pieces, you may want better equipment. Induction heating systems can heat copper fast and evenly. They use electromagnetic fields to do this.
Here is a table that lists some important tools for annealing copper and what they do:
| Essential Tool | Description |
|---|---|
| Blow Torch | Heats small copper pieces to the right temperature. |
| Tongs | Lets you hold and move hot copper safely. |
| Fireproof Surface | Protects your work area from heat and flames. |
| Induction Heating System | Uses electromagnetic fields to heat copper quickly and efficiently. |
| Induction Coil | Custom-shaped coil that creates a magnetic field to heat the copper. |
| AC Power Source | Supplies power to the induction coil for heating. |
| Cooling System | Keeps induction equipment cool and safe during use. |
Tip: Use a blow torch for small copper pieces or jewelry. Induction heating systems are best for big jobs or when you need more control.
Safety Gear
You must keep yourself safe when working with hot metal. Always wear safety gear to stop burns or hurt eyes. You should also avoid breathing in fumes. Here are some things you need:
- Heat-resistant gloves 🧤
- Safety goggles or a face shield 🥽
- Long-sleeved, non-flammable clothes
- Closed-toe shoes
- Respirator mask if the air is not clean
Note: Never forget your safety gear. Even a tiny bit of hot copper can burn you badly.
Optional Equipment
Some extra tools can make annealing copper easier and safer. You do not need them for every job. But they help if you work with copper a lot or want better results.
- Vacuum furnaces and inert gas atmospheres (like argon or nitrogen) keep copper from getting dirty.
- Fast-cycle furnaces and new induction systems heat copper quickly and save energy.
- Smart temperature controls and automation help you keep the right heat and make work easier.
- Batch optimization tools let you anneal many pieces at once, saving time and money.
Using extra equipment can help you get better results and stay safe. Pick the tools that match your skills and what you need.
How to Anneal Copper
Clean the Copper
Remove Dirt
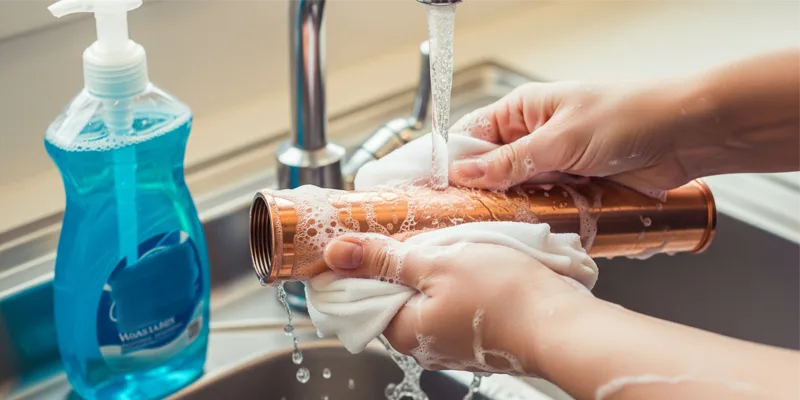
You need to start with clean copper before you begin the annealing process. Dirt, oil, and grease can cause problems when you heat the metal. Use warm water and dish soap to wash the copper. Scrub it with a soft brush or a clean cloth. Rinse the copper well and dry it with a towel. If you see any stubborn spots, use a little vinegar or a commercial metal cleaner. Clean copper helps you get better results during annealing.
Prepare Surface
After you remove dirt, check the surface for any marks or oxidation. You can use fine sandpaper or a scouring pad to gently rub the copper. This step removes any leftover tarnish or oxide. Make sure the surface looks bright and shiny. A clean surface lets heat spread evenly during the annealing process. You avoid spots that might not soften as much as the rest.
Heat the Copper
Temperature Range
You must heat copper to the right temperature for proper annealing. The best temperature for annealing copper is about 400 °C (752 °F). At this temperature, the copper changes inside and becomes soft again. You can use a temperature sensor or a color chart to help you judge the heat. Some advanced setups use sensors that measure temperature by checking how electricity moves through a metal part. This method gives you very accurate control over the heating process. Most people look for a dull red glow in the copper as a sign that it is hot enough.
Tip: Do not overheat the copper. Too much heat can damage the metal or cause it to melt.
Using a Torch
If you work with small pieces, you can use a blow torch for heating the copper. Hold the torch a few inches away and move it slowly over the surface. Try to heat the copper evenly. You want the whole piece to reach a dull red color. It usually takes about five minutes to reach the right temperature with a torch. The results depend on your skill and how steady you keep the flame. Torch annealing works well for jewelry or small copper sheets, but it can be hard to control the temperature exactly.
Induction Annealing
Induction annealing uses electricity to heat copper. You place the copper inside a coil, and the coil creates a magnetic field. This field heats the copper quickly and evenly. Induction annealing can reach the target temperature in about thirty seconds. You do not need to watch the process as closely, and you get the same results every time. Induction systems use less energy and do not have an open flame, so they are safer and more efficient. Here is a table that compares torch annealing and induction annealing:
| Aspect | Torch Annealing | Induction Annealing |
|---|---|---|
| Heating Time | About 5 minutes to reach 1300 °F (704 °C) | About 30 seconds to reach target temperature |
| Temperature Control | Inconsistent, depends on skill | Precise and consistent |
| Operator Dependence | High | Low |
| Safety | Open flame, hotter work area | No open flame, safer |
| Energy Efficiency | Uses gas, less efficient | Uses electricity, more efficient |
| Repeatability | Low | High |
| Equipment Size | N/A | Compact, saves space |
Induction annealing gives you better control and safer working conditions, especially if you need to anneal copper often.
Cool the Copper
Quenching
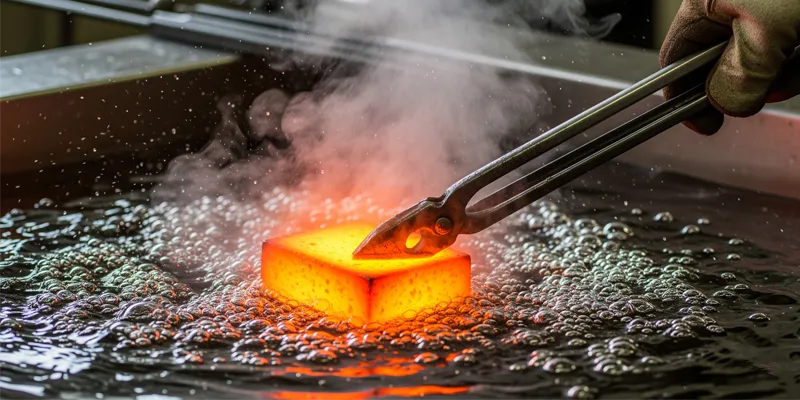
After heating the copper, you need to cool it down. One way is to quench the copper by dipping it in water. This method cools the metal very fast. Quenching of copper does not make it harder, so you can use this method if you want to speed up the process. Be careful, as hot copper can cause water to splash or steam to rise quickly.
Air Cooling
You can also let the copper cool in the air. Place the hot copper on a fireproof surface and wait until it reaches room temperature. Air cooling takes longer than quenching, but it works just as well for most projects. Both methods finish the annealing process and leave the copper soft and ready for shaping.
Always use tongs or gloves when cooling and drying the copper. Hot metal can burn your skin.
When you finish cooling and drying the copper, check the surface for any signs of damage or spots that did not soften. Proper cooling and drying the copper helps you avoid cracks and keeps your project safe.
Check Results
Test Softness
After you finish the annealing process, you need to check if the copper is soft enough. Pick up the cooled copper with your hands or tongs. Try to bend it gently. Soft copper bends easily without much force. If you can shape the copper with your fingers or simple tools, you have done the job well.
You can also use a simple test:
- Hold the copper in both hands.
- Try to twist or flex it.
- If it feels flexible and does not spring back, the copper is soft.
Tip: If the copper still feels hard or stiff, you may need to repeat the heating step. Sometimes, thick pieces need more time at the right temperature.
Inspect for Issues
Look closely at the copper after you anneal copper. Check the surface for any problems. Good copper should look clean and even. You should not see any cracks, burnt spots, or areas that look rough.
Here is a checklist to help you inspect your copper:
| What to Check | What It Means | What to Do Next |
|---|---|---|
| Even color | Copper heated evenly | Ready for next step |
| No cracks | Copper is not damaged | Safe to use |
| No burnt spots | Did not overheat the copper | Good result |
| Soft to the touch | Annealing process worked | Start shaping or forming |
| Hard or springy | Not fully annealed | Repeat heating and cooling |
If you see any dark or black spots, you may have overheated the copper. If you find cracks, the copper may have been too hard before you started. Always check your work before moving on.
Remember: Careful inspection helps you avoid mistakes in your next steps. Good results come from checking your copper every time you anneal it.
Common Annealing Mistakes
Overheating
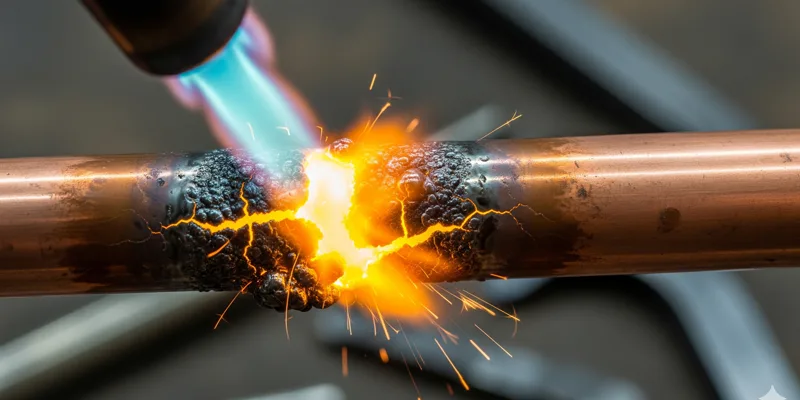
Overheating stands out as one of the most common mistakes when you work with copper. If you heat copper too much, you risk melting it or causing the surface to blister. Overheated copper can turn dark, brittle, or even develop cracks. You want to avoid these problems because they weaken your project.
To prevent overheating, watch the color of the copper closely. When you see a dull red glow, you have reached the right temperature for annealing. If the copper turns bright orange or yellow, you have gone too far. Always move the torch or heating tool evenly and never leave it in one spot for too long.
Tip: Use a temperature chart or an infrared thermometer to help you keep the copper at the correct heat. This simple step can save your work from damage.
Uneven Heating
Uneven heating happens when some parts of the copper get hotter than others. This mistake can leave you with soft spots and hard spots on the same piece. If you try to bend or shape copper that is not heated evenly, it may crack or break.
You can avoid uneven heating by moving your torch or heating tool in slow, steady circles. Make sure you cover the whole surface. For larger pieces, try to heat from both sides if possible. If you use induction heating, place the copper in the center of the coil for the best results.
Here is a quick checklist to help you get even heating:
- Move the heat source slowly and steadily.
- Watch for a uniform dull red color across the copper.
- Flip or rotate the piece if needed.
- Avoid heating only one spot for too long.
Contamination
Contamination can ruin your annealing process. Dirt, oil, or even fingerprints on the copper can cause spots or discoloration when you heat it. These marks can make the surface look bad and may weaken the metal.
You should always clean copper before you start. Use soap and water to remove grease and dirt. Dry the copper well. If you see any tarnish, use a scouring pad or fine sandpaper to polish the surface. Clean copper heats more evenly and gives you better results.
Note: Never touch the cleaned copper with bare hands before annealing. Wear gloves to keep the surface free from oils and dirt.
Improper Cooling
Improper cooling is a mistake that many people make when annealing copper. You might think that cooling the metal quickly will save time, but this can cause problems. The way you cool copper after heating affects its strength, softness, and how easy it is to work with.
When you heat copper for annealing, you change its internal structure. The next step—cooling—locks in those changes. If you cool copper too fast, you can undo the benefits of annealing. You want to avoid rushing this step.
Tip: Always plan your cooling method before you start heating the copper. This helps you get the best results.
Why Proper Cooling Matters
You need to cool copper slowly after annealing. Slow cooling, such as letting the copper cool in air or inside a furnace, helps the metal relax. This process removes internal stresses and keeps the copper soft and flexible.
If you cool copper too quickly, such as by dropping it into cold water, you risk creating new problems. Rapid cooling can trap stresses inside the metal. These stresses make copper harder and more brittle. You may notice that the copper bends less easily or even cracks when you try to shape it.
Here are some common issues caused by improper cooling:
- Residual internal stresses remain in the copper.
- Ductility decreases, making the copper less bendable.
- Brittleness increases, so the copper may snap or crack.
- The microstructure becomes uneven, leading to weak spots.
- The machinability of the copper gets worse, making it harder to cut or form.
You want to avoid these problems because they make your project harder and can ruin your work.
How to Cool Copper Correctly
You can use two main methods to cool copper after annealing:
- Air Cooling: Place the hot copper on a fireproof surface and let it cool at room temperature. This method works well for most projects and gives you soft, workable copper.
- Furnace Cooling: If you have access to a furnace, turn off the heat and let the copper cool inside. This method gives the slowest and most even cooling.
Note: Quenching in water is not always wrong, but you should only use it if you need to handle the copper quickly and do not need maximum softness.
Quick Checklist for Proper Cooling
| Step | What to Do | Why It Matters |
|---|---|---|
| Remove from heat | Use tongs or gloves | Prevent burns |
| Choose cooling method | Air or furnace cooling preferred | Reduces internal stresses |
| Wait patiently | Let copper reach room temperature | Ensures uniform softness |
| Inspect copper | Check for cracks or hard spots | Confirms successful annealing |
You can avoid most cooling mistakes by following these steps. Remember, patience pays off when working with copper. Slow cooling gives you the best results and helps you avoid common problems.
Cooling copper the right way is just as important as heating it. Take your time, and your copper will stay soft, strong, and ready for your next project.
Annealing Copper Safety
Handling Hot Metal
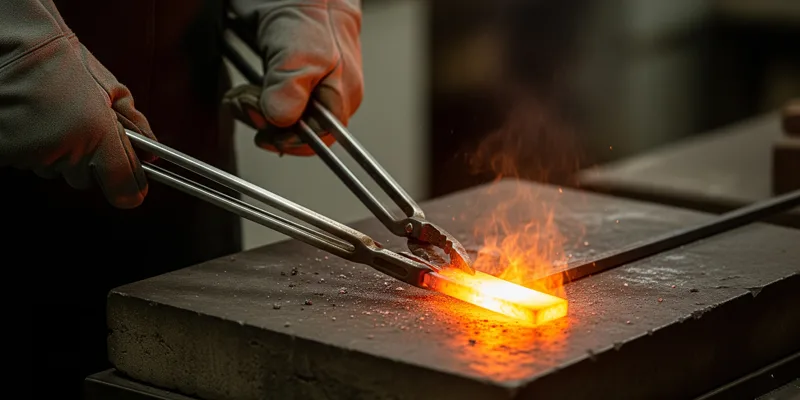
You must always treat hot copper with care. Hot metal can cause serious burns in seconds. Use tongs or pliers to pick up and move copper after heating. Never touch copper with your bare hands until you know it is cool. Even if copper looks dark, it can still be very hot.
Place hot copper on a fireproof surface. Do not set it on wood, plastic, or paper. These materials can catch fire or melt. Always keep your work area clear of clutter. This helps you avoid accidents.
Here are some tips for handling hot metal safely:
- Use long-handled tongs or pliers to grip copper.
- Wear heat-resistant gloves every time you handle hot metal.
- Set hot copper on a ceramic tile, brick, or metal tray.
- Let copper cool fully before you touch it with your hands.
- Warn others nearby when you have hot metal in your workspace.
Tip: Always assume copper is hot until you test it. Tap it gently with a wet stick or tool. If you hear a sizzle, the metal is still hot.
Ventilation
Good ventilation keeps you safe when you anneal copper. Heating copper can release fumes, especially if the metal is dirty or has coatings. You do not want to breathe in these fumes. They can irritate your nose, throat, and lungs.
Work in a space with plenty of fresh air. Open windows and doors if you work indoors. Use a fan to blow fumes away from your face. If you have a fume hood or exhaust system, turn it on before you start heating copper.
Here is a quick checklist for safe ventilation:
| Action | Why It Matters |
|---|---|
| Open windows/doors | Lets fresh air in and fumes out |
| Use a fan | Moves fumes away from your breathing |
| Wear a mask | Protects you from dust and particles |
| Clean your workspace | Reduces dust and dirt in the air |
Note: Never anneal copper in a closed room without airflow. Always make sure you have clean air to breathe.
Fire Safety
Fire safety is very important when you work with heat and metal. Torches and hot copper can start fires if you are not careful. You must prepare your workspace before you begin.
Keep flammable items away from your work area. This includes paper, cloth, and chemicals. Always have a fire extinguisher nearby. Know how to use it before you need it.
Follow these fire safety rules:
- Set up your work on a fireproof surface.
- Keep a bucket of water or sand close by.
- Never leave a lit torch or hot metal unattended.
- Check your torch and fuel lines for leaks before use.
- Store fuel tanks in a safe, upright position.
Alert: If a fire starts, stay calm. Use your fire extinguisher or water bucket right away. Call for help if you cannot control the fire.
By following these safety steps, you protect yourself and your workspace. Safe habits help you enjoy working with copper and avoid accidents.
Protective Gear
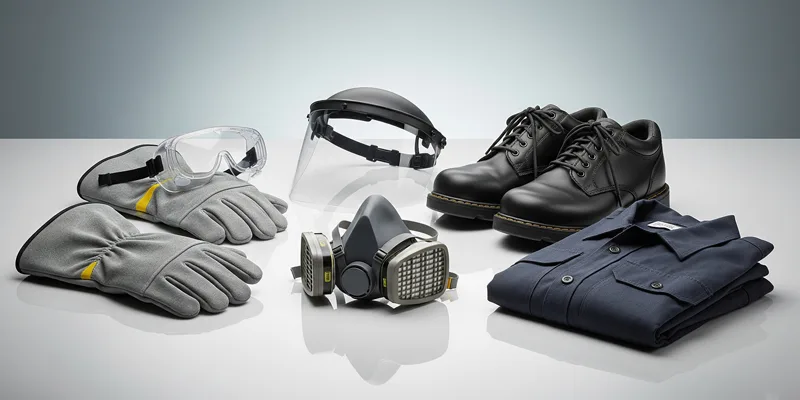
When you anneal copper, you must protect yourself from burns, fumes, and flying debris. The right protective gear keeps you safe and lets you focus on your work. You should always check your gear before you start. Worn or damaged equipment will not protect you.
Here is a list of essential protective gear for annealing copper:
- Heat-resistant gloves 🧤: These gloves shield your hands from hot metal and flames. Choose gloves made from leather or special heat-resistant materials. Always check for holes or thin spots before you use them.
- Safety goggles or face shield 🥽: Your eyes need protection from sparks, flying particles, and bright light. Safety goggles fit snugly and block debris. A face shield covers your whole face and gives extra protection.
- Long-sleeved, non-flammable clothing: Wear shirts and pants made from cotton or wool. Synthetic fabrics can melt and stick to your skin if they catch fire. Roll down your sleeves and tuck in loose clothing.
- Closed-toe shoes: Hot metal can fall on your feet. Wear sturdy shoes or boots that cover your toes. Avoid sandals or shoes with open tops.
- Respirator mask: Sometimes, heating copper releases fumes. A respirator mask filters out harmful particles and keeps your lungs safe. Use a mask if you work in a space with poor ventilation or if you notice smoke.
Tip: Always wear your protective gear, even for small jobs. Accidents can happen quickly.
You can use this table to check if you have the right gear before you start:
| Protective Gear | What It Protects Against | Why You Need It |
|---|---|---|
| Heat-resistant gloves | Burns from hot metal | Prevents serious hand injuries |
| Safety goggles/face shield | Sparks, debris, bright light | Protects your eyes and face |
| Non-flammable clothing | Flames, hot splashes | Stops burns on your body |
| Closed-toe shoes | Falling metal, hot surfaces | Shields your feet |
| Respirator mask | Fumes, dust | Keeps your lungs healthy |
You should also tie back long hair and remove jewelry. Loose hair or dangling items can catch fire or get caught in tools. Keep your workspace tidy so you do not trip or knock over hot metal.
Check your gear every time you work. Replace anything that looks worn out. Good protective gear lasts a long time if you take care of it.
Alert: Never skip safety steps. Protective gear saves you from painful injuries and lets you enjoy working with copper safely.
Troubleshooting Annealing
Copper Not Softening
Sometimes, you may notice that your copper does not become soft after annealing. This problem can make your project difficult. You want your metal to bend and shape easily. If it stays hard, you need to check a few things.
First, make sure you heat the copper to the right temperature. You should see a dull red glow. If you do not reach this color, the copper will not soften. Use a torch or induction heater and move the heat evenly across the surface. Do not rush this step.
Second, check if you cleaned the copper before heating. Dirt or oil can block the heat. Always scrub the metal with soap and water. Dry it well before you start.
Third, look at the thickness of your copper. Thick pieces need more time to heat up. Hold the heat longer for bigger pieces. Thin sheets will soften faster.
Tip: If your copper still feels hard, repeat the heating process. Make sure you reach the right color and let it cool slowly.
Discoloration
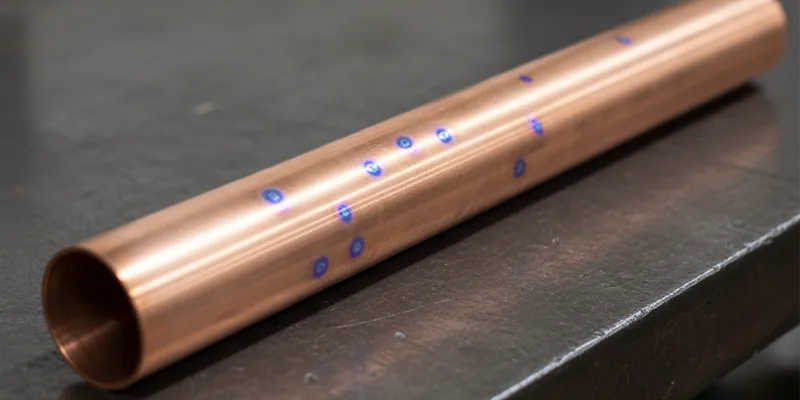
You may see strange colors on your copper after annealing. These colors can include black, purple, or blue spots. Discoloration happens when the surface reacts with air or dirt during heating.
To avoid this, always clean your copper before you start. Use a scouring pad or fine sandpaper to remove tarnish. Work in a clean area. If you use a torch, keep the flame moving to avoid burning one spot.
If you see discoloration, do not worry. You can remove most stains with a vinegar and salt solution. Rub the surface gently until the color fades. Rinse and dry the copper before using it again.
| Color Seen | Cause | Solution |
|---|---|---|
| Black | Overheating, dirt | Clean and reheat gently |
| Blue/Purple | Oxidation | Polish with vinegar/salt |
| Brown | Uneven heating | Heat more evenly |
Warping
Warping means your copper bends or twists out of shape during annealing. This can happen if you heat one area more than another. Uneven heating causes the metal to move.
To prevent warping, always heat the copper evenly. Move your torch in circles or lines. Do not focus on one spot for too long. For large pieces, flip the copper to heat both sides.
If your copper warps, you can fix it. Place the metal on a flat, hard surface. Tap it gently with a wooden or rubber mallet. Work slowly to avoid new bends.
Remember: Careful heating and patience help you avoid warping and keep your copper flat.
Uneven Results
You may notice that your copper does not look or feel the same all over after annealing. Some parts might be soft, while others stay hard. You might see color changes or rough spots. These are signs of uneven results. Uneven results can make your copper hard to shape or cause it to crack later.
Why Do Uneven Results Happen?
Uneven results often come from heating mistakes. If you do not heat the whole piece evenly, some areas will not reach the right temperature. Dirt or oil left on the copper can also block heat. Sometimes, cooling too fast or in the wrong way can cause problems. Using the wrong tools or rushing the process can also lead to uneven results.
Tip: Always check your tools and workspace before you start. Clean copper and steady hands help you get even results.
How to Spot Uneven Results
You can look for these signs to spot uneven results:
- Some parts of the copper bend easily, but others feel stiff.
- The color is not the same everywhere. You might see dark, light, or patchy spots.
- The surface feels rough or has bumps.
- Cracks or small splits appear in certain areas.
Try this simple test: Hold the copper and gently bend it in different spots. If some areas bend more than others, you have uneven results.
How to Fix and Prevent Uneven Results
You can fix uneven results by repeating the annealing process. Focus on the hard or rough spots. Heat those areas until they glow dull red. Let the copper cool slowly in the air. If you see dirt or oil, clean the copper again before reheating.
To prevent uneven results in the future, follow these steps:
- Clean the copper well before you start.
- Use a steady, even motion when heating.
- Watch for a uniform dull red color across the whole piece.
- Let the copper cool slowly and evenly.
- Check your tools for even heat output.
Here is a quick table to help you troubleshoot:
| Problem | Cause | Solution |
|---|---|---|
| Hard spots | Uneven heating | Reheat those areas |
| Patchy color | Dirt or oil on surface | Clean and re-anneal |
| Cracks in some areas | Fast cooling or hard spots | Slow cooling, reheat if needed |
Remember: Patience and careful work give you the best results. Take your time, and your copper will turn out smooth and even every time.
You can anneal copper by cleaning it, heating it to a dull red, and cooling it slowly. Always wear safety gear and work in a safe area. Practice helps you improve your skills and avoid mistakes. If you want to learn more, try reading about metalworking or watch videos on copper techniques.
Tip: Keep a notebook of your projects. Write down what works and what does not. This helps you get better every time.
FAQ
You can watch for a dull red glow in the copper. After cooling, the metal should feel soft and bend easily. If it stays hard, you may need to heat it again.
Yes, you can anneal copper many times. Each time you work or bend copper, it gets harder. Annealing restores softness, so repeat the process as needed.
No, you do not have to quench copper. Air cooling works well and keeps copper soft. Quenching in water cools it faster but does not make it harder.
Overheating can cause copper to blister, turn dark, or even melt. You want to stop heating when you see a dull red color. Too much heat weakens the metal.
Yes, a regular propane torch works for small copper pieces. Move the flame evenly over the surface. Watch for the dull red glow to know when to stop.
Copper turns black from oxidation during heating. This is normal. You can clean the black layer with vinegar and salt or a scouring pad.
You can anneal copper indoors if you have good ventilation. Open windows and use a fan to move fumes away. Always wear safety gear and keep flammable items away.
Use warm water and dish soap to remove dirt and oil. For tough stains, use vinegar or a commercial cleaner. Dry the copper well before heating.


