If you want to know how to polish aluminum, you can make it shine beautifully. You need to follow the right steps to achieve a mirror finish. Many beginners encounter issues like oxidation, which can make the surface look dull. Some people overlook how important sanding is in this process. Using finer grits helps create a smooth surface. Always remember to wear gloves and eye protection, as fine metal dust can be harmful. If you are patient and apply the right methods, you can successfully polish aluminum sheet or sheet metal until it resembles a mirror.
Key Takeaways
- To make aluminum shiny like a mirror, you must clean, sand, buff, and polish it carefully. Start with rough sandpaper, like 220 grit. Then use smoother sandpaper, up to 5000 grit, to make the surface smooth. Always clean the aluminum before each step. This stops scratches and helps you get a perfect finish. Use a rotary polisher with wool pads for buffing. Use foam pads for polishing to make it very shiny. Put on a protective wax or sealant after polishing. This keeps the shine and stops the aluminum from getting dull. Look at the polished surface under warm light. This helps you see any mistakes before you finish. Take care of the aluminum by cleaning it gently and putting on more wax when needed. This keeps it looking nice for a long time. Safety is very important. Always wear gloves and eye protection. This keeps you safe from metal dust and sharp edges.
Table of Contents
Process Overview
What Is a Mirror Finish?
A mirror finish on aluminum means the surface is shiny and smooth. It reflects light just like a real mirror. You will not see many scratches or marks. The surface looks almost perfect because it is very smooth. This smoothness helps the aluminum reflect light well. When you polish aluminum, you want it to look this shiny and clear. The mirror finish makes the metal look nice and professional.
Why Polish Aluminum?
People polish aluminum for different reasons. First, it makes the metal look much better. A shiny surface stands out and gets noticed. Polishing also protects the aluminum from damage. It helps stop contamination and prevents oxidation, which can make the metal dull. The mirror finish keeps aluminum strong and helps it last longer. Cleaning is easier because dirt does not stick as much. Many people polish aluminum sheet metal to make it look good and work better.
Tip: Polishing and buffing make aluminum look great. They also help protect it from corrosion and wear.
- Benefits of a mirror finish:
- Makes aluminum look better
- Stops oxidation and contamination
- Helps aluminum last longer
- Cleaning is easier
Key Steps
There are several main steps in the polishing process. Each step helps you get closer to a mirror finish. You can use these steps for aluminum sheet and sheet metal.
- Clean the Aluminum
Take off dirt, grease, and coatings. Make sure the surface is dry and has no corrosion. - Sand the Aluminum
Start with rough sandpaper and move to finer grits, up to 2000 grit or more. Sanding takes away scratches and makes the surface smooth. - Buff the Aluminum
Use a buffing wheel with polishing compound. Buff in circles to make the aluminum shine. - Polish the Aluminum
Put metal polish on with a hand buffer or clean cloth. Polish until you see a clear, mirror-like reflection. - Protect the Finish
Add wax or sealant to keep the shine and protect the surface from damage.
You can learn how to polish aluminum by following these steps. This process works for many types of aluminum, including sheet metal. When you polish aluminum sheet metal, you get a strong, shiny surface that lasts.
Tools and Materials
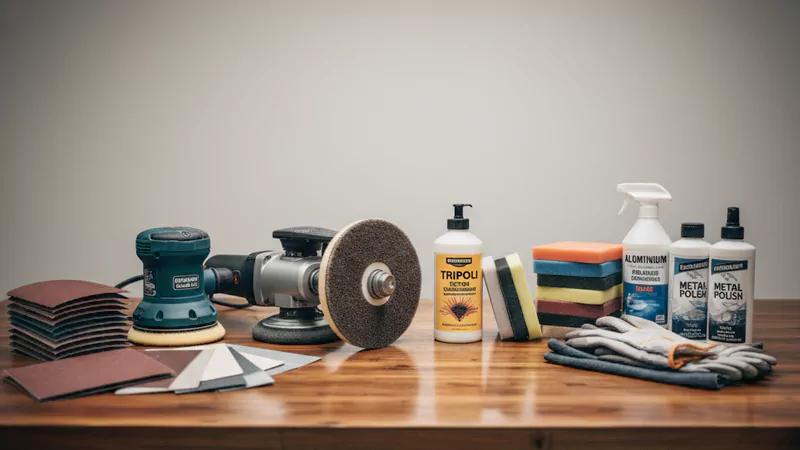
Essential Tools
Sandpaper (220–5000 grit)
You need sandpaper to smooth the aluminum. Start with 220 grit to remove deep scratches. Move up to finer grits like 400, 800, 1200, and even 5000 for a smooth finish. Wet/dry sandpaper works best because you can use it with water. Water helps reduce dust and keeps the surface cool. Professionals often use a range of grits to get the best results.
Random Orbit Sander
A random orbit sander helps you sand large areas quickly. It gives an even finish and saves time. You can attach different grits of sandpaper to the sander. This tool is great for both beginners and experts.
Rotary Polisher
A rotary polisher makes buffing and polishing easier. It spins fast and helps you get a shiny surface. You use this tool with special pads and compounds. Many people use a rotary polisher for the final steps.
Wool and Foam Pads
Wool pads work well for heavy buffing. Foam pads are better for finishing and polishing. You attach these pads to your polisher. Use the right pad for each step to avoid scratches.
Microfiber Cloths
Microfiber cloths help you clean and polish the aluminum. They do not scratch the surface. You can use them to wipe away dust, polish, and residue. Always use clean cloths for the best shine.
Compounds
Cutting Compound
A cutting compound removes fine scratches and oxidation. It prepares the surface for final polishing. Professionals often use Tripoli (brown) compound for this step.
Finishing Compound
A finishing compound gives the aluminum its mirror shine. Jewelers Rouge (white) is a popular choice. Use a small amount on a foam pad or cloth for the best results. Many metal polishing products include both cutting and finishing compounds.
Safety Gear
Gloves
Wear gloves to protect your hands from sharp edges and chemicals. Gloves also keep your hands clean during sanding and polishing.
Eye Protection
Always wear safety glasses or goggles. Aluminum dust can hurt your eyes. Some professionals also use a face shield for extra safety.
Tip: Fine aluminum dust can be dangerous. It can cause breathing problems and even explode if it builds up. Always work in a well-ventilated area and keep your workspace clean. Use a dust mask or respirator to protect your lungs.
Optional Items
Masking Tape
Masking tape can help you get a cleaner and safer result when you polish aluminum. You use masking tape to cover areas you do not want to polish. This tape acts as a barrier. It protects paint, plastic, or rubber parts that sit close to the aluminum. If you use a rotary polisher or sander, the tool can slip. The tape keeps you from scratching or damaging nearby surfaces.
- Masking tape shields painted edges from accidental contact with sandpaper or polishing pads.
- You can use it to outline the area you want to polish, which helps you stay focused and neat.
- The tape also protects your hands from sharp edges during the process.
Tip: Always press the tape down firmly. Make sure it sticks well so no polish or compound seeps underneath. Remove the tape slowly after you finish to avoid peeling off any paint.
Masking tape becomes even more important when you polish wheels or trim near painted surfaces. High-speed tools can fling compound or polish onto paint. The tape blocks this and keeps your work area tidy. You save time on cleanup and avoid costly mistakes.
Cleaning Agents
Cleaning agents play a big role in getting a mirror finish. Before you start sanding or polishing, you need to make sure the aluminum is spotless. Dirt, grease, or old wax can scratch the surface if you do not remove them first. Use a gentle degreaser or a dedicated aluminum cleaner. Spray it on and wipe with a microfiber cloth.
- Cleaning agents remove oils and grime that can interfere with sanding.
- They help prevent dirt from being ground into the aluminum, which can make scratches worse.
- Clean surfaces allow compounds and polishes to work better, giving you a brighter shine.
Note: Never use harsh chemicals like bleach or ammonia. These can damage aluminum and leave stains. Choose products made for metals or automotive use.
You should always clean the aluminum before each step. After sanding, wipe away dust. Before buffing, check for any leftover residue. A clean surface gives you the best results and helps your tools last longer.
Summary Table: Optional Items and Their Benefits
| Item | Main Benefit | Extra Tip |
|---|---|---|
| Masking Tape | Protects paint and nearby surfaces | Press down firmly for best seal |
| Cleaning Agent | Removes dirt and grease for a flawless finish | Use microfiber for wiping |
Using these optional items makes the polishing process smoother and safer. You get a better finish and protect your work area at the same time.
Preparation
Cleaning
Before you start polishing, you need to make sure the aluminum is completely clean. Any dirt, grease, or leftover residue can scratch the surface during sanding and polishing. A clean surface helps you get the best shine and prevents problems later.
Remove Dirt and Grease
You should always begin by removing all dirt and grease from the aluminum. Use a wet rag or sponge with a gentle cleaning solution to wipe away debris, grime, and dust. For tougher jobs, a mixture of water and vinegar works well. Commercial cleaners can also help if you are working on a large project. If you see built-up oil or grease, a strong degreaser or paint thinner may be necessary. For stubborn grime, you can use a soft-bristled brush, but avoid carbon steel brushes because they can scratch the aluminum.
Here is a simple step-by-step method to clean aluminum before polishing:
- Rinse the aluminum under warm running water to loosen debris.
- Mix a small amount of detergent into the water (about one teaspoon per quart) to create a gentle cleaning solution.
- Submerge the aluminum item and let it soak for a few minutes if there’s stubborn buildup.
- Use a soft sponge or cloth to wipe each area in circular motions.
- For grooves or corners, use a soft-bristled brush to clean those areas.
- Rinse thoroughly under warm water to remove all soap residue.
- Dry immediately with a lint-free towel or microfiber cloth.
Tip: For smaller projects, regular dish soap or a water-vinegar mix is usually enough. For larger surfaces, try a commercial cleaner like Metal Pre-Clean.
Dry Surface
After cleaning, you must dry the aluminum completely. Water spots or streaks can affect the finish. Use a lint-free towel or a clean microfiber cloth to dry the surface. Make sure you reach all corners and edges. If you leave any moisture, it can cause streaks or even start corrosion. Always check that the surface feels dry before moving to the next step.
Inspecting
Once the aluminum is clean and dry, you need to inspect it closely. Careful inspection helps you spot scratches, dents, or other imperfections that could affect your final result.
Check for Scratches
Look over the entire surface for scratches or marks. Use good lighting so you do not miss anything. Scratches that remain will become more visible after polishing. If you find any, you will need to sand them out in the next step. Inspecting for scratches is essential for a high-quality polished finish. When you address these issues early, you create a smoother surface and a better shine.
Assess for Repairs
Check for dents, deep gouges, or other damage. If you see any, decide if you need to repair them before you start sanding. Sometimes, you can fill small dents or use special tools to fix them. If you skip this step, imperfections can stand out even more after polishing. Taking time to assess and repair the aluminum now will help you achieve a flawless mirror finish.
Note: Careful cleaning and inspection set the stage for a perfect polish. You save time and effort later by starting with a spotless, smooth surface.
How to Polish Aluminum: Step-by-Step
Sanding
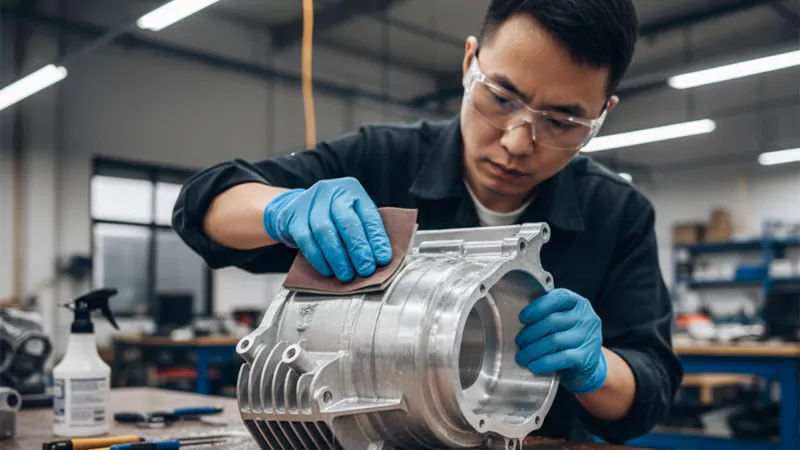
Sanding is the first big step when you want to learn how to polish aluminum. You need to remove old scratches and make the surface smooth. Each sanding stage prepares the metal for the next, finer grit.
Start with 220 Grit
Begin with 220-grit sandpaper. This grit removes deep scratches, oxidation, and any rough spots. Hold the sandpaper flat against the aluminum. Move your hand in straight lines or use a random orbit sander for large areas. Do not press too hard. Let the sandpaper do the work. Check the surface often. When you see that the big scratches are gone, you can move to the next grit.
Progress to 5000 Grit
After 220 grit, switch to a finer sandpaper. Use 400, 800, 1200, 2000, and finally 5000 grit. Each stage removes the marks left by the previous one. If you skip a grit, you might see scratches or haze in the final finish. Take your time with each grit. This careful progression helps you get a professional-grade surface that is ready for polishing.
- Each grit stage removes marks from the last one.
- Skipping grits can leave scratches or a dull look.
- Spending time on each grit gives you a smoother, shinier finish.
Wet Sanding Tips
Wet sanding makes the process even better. Dip your sandpaper in water before you start. Keep the aluminum surface wet as you sand. Water acts as a lubricant. It helps the sandpaper cut smoothly and keeps it from clogging. You can add a drop of dish soap to the water for extra smoothness. Wet sanding also keeps the metal cool and helps prevent scratches.
- Wet sanding gives a smoother finish.
- Water stops the sandpaper from clogging.
- Soap in the water can help the sandpaper glide.
Tip: Always clean the surface between each grit. Wipe away dust and check for scratches before moving to the next sandpaper.
Use Random Orbit Sander
A random orbit sander makes sanding faster and more even. Attach the right grit sandpaper to the sander. Keep the surface wet if you are wet sanding. Move the sander in slow, overlapping circles. Do not stay in one spot for too long. This tool helps you avoid swirl marks and gives a flat, smooth surface. Start with 320-grit on the sander and work up to 2000-grit for best results.
- Soak your sandpaper before use.
- Keep the aluminum wet to stop heat buildup.
- Move the sander slowly and evenly.
- Clean the pad often to avoid residue.
Buffing
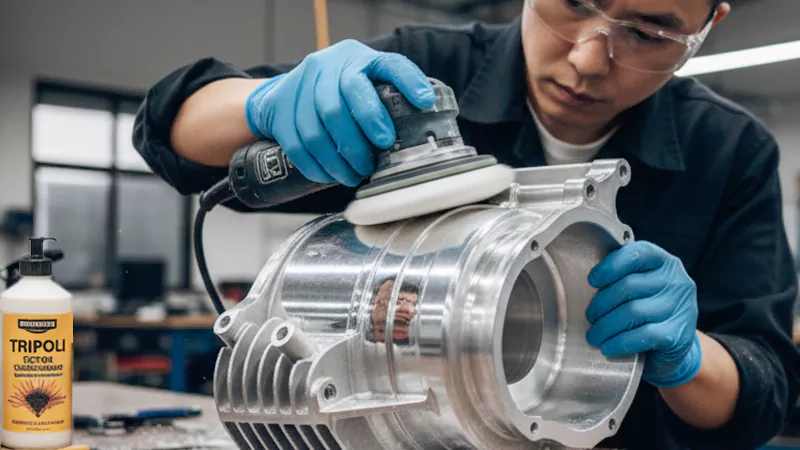
Buffing is the next step in how to polish aluminum. This stage removes tiny imperfections and brings out a soft shine. You need the right pads and tools for the best results.
Wool Pad on Rotary Polisher
Use a wool pad with a rotary polisher for heavy buffing. Wool pads work well for cutting and smoothing the surface after sanding. Set the polisher to about 3500 RPM if you are new to the tool. Experienced users can go up to 6000 RPM. Move the polisher in overlapping passes. Do not press down too hard. Let the machine and pad do the work. Wool pads help remove any last sanding marks and prepare the aluminum for final polishing.
- Buffing removes small imperfections.
- Wool pads are best for heavy compounding.
- Use different wheels for each compound to avoid mixing.
Foam Pad on Random Orbital Polisher
Switch to a foam pad for the finishing stage. Foam pads work well with a random orbital polisher. They help you get a high-gloss finish without swirl marks. Use a clean foam pad for each type of compound. Move the polisher in slow, even strokes. Foam pads spread the polish evenly and bring out the shine.
Note: Buffing wheels and pads come in different types. Use one for compounding, one for polishing, and one for finishing. This keeps your results clean and bright.
Polishing
Polishing is the final step in how to polish aluminum. This stage gives the metal its mirror-like shine. You need to use the right compounds and techniques.
Apply Cutting Compound
Start with a coarse compound like brown Tripoli. Put a small amount on your wool or foam pad. Work the compound into the aluminum using your polisher. Move in slow, overlapping passes. The cutting compound removes fine scratches and oxidation. Wipe away any residue with a clean microfiber cloth.
Switch to Finishing Compound
After the cutting compound, switch to a finer compound such as white rouge. Use a clean foam pad for this step. The finishing compound brings out a deep, high-luster shine. For an even brighter finish, you can use a green or purple compound. Each compound has a different level of abrasiveness. Coarse compounds remove scratches. Fine compounds create a smooth, shiny surface.
- Start with brown Tripoli to remove scratches.
- Use white rouge for a mirror-like shine.
- Try green rouge for extra luster if you want a competition-grade finish.
Tip: Always use a clean pad for each compound. Mixing compounds can dull your results.
A careful polishing process makes aluminum look like a true mirror. You now know how to polish aluminum from start to finish. Take your time with each step for the best results.
Inspecting Finish
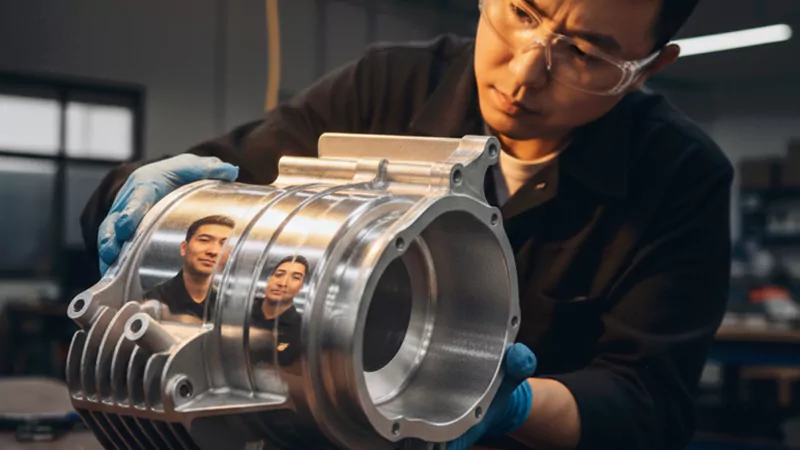
After you finish polishing aluminum, you need to inspect the surface carefully. This step helps you catch any flaws before you protect the metal. A good inspection makes sure your hard work pays off with a true mirror finish.
Use Warm Lighting
Lighting plays a big role in spotting imperfections. You should use warm lighting, such as soft white bulbs or natural sunlight. Warm light shows scratches, swirl marks, and dull spots better than cool light. Hold the aluminum at different angles under the light. Look for any areas that do not reflect clearly. If you see cloudy patches or lines, you may need to polish those spots again.
Tip: Move the aluminum slowly while you inspect. Changing the angle helps you see hidden scratches or haze.
You can also use a flashlight or a shop lamp. Shine the light across the surface, not directly at it. This method highlights dents and rough spots. Many professionals use this trick to check for a perfect finish.
Avoid Paper Towels
When you clean or inspect the polished aluminum, never use paper towels. Paper towels can scratch the surface and leave lint behind. You should use clean microfiber cloths instead. Microfiber picks up dust and residue without harming the finish. Always wipe gently. Pressing too hard can create new marks.
Note: Keep several microfiber cloths handy. Use a fresh one for each step to avoid spreading dirt.
If you need to mark problem areas, use masking tape. Place a small piece near any scratch or dull spot. This helps you remember where to polish again.
Here is a table that shows the best ways to inspect your polished aluminum:
| Inspection Technique | Description |
|---|---|
| Check for Imperfections | Inspect the surface for dents, scratches, or oxidation using bright light. |
| Identify Problem Areas | Mark imperfections that require attention and plan for further treatment. |
| Test the Surface | Feel the surface to detect roughness or raised areas needing extra work. |
You should also touch the surface lightly. Run your fingers across the aluminum. If you feel rough spots or bumps, you may need to sand or polish those areas again. A flawless finish feels smooth and cool.
🛠️ Quick Checklist:
- Use warm lighting to spot flaws
- Inspect from different angles
- Avoid paper towels
- Use microfiber cloths
- Mark problem areas with tape
- Feel for roughness with your hand
Careful inspection helps you achieve a mirror finish that stands out. Take your time with this step. Your attention to detail will make your aluminum shine like new.
Tips for Polishing Aluminum Sheet
Polish Aluminum Sheet Metal: Special Considerations
When you polish aluminum sheet, watch for some special things. Aluminum sheet metal is usually big and flat. You need to use even pressure so you do not miss spots. There are two ways to polish: mechanical and chemical. Mechanical polishing uses tools like sanders and polishers. Chemical polishing uses special liquids to clean and make the metal shiny. Each way has good points. Mechanical polishing lets you control the process. Chemical polishing is faster for big jobs.
Tip: Try your polishing method on a small spot first. This helps you see what happens and avoid mistakes.
Use color-coded buffing pads for different roughness. WD40 helps as a lubricant when sanding and buffing. Microfiber cloths clean and polish without scratching.
- Use even pressure for a smooth finish.
- Mechanical polishing is good for beginners.
- Chemical polishing helps with large areas.
- WD40 and microfiber cloths give better results.
Common Mistakes
People often make mistakes when polishing aluminum sheet. You can stop these problems by following simple rules. The table below shows mistakes and how to fix them.
| Common Mistakes | Solutions |
|---|---|
| Using the wrong type of abrasive | Use stones made for nonferrous metals like aluminum. |
| Applying too much pressure | Keep your pressure steady and gentle across the whole surface. |
| Not following correct sanding techniques | Clean, sand with increasing grit, and buff in order. |
| Contaminated polishing materials | Replace pads and cloths often. Keep everything clean. |
| Skipping grit sizes | Use every grit in order to remove all scratches. |
| Excessive heat during polishing | Use water or WD40 to keep the surface cool. |
| Incomplete removal of oxide layer | Sand and polish until all oxidation is gone. |
| Insufficient buffing | Buff longer and use a finishing compound for high gloss. |
| Using the wrong polishing compound | Pick the right compound for your aluminum alloy and desired finish. |
Note: If you see streaks or dull spots, check your tools. Clean pads and steady pressure help a lot.
Troubleshooting
Sometimes problems happen when you polish aluminum sheet. You might see streaks, uneven shine, or scratches. The table below lists problems, causes, and solutions.
| Problem | Causes | Solutions |
|---|---|---|
| Uneven Polish | Uneven pressure, inconsistent tool speed, worn-out pads | Use steady pressure, set your tool to a constant speed, replace old pads |
| Scratches After Polishing | Dirty pads, skipped grit sizes, dirty cloths | Clean your pads, use every grit, wipe with a clean microfiber cloth |
| Discoloration | Too much heat, wrong compound, moisture after cleaning | Keep the surface cool, use the right compound, dry the aluminum completely |
| Oxidation Reoccurring Quickly | Not removing all oxidation, harsh environment, no protective coating | Remove all oxidation, store in a safe place, apply a protective coating |
| Poor Gloss | Not enough buffing, wrong compound, unsuitable alloy | Buff longer, use the right compound, try other treatments if needed |
🛠️ Quick Fix: If the gloss is poor, buff longer and use a finishing compound. For scratches, use clean materials and follow the right sanding steps.
You can polish aluminum sheet metal to a mirror finish by using these tips. Clean the surface after each sanding step. Use WD40 for lubrication. Buff again and again until you see the shine you want. If you have problems, check your tools and technique. With patience and care, you will get a great result.
Protection and Maintenance
Cleaning Residue
After you finish polishing aluminum, you often see a thin layer of residue or haze. This residue can dull the shine if you leave it on the surface. You should remove it right away to keep the mirror finish bright.
- Use a fine aluminum polish like Blue Magic or Flitz to clean off any haze. These products work well for routine maintenance.
- Avoid chrome polish. It can scratch aluminum and ruin your hard work. Always choose a polish made for aluminum or a jeweler’s polish.
- For oily residue, mist the surface lightly with water. Sprinkle a little corn starch on the area. Polish in one direction with a soft cloth. This method lifts away oil and leaves the surface clean.
- If you want a deeper clean, use an electric drill with polishing nubs and bonnets. This tool helps you reach every spot and gives a smooth, even finish.
Tip: Always use a clean microfiber cloth when wiping away residue. Paper towels can scratch the surface.
Applying Wax or Sealant
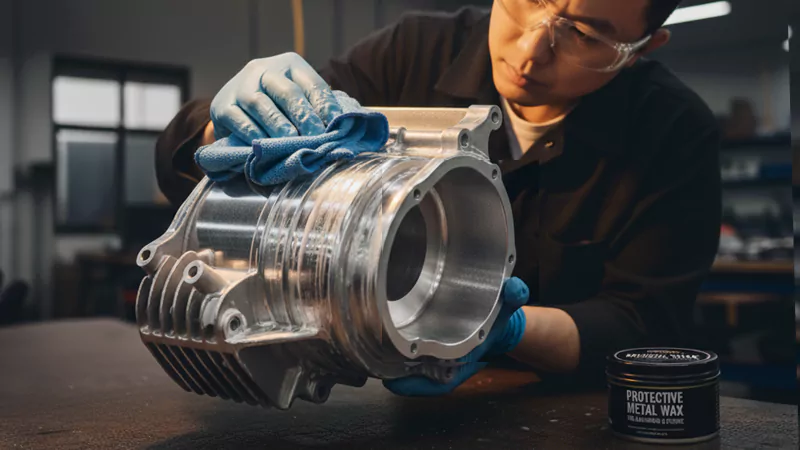
You need to protect your polished aluminum from oxidation and dullness. A thin layer of wax or a specialized aluminum sealant works best. These coatings form a barrier that keeps air and moisture away from the metal. This step helps your mirror finish last much longer.
Applying a synthetic protective coating to polished aluminum prevents oxidation and helps maintain its shine. You should use a wax or sealant made for metals. Spread a thin, even layer over the surface. Let it dry, then buff gently with a clean microfiber cloth. This process locks in the shine and keeps the aluminum bright.
Note: Always follow the instructions on your wax or sealant. Some products need extra drying time for the best protection.
Maintaining Shine
You want your polished aluminum to look great for a long time. Regular care keeps the shine strong and prevents damage. Follow these simple routines:
- Inspect the surface often. Look for scratches, dull spots, or signs of wear.
- Clean with a soft, damp cloth to remove dust and dirt. This step stops dullness before it starts.
- For tough stains, use a mild detergent mixed with water. Avoid abrasive cleaners.
- Dry and polish with a microfiber cloth. These cloths do not scratch the finish.
- Stay away from harsh chemicals and abrasive scrubbers. They can damage the mirror shine.
- Apply a fresh coat of wax or sealant every few months to protect the surface.
- Store aluminum items in a clean, dry place. Use soft covers to keep dust away.
- Keep items out of direct sunlight. Sunlight can fade the shine over time.
- For detailed areas, use a soft-bristle brush. Never use steel wool or rough pads.
- If you have valuable or large items, consider professional maintenance.
🛡️ Regular care and gentle cleaning help your polished aluminum stay bright and beautiful year after year.
You can achieve a mirror finish on aluminum by following these key steps:
- Sand with 220 grit and move up to 2000 grit.
- Wet sand with water and soap.
- Polish with compounds and buffing wheels.
- Finish with a final glaze.
Patience and careful technique make your finish last longer and look better. Regular maintenance keeps your aluminum shiny and protects it from damage.
| Advantage | Description |
|---|---|
| Looks great | Polished aluminum stands out and shines. |
| Easy maintenance | You can re-polish scratches yourself. |
Try this process and enjoy the results you create!
FAQ
You can finish a small project in about two hours. Large pieces may take a full day. The time depends on the size and condition of the aluminum.
You can polish aluminum by hand using sandpaper, polishing compounds, and microfiber cloths. Power tools make the process faster and easier, but you can still get good results without them.
You should use a cutting compound like Tripoli for the first stage. Switch to a finishing compound such as white rouge for the final shine. These products work well for most aluminum alloys.
Wet sanding helps you get a smoother finish. Water keeps the sandpaper clean and cool. You should wet sand for the best results, especially when using fine grits.
Always use clean pads and cloths. Sand in one direction. Avoid paper towels. Inspect your tools before each step. You can use masking tape to protect nearby surfaces.
You can use car wax to protect polished aluminum. Choose a wax made for metal surfaces. Apply a thin layer and buff with a microfiber cloth for extra shine.
Cloudy spots often come from leftover residue or moisture. You should clean the surface with a dedicated aluminum polish. Dry the metal completely before applying any protective coating.
You should work in a well-ventilated area. Wear gloves, eye protection, and a dust mask. Aluminum dust can be harmful if you breathe it in. Clean your workspace often to stay safe.


