You can get a mirror finish on stainless steel if you use the right steps. You can use your hands or a machine for great results. Preparation, sanding, polishing, buffing, and cleaning are all very important. Safety is always important, so pick the right tools and materials for each step.
Tip: Many beginners want to know how to polish stainless steel. Be patient and pay close attention to details, and you will get professional results.
Key Takeaways
- Pick the right tools and materials for polishing stainless steel. You need different grits of sandpaper and polishing compounds.
- Safety comes first. Wear gloves, goggles, and a mask to keep safe from dust and sharp edges.
- Clean the stainless steel surface well before you start polishing. Take off dirt, grease, and stains so the finish is smooth.
- Sand in the correct order. Begin with coarse sandpaper. Then use finer grits for better results.
- Put on polishing compounds with care. Use a buffing wheel or a soft cloth. This helps you get a shiny look without hurting the surface.
- Check your work often. Look for mistakes and flaws after each step. This helps you get a perfect mirror finish.
- Think about using protective coatings after you polish. These coatings keep the shine and protect from stains and rust.
- Take your time and keep practicing. Getting a mirror finish needs patience and careful work, but it is worth it.
Table of Contents
Polishing Stainless Steel: Tools and Materials
Essential Tools
You need the right tools to get a mirror finish. Both hand and machine methods need special items. The table below lists common tools and how well they work:
| Tool/Material | Description/Effectiveness |
|---|---|
| 80-grit sandpaper | Takes away deep scratches and marks. |
| 400-450 grit sandpaper | Makes the surface smooth and removes the oxide layer. |
| 2000-grit sandpaper | Gets the surface ready for the last polish. |
| PTX ECO SMART | Blends welds and takes out scratches. |
| PTX sanding flap wheel (40/60 grit) | Removes scratches and gets ready for finer sanding. |
| Non-woven abrasives | Makes a smooth and even finish. |
| Cotton buffing wheel | Used with polishing cream for the final shine. |
| Lubricant | Lowers heat and friction while polishing. |
Hand tools are good for small or detailed work. Machine tools are faster and give even results. Machine polishing works best for big, flat surfaces. Hand polishing is better for small designs and tight spots. Non-woven abrasives and flap wheels help make the finish smooth. Start with rough abrasives and use finer ones for the best look.
Tip: Use a lubricant to stop heat and protect the stainless steel surface.
Polishing Compounds
Polishing compounds help you get a mirror finish. Each compound does something special. The table below shows the best compounds for polishing stainless steel:
| Polishing Compound | Description | Effectiveness |
|---|---|---|
| Tripolis | Takes away scratches and marks. | High cut for first steps |
| Greystar | Removes firescale and smooths the surface. | Fine abrasives for a smooth finish |
| Brown Tripoli | Cleans and makes the surface better. | Safe for stainless steel |
| Green Rouge | Gives a shiny, mirror finish. | Great for final polishing |
| Polina | Makes the finish sparkle. | Good for jewelry and watches |
Start with Tripolis to take away scratches. Use Greystar or Brown Tripoli to make the surface better. Finish with Green Rouge or Polina for a bright shine. Always use a clean buffing wheel for each compound so you do not mix them.
Safety Gear
Safety is very important when polishing stainless steel. You should always wear the right gear. The table below lists the safety equipment you need:
| Safety Gear | Purpose |
|---|---|
| Gloves | Keep your hands safe from sharp edges and chemicals. |
| Safety goggles | Protect your eyes from dust and bits. |
| Face shields | Give extra protection for your face. |
| Respiratory protection | Stop you from breathing in dust and fumes. |
| Hearing protection | Protect your ears from loud machine sounds. |
You can also wear coveralls and safety boots. These keep your body and feet safe from flying pieces. Always work in a place with good airflow to lower dust and fumes.
Note: Never forget your safety gear, even for small jobs. Good protection keeps you safe and comfortable while you polish.
Optional Equipment
If you want your stainless steel to look even better, you can use extra equipment. These tools help you work faster and make your finish look nicer. They also help protect your hard work. You do not need every tool for each project. But using them can help you get a professional result.
Here are some optional items you might use:
- Variable Speed Polisher: This tool lets you change the speed. Use slow speed for careful work. Use fast speed for big areas. It helps you keep the metal cool. You get more control over how shiny it looks.
- Microfiber Cloths: These cloths grab tiny dust and polish. They do not scratch the surface. Use them at the end to clean off leftover compound or fingerprints.
- Detailing Brushes: Small brushes reach tight corners and edges. They help clean out polishing compound from grooves or seams.
- Protective Coatings: After polishing, you can add a coating. This step gives you many benefits:
- Your surface is less likely to rust.
- Cleaning is easier because dirt does not stick.
- The finish lasts longer and resists scratches.
- Fingerprints and water spots do not show as much.
- Your stainless steel looks fancier.
- Oil-Based Protectants: These work well on surfaces that get dirty a lot. They clean stains and stop new dirt from sticking.
- Water-Based Protectants: These are better for the planet. They make a thin layer that keeps water away and stops damage.
Tip: Test any new protectant on a small spot first. Some coatings can change how your stainless steel looks.
If you are advanced, you can try electrochemical polishing. This uses electricity and chemicals to make the surface smoother. You can get a very smooth finish. The best results come when you use the right amount of electricity. Electrochemical polishing works best on flat or simple shapes. It may not work for every project.
Optional equipment can help you:
- Work faster and make polishing easier.
- Get a better mirror finish.
- Keep your polished surface looking good for longer.
You do not need every item on this list. Pick the tools and products that match your project and budget. With the right equipment, your stainless steel will shine brighter and stay nice for years.
Surface Preparation
Cleaning
You need to clean the surface before you polish stainless steel. Dirt, grease, and other stuff can mess up your work. Here are the steps to clean stainless steel the right way:
- Initial Surface Cleaning: Use a soft cloth to wipe away dust and loose dirt.
- Degreasing: Pick a solvent or alkaline cleaner to remove oils and grease. This helps the polishing compounds work better.
- Pickling Solution Application: If you see heavy stains or color changes, use a pickling solution. It gets rid of tough marks and gets the metal ready for polishing.
- Reaction Time: Let the pickling solution sit for as long as the directions say. Do not hurry this step.
- Rinsing: Wash the surface with clean water to get rid of all chemicals.
- Drying: Dry the surface with a lint-free cloth so you do not get water spots.
For normal cleaning, use pH-neutral cleaners or gentle soap. These cleaners remove dirt but do not hurt the stainless steel’s protective layer. Lab-safe stainless steel polishes can also bring back shine and add protection.
Tip: Always rinse and dry after cleaning. Water spots or leftover chemicals can mess up your polish.
Inspecting for Flaws
After cleaning, look closely at the stainless steel. Check for problems that could ruin the finish. Some common problems are:
- Embedded iron particles
- Sulfide inclusions
- Heat tint from welding or cutting
- Arc strikes
- Grind marks
- Weld spatter
- Scratches
- Organic contamination like oils or glue
- Electropolish frosting
These problems can make polishing harder. For example, embedded iron can cause rust. Sulfide inclusions can start pit corrosion. Heat tint makes the metal less resistant to corrosion. Scratches and sticky stuff make the surface uneven and easy to see after polishing. Fix these problems before you move on. Use abrasives or chemicals to help fix them.
Note: Checking for flaws now saves time later. A perfect surface gives you a better mirror finish.
Masking Areas
Some parts of your project do not need polishing. You should protect these spots by masking them. The table below shows different masking methods and what is good about each one:
| Masking Technique | Description | Advantages |
|---|---|---|
| Wax Masking | Two types: Petroleum-based for low heat and chlorinated synthetic for high heat. | Can be used again, easy to take off, fits many shapes, not expensive. |
| Liquid Masking | Stop-off lacquers used for anodizing and electroplating. | Easy to put on and take off, works in small spaces, can be brushed or sprayed. |
| Tape Masking | Metallic and non-metallic tapes, good for many jobs. | Some tapes can take heat up to 450°F, easy to use, but can take time. |
Pick the masking method that works best for your project. Wax masking is good for tricky shapes. Liquid masking is best for small or detailed spots. Tape masking is fast for straight lines or big areas.
Tip: Always test your masking on a small spot first. This makes sure it will not hurt or stain your stainless steel.
How to Polish Stainless Steel: Step-by-Step
Achieving a flawless, mirror-like shine on stainless steel requires careful attention to each stage of the process. This step-by-step guide will help you understand how to polish stainless steel, whether you work by hand or use machines. You will learn the best methods for polishing stainless steel sheet and other items, ensuring a professional finish every time.
Sanding
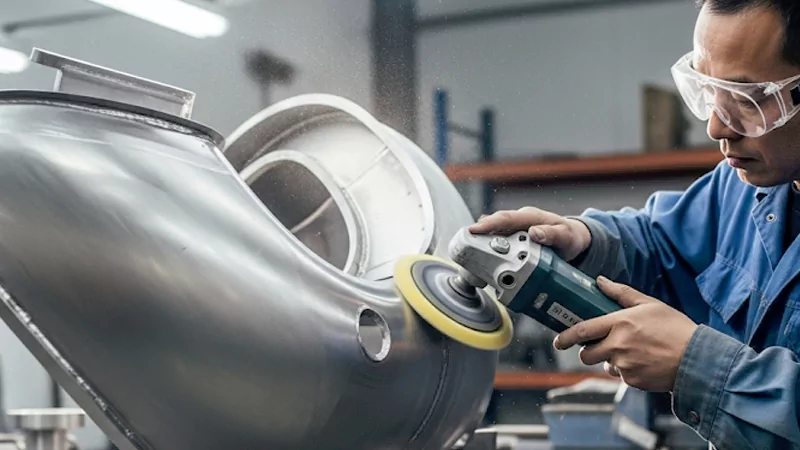
Sanding prepares the surface for polishing. You must remove scratches, oxidation, and imperfections before you can achieve a mirror finish.
Grit Progression
Follow this grit progression for the best results:
- Start with coarse sandpaper, such as 80 grit. This removes deep scratches and surface defects.
- Move to medium grits like 120 and 220. These grits smooth out the marks left by the coarser paper.
- Continue with fine grits: 400, 600, 800, and 1000. Each step removes the scratches from the previous grit.
- Use a cross-hatching technique. Sand in one direction, then switch to a perpendicular direction with the next grit. This method helps you spot and remove any remaining scratches.
- Finish with ultra-fine sandpaper, such as 2000 grit. This prepares the surface for the final polish.
Tip: Never skip a grit. Each step builds on the last, making the final polishing much easier.
Hand vs. Machine Sanding
You can sand by hand or with a machine. Each method has its strengths:
- Hand Sanding:
You control the pressure and direction. Hand sanding works well for small parts, detailed areas, or when you need precision. It takes more time and effort, but you can reach tight spots and avoid over-sanding edges. - Machine Sanding:
Use a random orbital sander or a belt sander for large, flat surfaces. Machines save time and give even results. They work best for polishing stainless steel sheet or big projects. Always keep the sander moving to avoid heat buildup and uneven spots.
For most projects, you can combine both methods. Start with a machine for large areas, then switch to hand sanding for corners and edges.
Applying Polishing Compounds
After sanding, you need to polish the surface using special compounds. This step brings out the shine and removes any fine scratches left by sanding.
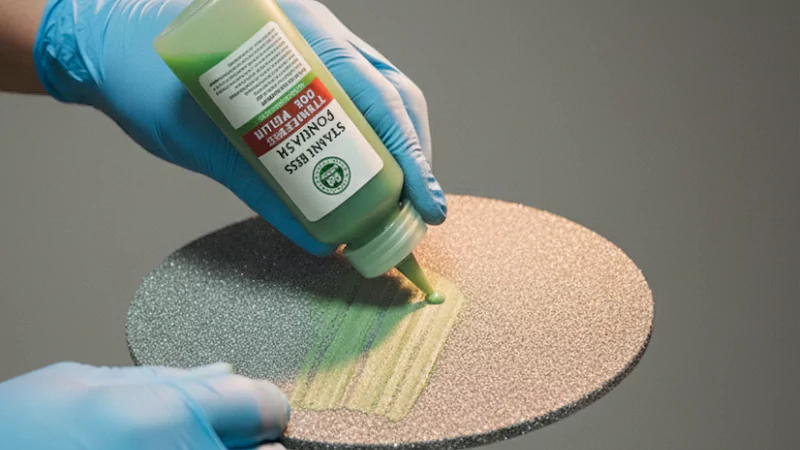
- Attach a buffing pad or polishing wheel to your grinder, rotary tool, or polisher.
- Apply a small amount of polishing compound to the wheel or pad. Choose a compound designed for stainless steel, such as green or white rouge.
- Hold the tool firmly and gently press it against the surface. Move in a steady, overlapping pattern. Do not stay in one spot for too long, or you may burn the metal.
- For hand polishing, use a soft cloth and rub the compound onto the surface in small circles.
- Wipe away any leftover compound with a clean microfiber cloth after each stage.
- If you want a higher gloss, switch to a finer compound and repeat the process.
Safety Alert: Always wear gloves, goggles, and a mask. Polishing compounds can create dust and fumes. Work in a well-ventilated area.
Note: The quality of your polishing compound affects the final result. Use more abrasive compounds for deep scratches, then switch to finer ones for the mirror finish.
Buffing
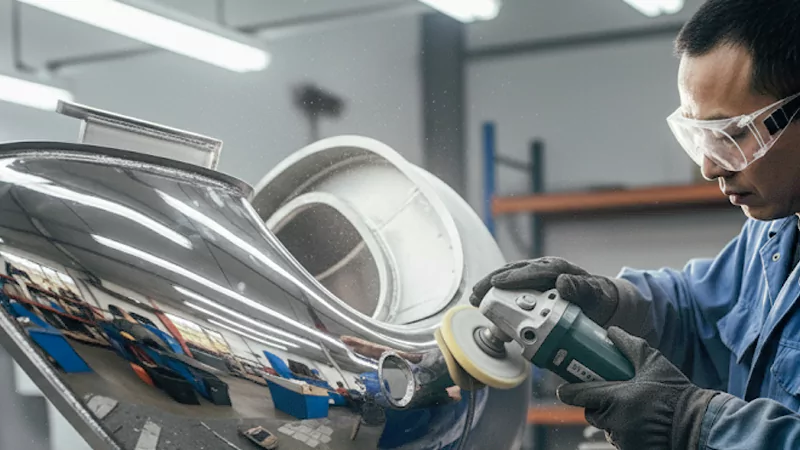
Buffing is the final step in this step-by-step guide. This stage gives your stainless steel its mirror-like shine and smoothness.
Buffing Wheel Safety
Buffing wheels spin at high speeds. You must follow safety rules:
- Wear safety goggles and gloves at all times.
- Keep loose clothing and hair away from the spinning wheel.
- Hold your workpiece firmly, but do not force it into the wheel.
- Stand to one side of the wheel, not directly in front of it.
- Make sure your buffing wheel is in good condition before you start.
Tip: If you are new to buffing, practice on a scrap piece first.
Technique Tips
- Use a light touch. Let the buffing wheel do the work.
- Move the piece back and forth, overlapping each pass. This prevents streaks and burn marks.
- Do not apply too much pressure. Too much force can overheat the metal and damage the finish.
- Clean the surface between each buffing stage. Use a clean cloth to remove any residue.
- For the highest gloss, finish with a fine polishing compound and a clean, soft wheel.
Buffing removes the last traces of scratches and imperfections. When you follow these steps, you will see your stainless steel transform into a true mirror finish. Many professionals use these same techniques for polishing stainless steel sheet in kitchens, medical tools, and decorative projects. A well-buffed surface not only looks great but also resists dirt and bacteria.
Remember, patience and attention to detail make all the difference. This step-by-step guide shows you how to polish stainless steel like a pro, whether you use hand tools or machines.
Achieving a Mirror Finish
Inspecting the Shine
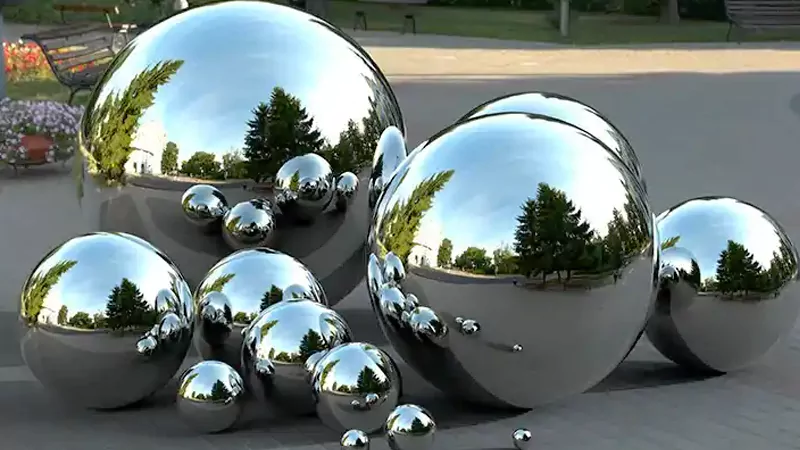
After you complete the polishing and buffing steps, you need to inspect the shine of your stainless steel. A true mirror finish reflects light clearly and shows sharp images, almost like a glass mirror. You should look for a surface that is free from haze, swirl marks, or visible scratches. Hold your work up to a bright light or a window. If you see a clear reflection, you have achieved a high-quality mirror finish.
Professionals use specific measurements to check the quality of a mirror finish. You can use these metrics to judge your results:
| Metric | Description |
|---|---|
| Ra | Average roughness, commonly used in North America, representing the average of the peaks and valleys over a set sampling length. |
| Rz | Mean roughness depth, commonly used in Europe, representing the average of the highest peak to the lowest valley over 5 sampling lengths. |
A lower Ra or Rz value means a smoother surface and a better mirror finish. You do not need special tools for home projects, but you can use your eyes and a flashlight to spot imperfections. If you see dull spots or lines, you may need to repeat some steps.
Tip: Always inspect your mirror finish from different angles. Good lighting helps you catch small flaws before you move on.
Repeating Steps for Perfection
You may not get a perfect mirror finish on your first try. Do not worry. Many professionals repeat the polishing and buffing steps several times. If you see scratches, haze, or uneven shine, go back to a finer grit sandpaper or a lighter polishing compound. Work slowly and check your progress often.
Follow this process for the best mirror finish:
- Inspect the surface after each stage.
- If you see flaws, return to the last step that gave you a smooth result.
- Use a clean buffing wheel and fresh compound for each round.
- Wipe the surface with a microfiber cloth between steps.
Patience leads to a flawless mirror finish. Each time you repeat the process, your stainless steel will look brighter and more reflective. You control the final result, so take your time and enjoy the transformation.
Benefits of a Mirror Finish
A mirror finish offers more than just a beautiful look. You gain many practical advantages when you polish stainless steel to a mirror shine:
- Stainless steel keeps its beauty over time. You do not need extra treatments or coatings.
- The mirror finish gives your project a luxurious and high-end appearance.
- Polishing removes impurities. This process boosts the corrosion and oxidation resistance of your stainless steel.
- You will find that mirror surfaces are much easier to clean. Dirt and grime do not stick as easily.
- A proper mirror finish acts as a shield. It protects against rust, tarnishing, and harsh environmental elements.
- The smooth surface means you spend less time on maintenance. Cleaning becomes quick and simple.
Note: A mirror finish does not just improve looks. It also makes your stainless steel last longer and perform better in demanding environments.
When you achieve a true mirror finish, you create a surface that stands out in any setting. Whether you use it in kitchens, medical tools, or art pieces, the mirror shine adds value and durability.
Maintaining Polished Stainless Steel
Cleaning Tips
You want your polished stainless steel to stay shiny for a long time. Clean it often so it does not get dull or stained. Use gentle cleaners and easy steps to keep the mirror finish safe.
- Pick pH-neutral cleaners. They clean off dirt but do not hurt the protective layer.
- Use mild detergents for daily cleaning. These get rid of fingerprints and light dirt.
- Use lab-safe stainless steel polishes to bring back shine. These also protect the surface.
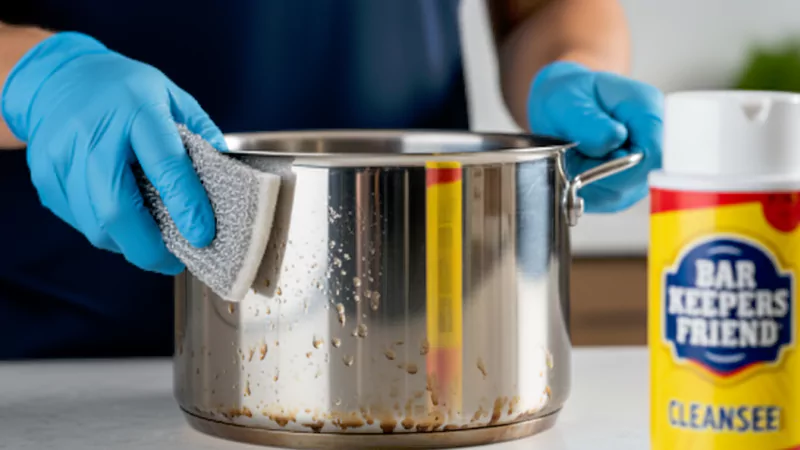
- For tough dirt, use Bar Keepers Friend Stainless Steel Cleaner. It removes stains and oxidation but does not scratch.
Bar Keepers Friend Stainless Steel Cleaner and Polish gets great reviews for making surfaces smooth and shiny. Ducky Metal Works Polish & Protectant is also good and makes cleaning easier.
| Product Name | Best Use | Benefits |
|---|---|---|
| pH-neutral cleaner | Everyday cleaning | Keeps the protective layer |
| Bar Keepers Friend Stainless Steel Cleaner | Hard stains and oxidation | Does not scratch, smooth finish |
| Ducky Metal Works Polish & Protectant | Shine and protection | Simple to use, lasts a long time |
Always use a soft microfiber cloth to wipe surfaces. Do not use steel wool or rough pads. These can scratch and ruin the shiny finish.
Protective Coatings
Protective coatings help your polished stainless steel look new. These products make a shield that stops fingerprints, smudges, and stains. You can buy cleaners and sprays made for stainless steel. They make the shine better and cleaning easier.
- Use stainless steel cleaners or coatings made for mirror finishes.
- These coatings stop tarnishing and keep the surface smooth.
- Using special sprays often makes a shield against dirt and messes.
Putting a coating on your polished stainless steel means you do not have to clean it as much. You spend less time cleaning and more time enjoying the shine.
Long-Term Care
Long-term care keeps your polished stainless steel looking great. Follow easy steps to stop scratches and tarnishing.
- Use disinfectants that match your stainless steel type. Follow the maker’s instructions.
- Stay away from chlorine and bleach. These chemicals hurt the protective layer.
- Do not use rough cleaners like steel wool.
- Clean up messes fast so dirt does not stick.
- Rinse and dry after cleaning. Water spots can make the shine go away.
Here is an easy routine for long-term care:
- Gently scrub dirt with a soft nylon brush.
- Wash with mild soap or detergent safe for stainless steel.
- Rinse with clean water to get rid of all soap.
- Dry with a soft cloth or air blower.
Always use disinfectants the way the directions say. This keeps your polished stainless steel safe and shiny.
Taking care of your stainless steel helps you avoid expensive fixes. You protect your stainless steel and enjoy a bright finish every day.
Safety Tips and Troubleshooting
Safety Precautions
You must always think about safety when polishing stainless steel. Buffing wheels and machines spin fast and can be dangerous. Protect yourself by following these important safety tips:
- Wear safety goggles to keep your eyes safe from flying bits.
- Use gloves to protect your hands from sharp edges and hot metal.
- Put on a dust mask or respirator so you do not breathe in tiny particles.
- Use hearing protection if your machine is loud.
- Tie back long hair and do not wear loose clothes near spinning wheels.
- Make sure your buffing wheel is tight and in good shape before you start.
- Hold your workpiece firmly, but do not push it hard into the wheel.
- Stand beside the buffing wheel, not right in front of it.
- Work in a place with good airflow to lower dust and fumes.
Tip: Try your tools on scrap metal first. This helps you learn how they work and makes mistakes less likely.
Common Problems
You might run into problems while polishing. Knowing why they happen helps you fix them fast. The table below shows common problems, what causes them, and how to solve them:
| Problem Description | Cause Analysis | Solution |
|---|---|---|
| Dullness and gray appearance after polishing | Bad electrochemical polishing solution | Check the solution and its parts |
| White stripes on the surface | Solution is too thick | Stir more or add water to thin it |
| Uneven brightness and local lack of luster | Workpiece not lined up right | Move your piece and change power settings |
| Dull contact points with brown spots | Bad contact makes uneven current | Polish contact spots to help electricity flow |
| Brightness inconsistency among parts | Too many pieces in the slot | Use fewer pieces at one time |
| Silver white spots near concave parts | Parts or tools block power | Move things for better power flow |
| Excessive corrosion | Solution is too hot or current is too strong | Prepare your piece well before polishing |
| Foam in electrolyte | Oil stains on the workpiece | Clean off oil before you polish |
| Imbalance of sulfuric and phosphoric acid | Too much acid causes problems | Change the acid mix in your solution |
Note: Always check your work after each step. Finding problems early saves you time and work.
Fixing Imperfections
You can fix most problems on polished stainless steel if you use the right steps. Here are some good ways to do it:
- Use the right polishing compound to get rid of scratches and swirl marks.
- Machine polishing works fast and gives even results on big surfaces.
- Hand polishing is good for small spots or light problems.
- Pick a polish or compound with the right roughness. Start with a rough one for deep scratches, then use a smooth one for a shiny finish.
- Repeat polishing if you need to. Check your work often and clean the surface between steps.
If you see haze or swirl marks, do not worry. You can usually fix them by using a finer grit or a softer buffing wheel.
If you follow these steps, your stainless steel will stay shiny and smooth. Practice and patience help you get a true mirror finish every time.
You can make stainless steel shiny like a mirror if you follow each step carefully. First, get the metal flat and ready. Next, polish it in different steps. At the end, use the best buffing compound. Take your time and pay close attention. Many people have trouble when they start, but you get better with practice. A mirror finish looks nice, does not stain easily, and stays good for a long time. If you need tips or want to show your work, you can find help and ideas from people online. When you work hard, you feel proud and get great results.
FAQ
You can finish most small projects in one to two hours. Larger surfaces may take longer. The time depends on the condition of the metal and your experience.
You can polish stainless steel by hand using sandpaper, polishing compounds, and a soft cloth. Hand polishing works well for small items or detailed areas.
Start with coarse sandpaper to remove deep scratches. Move to finer grits for a smooth surface. Always sand in different directions to spot any remaining marks.
You should use compounds made for stainless steel, such as green rouge or Tripolis. These compounds help you achieve a mirror finish and protect the metal.
You can find many helpful video guides online. Watching a video helps you understand each step and see the correct techniques for polishing stainless steel.
Clean the surface regularly with pH-neutral cleaners. Apply protective coatings to prevent fingerprints and stains. Use a soft cloth to avoid scratches.
You can remove swirl marks by using a finer polishing compound and a clean buffing wheel. Repeat the buffing process until the marks disappear.


