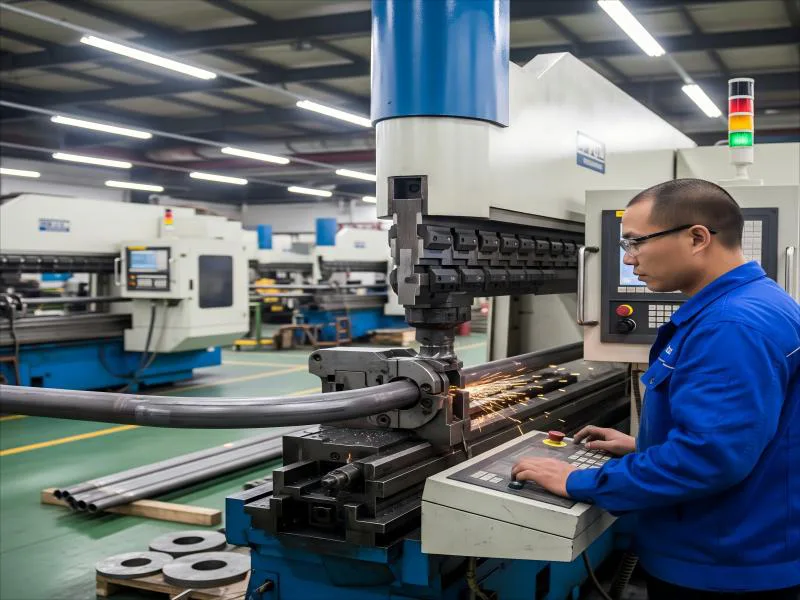
If you want to bend conduit accurately, you must measure carefully. You also need to use the right tools and keep your hands steady. Learning how to bend conduit well helps you control your project. This is true if you are a diy fan or a professional. Many professionals say bending conduit the right way has many good points:
- You use less material and save money.
- Your work is safe and looks neat.
- You can fix hard layout problems easily.
- Projects finish faster and look better. With the right steps, both diy users and experts can make perfect conduit bends every time.
Key Takeaways
- Measure two times and make clear marks before you bend. This helps you avoid mistakes and save material. Use the correct bender size and type for your conduit. This stops kinks and damage. Always wear safety gear like glasses, gloves, and steel-toe boots when you bend conduit. Plan your conduit run with care. Think about where bends go and how far apart they are. This keeps your work neat and follows the rules. Push down with steady pressure and use your body weight to control the bend. This helps keep bends smooth. Make sure you allow the right bend radius. This keeps the conduit strong and makes wiring easier. Use multipliers and templates to mark offsets and tricky bends the right way. Check each bend with a level or angle gauge. Fix any mistakes right away for a professional job.
Table of Contents
Tools for Conduit Bending
Manual Benders
Manual benders help you shape conduit by hand. You use these tools for small or medium projects. An emt conduit bender is the most common manual tool. You insert the conduit into the bender and use your foot or hands to apply pressure. You must align the conduit with marks on the bender. The star mark shows where to start a 90-degree bend. The arrow helps you line up for offsets. Degree marks let you check the angle as you bend. You should always measure twice before you bend. This step helps you avoid mistakes and wasted material.
Manual benders work best for emt conduit and thin metal pipes. You can carry them easily to different job sites. You need to choose the right size bender for your conduit. If you use a bender that is too small or too large, you may crush or kink the pipe. For larger conduit, keep the handle up to get more force. For smaller conduit, keep the handle down for better control. You can use the extended handle to straighten the conduit if it bends too much.
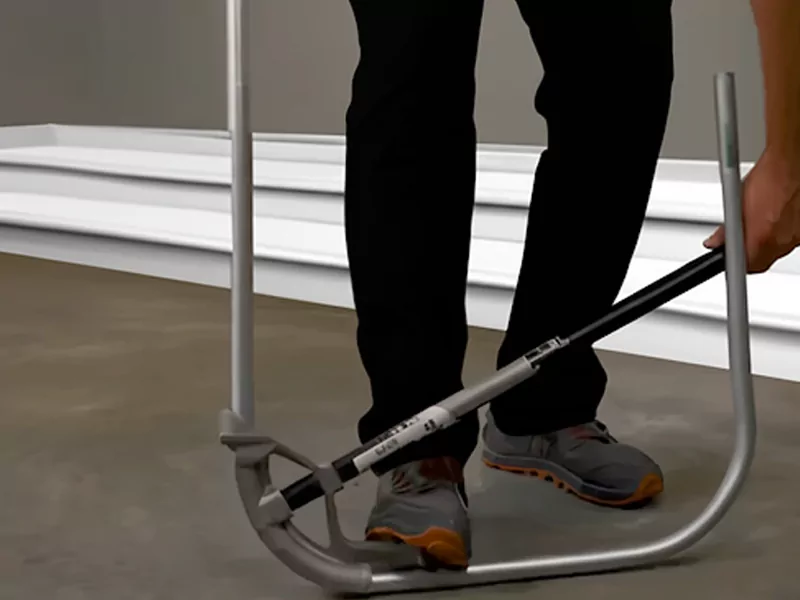
Tip: Always keep your body steady and apply firm foot pressure on the bender’s heel. This helps you make smooth and accurate bends.
Hydraulic and CNC Benders
Hydraulic benders and CNC benders help you bend conduit with more power and precision. You use hydraulic benders for thick or rigid conduit. These machines use fluid pressure to make smooth bends. CNC benders use computer controls to shape conduit exactly as you need. These tools work well for complex bends and large projects.
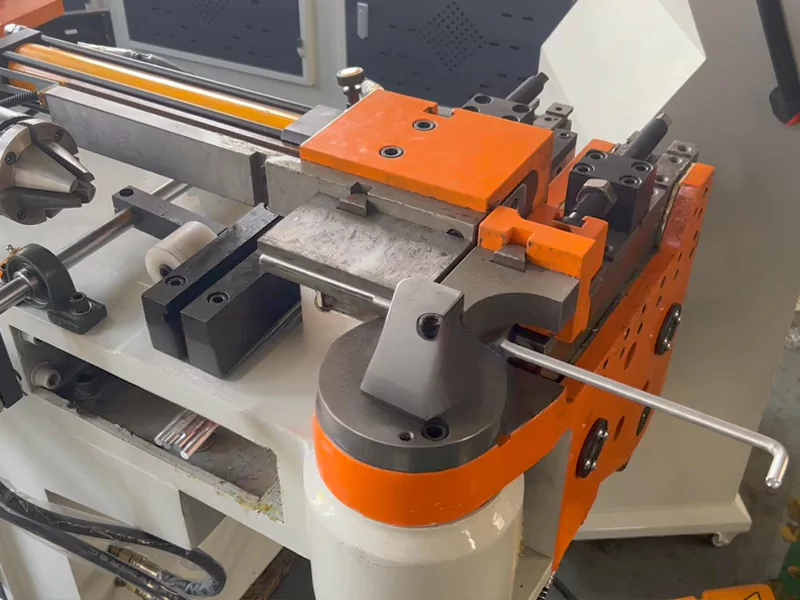
AFI Industrial Co., Ltd. offers advanced pipe bending equipment and services. Their machines can bend metal pipes with high accuracy. You can use their services for aerospace, medical, or construction projects. AFI’s CNC benders keep the bending angle precise and the surface smooth. If you need custom shapes or tight tolerances, you can rely on AFI’s technical team.
Hydraulic and CNC benders save you time and reduce errors. You can bend many pieces quickly and get the same results every time. These tools are best for professionals or anyone who needs perfect conduit bending for big jobs.
Measuring Tools

Measuring tools help you plan and mark your conduit before you bend it. You need a tape measure to check the length of each run. Use a marker to draw lines where each bend will go. A level helps you keep the conduit straight. For complex bends, you may need a protractor or angle finder. These tools let you measure the exact angle for each bend.
You should always measure twice and mark clearly. This step makes sure your bends fit the layout and connect to boxes or panels. Good measuring tools help you avoid mistakes and keep your conduit runs neat and safe.
Note: Accurate measuring and marking are just as important as using the right bender. Careful planning leads to perfect conduit bends.
Safety Gear
When you bend conduit, safety must come first. The right safety gear protects you from injuries and helps you work with confidence. You should always check your gear before you start any project. Here are the most important items you need:
1. Safety Glasses 👓
You need to protect your eyes from flying metal chips, dust, or sparks. Safety glasses keep your eyes safe when you cut, bend, or handle conduit. Choose glasses that fit well and do not slip off your face. If you wear prescription glasses, use safety goggles that fit over them.
2. Work Gloves 🧤
Work gloves protect your hands from sharp edges and hot surfaces. Metal conduit can have burrs or rough spots that cut your skin. Gloves also help you grip the conduit and tools better. Pick gloves that fit snugly but still let you move your fingers easily.
3. Steel-Toe Boots 👢
Heavy conduit or tools can fall on your feet. Steel-toe boots shield your toes from injury. They also give you a firm grip on the ground, which helps you keep your balance when you use a bender.
4. Hearing Protection 🎧
Some bending machines, like hydraulic or CNC benders, make loud noises. Long exposure to noise can damage your hearing. Use earplugs or earmuffs to protect your ears, especially in busy workshops or on construction sites.
5. Long-Sleeve Shirts and Pants
Wear long sleeves and pants to protect your skin from sparks, metal shavings, and accidental scrapes. Choose clothes made from sturdy material. Avoid loose clothing that can get caught in machines.
6. Dust Mask or Respirator 😷
If you cut or grind conduit, you may create dust or fumes. A dust mask or respirator keeps you from breathing in harmful particles. Always use a mask in areas with poor ventilation.
Tip: Always inspect your safety gear before each use. Replace any damaged items right away. Clean your gear after every project to keep it in good condition.
7. Hard Hat
If you work on a construction site or in an area where objects might fall, wear a hard hat. It protects your head from bumps and falling debris.
Safety in Professional Settings
Professional companies, such as AFI Industrial Co., Ltd., always follow strict safety rules. Their teams use advanced pipe bending equipment and wear the right safety gear for every job. You should follow their example and make safety your top priority. Good safety habits help you avoid accidents and finish your work without injury.
| Safety Gear | Purpose | When to Use |
|---|---|---|
| Safety Glasses | Protect eyes | Cutting, bending, grinding |
| Work Gloves | Protect hands | Handling conduit/tools |
| Steel-Toe Boots | Protect feet | All times |
| Hearing Protection | Protect hearing | Using loud machines |
| Dust Mask/Respirator | Protect lungs | Cutting, grinding |
| Hard Hat | Protect head | Construction sites |
| Long Sleeves/Pants | Protect skin | All times |
Remember, safety gear is not optional. You must use it every time you bend conduit. This habit keeps you safe and lets you focus on making perfect bends.
Conduit Types and Sizing
Choosing the right conduit for your project helps you get safe and neat electrical installations. Each type of conduit has unique features. You need to know how these features affect your bending methods and the tools you use.
EMT Conduit
EMT conduit stands for Electrical Metallic Tubing. You often see emt in homes, schools, and offices. This conduit is thin-walled and made from steel or aluminum. Because emt is light and easy to handle, you can bend it with a manual bender. You do not need special machines for most jobs. EMT does not have threads, so you use set-screw or compression fittings to join pieces. The thin walls make emt easy to cut and shape, but you must avoid crushing it. Always use the correct size bender for emt to keep your bends smooth and round.
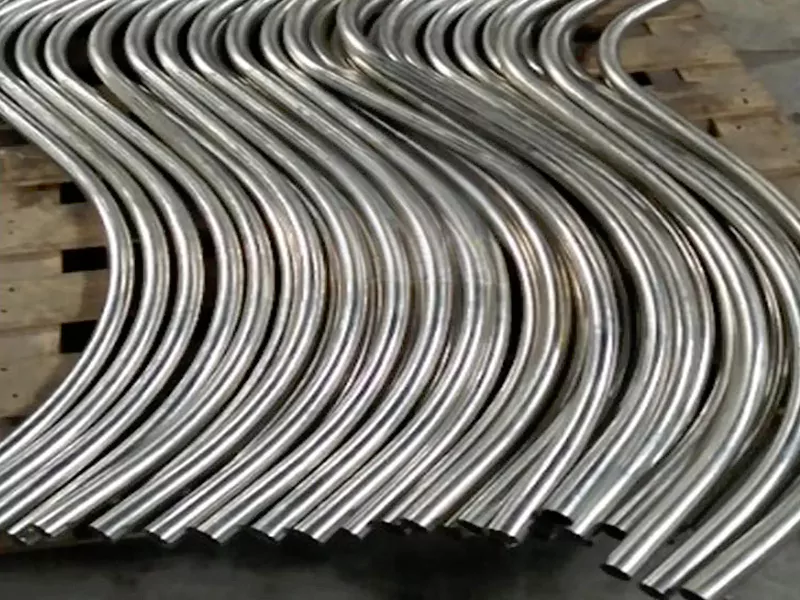
Tip: EMT conduit works well for indoor projects where you need quick and accurate bends.
Rigid and Flexible Conduit
Rigid conduit includes Rigid Metal Conduit (RMC) and Intermediate Metal Conduit (IMC). RMC has thick walls and is heavy. You use it in places that need strong protection, like outdoor or industrial sites. Bending rigid conduit takes more effort. You need special tools, such as hydraulic benders, to shape it. IMC is lighter than RMC but still strong. It bends more easily, but you must watch for kinks.
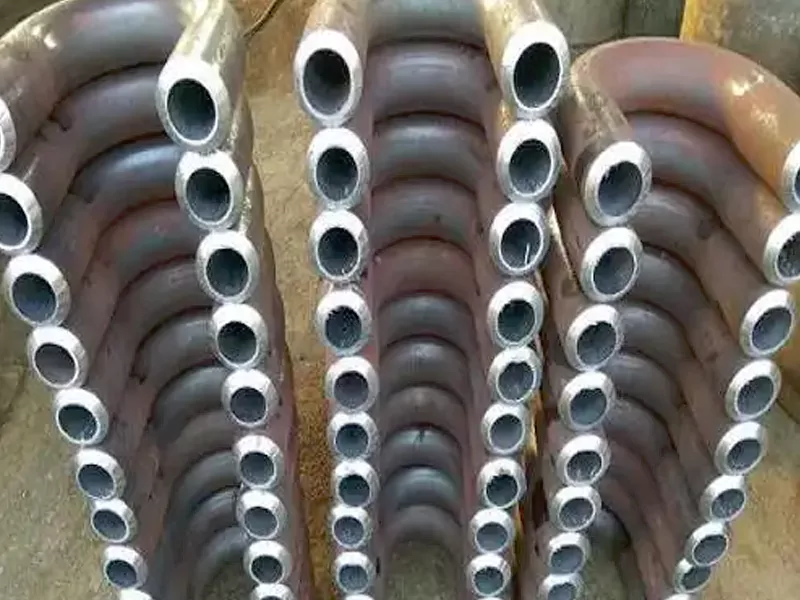
Flexible conduit comes in two main types: Electrical Nonmetallic Tubing (ENT) and Flexible Metal Conduit (FMC). ENT is made from corrugated PVC. You can bend it by hand without tools. FMC is metal and flexible, but it has less space inside for wires. You use flexible conduit in places where you need to move or adjust the wiring often.
Here is a table to help you compare the main conduit types and their bending needs:
| Conduit Type | Material & Features | Bending Techniques |
|---|---|---|
| EMT | Thin-walled steel or aluminum, light | Easy to bend with manual bender |
| RMC | Thick-walled, heavy, threaded | Needs special tools, more labor |
| IMC | Medium thickness, lighter than RMC | Careful bending, avoid kinks |
| ENT | Corrugated PVC, very flexible | Bend by hand, no tools needed |
| FMC | Flexible metal, corrugated | Bend by hand, less wire space |
AFI Industrial Co., Ltd. uses advanced equipment to bend all types of conduit, including complex shapes for special projects. Their team can handle both rigid and flexible conduit with high precision.
Sizing Guidelines
You must pick the right size conduit for your wires. The National Electrical Code (NEC) gives rules for how many wires you can put in each size. EMT has the largest space inside for wires because its walls are thin. Rigid conduit has thicker walls, so it holds fewer wires of the same size. Flexible conduit, like FMC, has the least space because of its shape.
For example, a 3/4-inch emt conduit can hold up to 16 wires of #12 AWG size. The same size rigid conduit holds about 16 wires, but IMC can hold 17. Always check the fill chart before you start. If you use more wires, you may need a bigger conduit.
Note: When you switch from emt to rigid or flexible conduit, you may need to upsize to keep the same wire capacity.
You should also think about where you install the conduit. Outdoor and wet locations need conduit with strong protection, like RMC. Indoor jobs often use emt because it is easy to bend and install.
Measuring and Marking
Planning the Run
You need to plan your conduit run before you start any installation. This step helps you avoid mistakes and makes your work look professional. Start by visualizing the path your conduit will take. Think about where you want to place boxes, outlets, and switches. Mark the drilling points on the wall at the right height, usually between 24 and 30 inches from the ground. This gives you enough space for bends and keeps outlets easy to reach.
Mount all your boxes before you install the conduit. This method saves time and keeps your workflow smooth. Use exterior-grade deck screws to secure the boxes. These screws prevent rust and keep your installation strong. Avoid drilling through center knockouts, as this can cause problems with screws and alignment. Secure your conduit with nail straps or clamps after routing. This keeps everything neat and prevents movement. Plan the electrical flow as a continuous path from the power source to each outlet. This approach helps you avoid unnecessary loops and confusion.
Tip: Careful planning reduces errors and helps you achieve a clean, code-compliant installation.
Marking for Bends
Accurate marking is key to perfect conduit bends. Use a tape measure to find the exact spot for each bend. A green cross line laser level can help you project straight lines on the wall, making sure your conduit stays level and plumb. Mark the points for bends using calculated distances and multipliers. For example, when making a box offset, multiply the height of the offset by 3/8 inch to find the spacing between bends. If you need a 10-degree offset, mark the first point, then measure 2 1/4 inches for the second mark.
Align your marks with the arrow on your bender. This step ensures you get the right angle every time. For three-point saddle bends, measure the distance to the obstacle and calculate shrinkage. Mark the center bend at 45 degrees and the outer bends at 22.5 degrees. Always use your laser level to check that all marks line up in the same plane. When bending multiple conduits, measure stub lengths carefully to keep them uniform.
Note: Double-check your marks before bending. This habit saves material and prevents costly mistakes.
Allowing for Bend Radius
Every conduit bend has a minimum radius you must respect. The radius is the curve distance from the center of the bend to the centerline of the conduit. If you make the bend too tight, you risk kinking the conduit or damaging the wires inside. Always check the manufacturer’s guidelines for the correct radius for your conduit type.
When you plan your run, leave enough space for each bend’s radius. For example, if your bender requires a 6-inch radius, make sure you do not place boxes or obstacles too close together. Use a protractor or angle finder to measure the bend as you work. This tool helps you keep each radius consistent. Companies like AFI Industrial Co., Ltd. use advanced equipment to achieve precise bends with exact radii, ensuring professional results.
Remember: Allowing for the correct radius keeps your conduit smooth and safe for wiring.
How to Bend Conduit
Bend EMT Conduit
You can bend EMT conduit with a manual bender. This process helps you create smooth curves for wiring runs. Start by measuring the length you need for your project. Mark the spot where you want the bend. Place the bender on the ground with the handle pointing up. Slide the conduit into the bender’s head. Align your mark with the arrow on the bender.
Stand with your feet shoulder-width apart. Step firmly on the bender’s foot pedal. Pull the handle slowly. Watch the degree marks as you bend EMT conduit. Stop when you reach the angle you want. Check the bend for kinks or wrinkles. If you see any problems, straighten the conduit by inserting the end into the bender handle and pushing down gently.
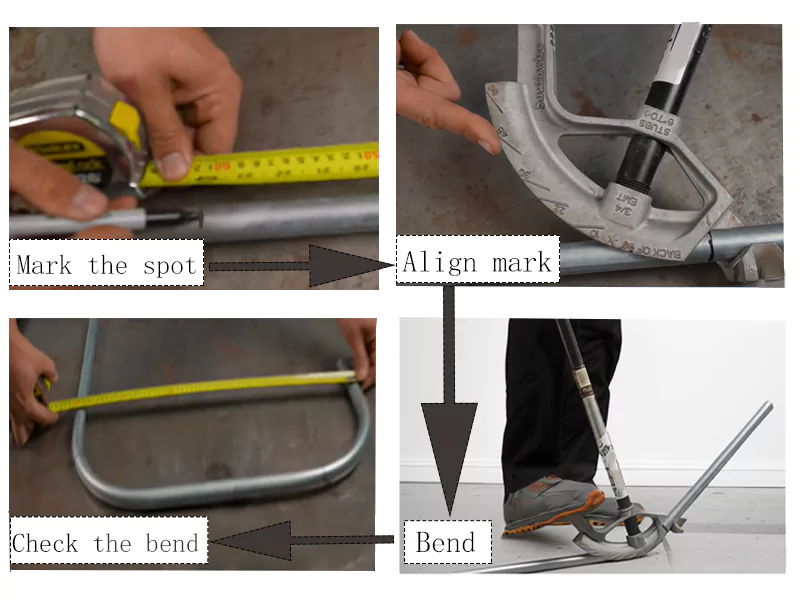
Tip: Always measure twice before you bend EMT conduit. This habit saves you time and material.
Industry experts recommend using the correct bender shoe for EMT. This step prevents damage and keeps your bends neat. AFI Industrial Co., Ltd. uses advanced equipment to bend EMT with high accuracy. Their team achieves precise angles and smooth surfaces, setting a standard for professional results.
90-Degree Bends
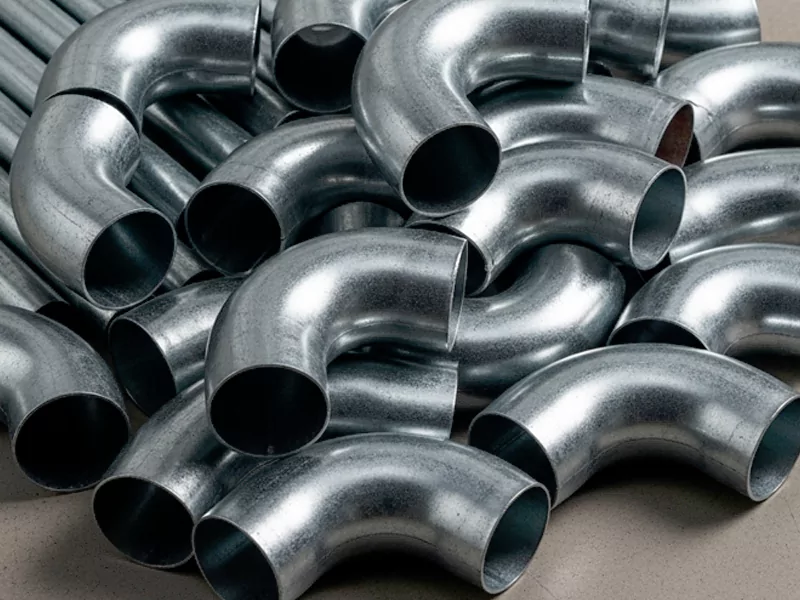
A 90 degree conduit bend is common in electrical work. You use it to change the direction of your conduit run. To make a 90 degree conduit bend, follow these steps:
- Measure the stub height you need.
- Subtract the take-up length from your measurement.
- Mark the starting point on the conduit.
- Place the bender on the ground with the handle up.
- Slide the conduit into the bender.
- Align the mark with the arrow on the bender.
- Step on the bender’s foot pedal and the back end of the conduit.
- Pull the handle until you reach 90 degrees.
- Remove the conduit and check the angle with a level.
Use high-contrast angle markings on your bender for better accuracy. Apply steady pressure to avoid kinks. If you need to make back-to-back bends, measure the distance between surfaces and mark the conduit. Align with the star symbol on the bender and bend two 90-degree angles spaced properly.
Note: Consistent pressure and careful alignment help you achieve perfect 90 degree conduit bends every time.
AFI Industrial Co., Ltd. uses CNC benders with live angle displays. Their machines keep the bending angle precise within ±0.1°. You can use their services for complex projects that require exact bends.
Offsets and Saddles
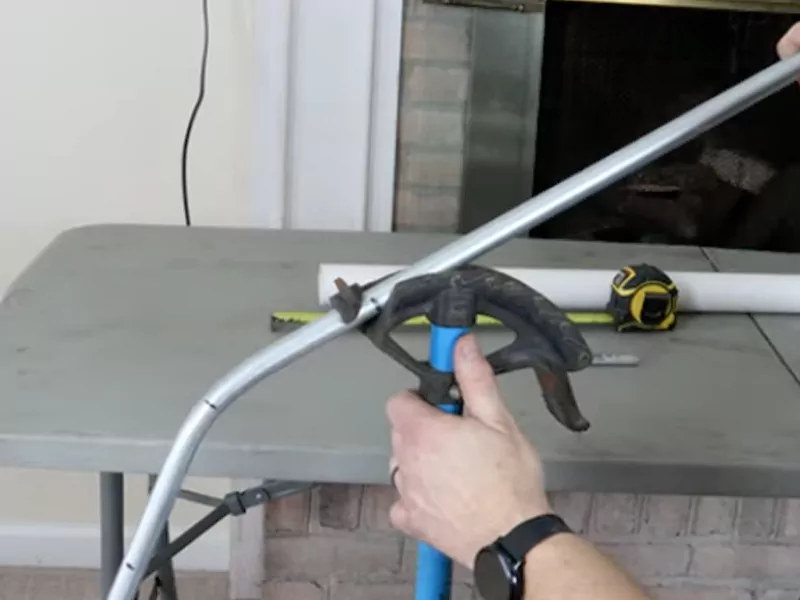
Offsets and saddles help you navigate obstacles like pipes or beams. You use offsets to raise or lower the conduit over small barriers. Saddles let you go over larger objects. Here is how to make an offset:
- Mark the start and center-to-center distance on the conduit.
- Place the conduit in the bender and align the first mark with the arrow.
- Make the first bend at the desired angle (usually 45 degrees).
- Rotate the conduit 180 degrees.
- Align the second mark with the arrow.
- Make the second bend to match the first.
For a three-point saddle bend:
- Calculate the center and side points based on conduit diameter.
- Mark the center and side points on the conduit.
- Align the center mark with the rim notch on the bender.
- Make the center bend at 45 degrees.
- Move to the side marks and make two bends at 22.5 degrees each.
Use offset benders for precise offset bends in one setup. This tool simplifies performing the bends and improves quality. Always check your work for alignment and accuracy.
| Tip Category | Practical Tip | Benefit |
|---|---|---|
| Correct Bender Shoes | Use the right shoe for EMT, IMC, RMC, or PVC conduit | Prevents wrinkling and crooked bends |
| Consistent Pressure | Apply steady pressure | Avoids kinks and keeps bends smooth |
| High-Contrast Markings | Use benders with clear angle markings | Improves accuracy and reduces mistakes |
| Safety and Handling | Maintain proper body position | Increases control and confidence |
AFI Industrial Co., Ltd. uses advanced bending stations and offset benders. Their team can perform complex bends with high precision. You can trust their expertise for projects that need perfect offsets and saddles.
Tip: Always inspect your bends after performing the bends. Accurate bends make your conduit runs look professional and work safely.
Circles and Arches
Bending conduit into circles and arches lets you create smooth curves for special installations. You might need these shapes for decorative lighting, custom railings, or unique wiring paths. You can bend EMT, PVC, or metal conduit into circles and arches with the right tools and careful planning.
How to Bend Circles and Arches
You start by choosing the right conduit type. EMT works well for gentle curves. PVC bends easily with heat. Rigid metal conduit needs special machines.
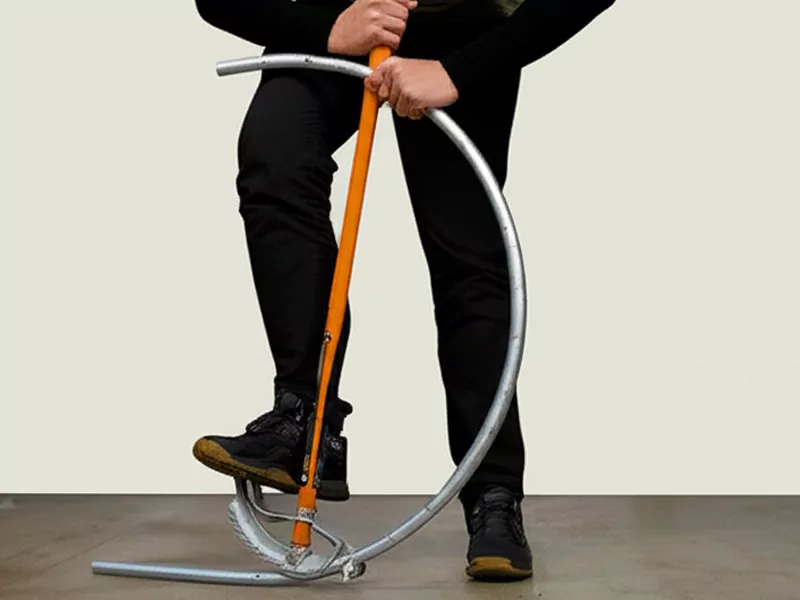
Steps for Bending Circles and Arches:
- Measure the Diameter
Decide how big you want your circle or arch. Use a tape measure to mark the diameter on the floor or wall. - Mark the Bend Points
Mark the conduit at regular intervals. Small marks help you keep the curve smooth. - Use a Bending Jig or Form
Place the conduit against a round form or jig. You can use a wooden template, a metal ring, or a pipe bender with a large radius. - Apply Even Pressure
Bend the conduit slowly. Move along the marks and keep the pressure steady. For PVC, heat the conduit with a heat gun before bending. - Check the Curve
Lay the conduit on the template. Make sure the curve matches your plan. Adjust as needed.
Tip: For tight circles, use a conduit bender with a large radius shoe. This tool helps you avoid kinks and keeps the curve smooth.
Practical Tips for Different Conduit Types
| Conduit Type | Best Method for Circles/Arches | Key Precautions |
|---|---|---|
| EMT | Manual bender, large radius | Avoid sharp bends |
| PVC | Heat gun, bending jig | Do not overheat |
| Rigid Metal | Hydraulic/CNC bender | Use correct form size |
You can bend PVC conduit by heating it with a heat gun. When the pipe feels soft, you shape it around a form. Hold it in place until it cools. For EMT, use a manual bender or a jig with a gentle curve. Move slowly to keep the bend even.
Achieving Professional Results
If you want perfect circles or arches, you can look to AFI Industrial Co., Ltd. Their team uses CNC pipe benders and custom jigs to create precise curves. AFI’s machines control the bending angle within ±0.1°, so every circle looks smooth and matches your design. You can trust their expertise for complex shapes in construction, lighting, or industrial projects.
Note: Always measure your bends and check the radius. Consistent curves make your installation look professional and work safely.
Common Mistakes to Avoid
- Bending too quickly can cause kinks.
- Not using a form leads to uneven curves.
- Overheating PVC makes it weak.
- Skipping measurements results in poor alignment.
Checklist for Success:
- ✅ Measure diameter and radius
- ✅ Mark bend points
- ✅ Use a proper form or jig
- ✅ Apply even pressure
- ✅ Check the curve often
You can create circles and arches with practice and patience. Use the right tools and follow each step. If you need advanced shapes or high precision, AFI Industrial Co., Ltd. offers professional pipe bending services for any project.
How to Bend EMT Conduit
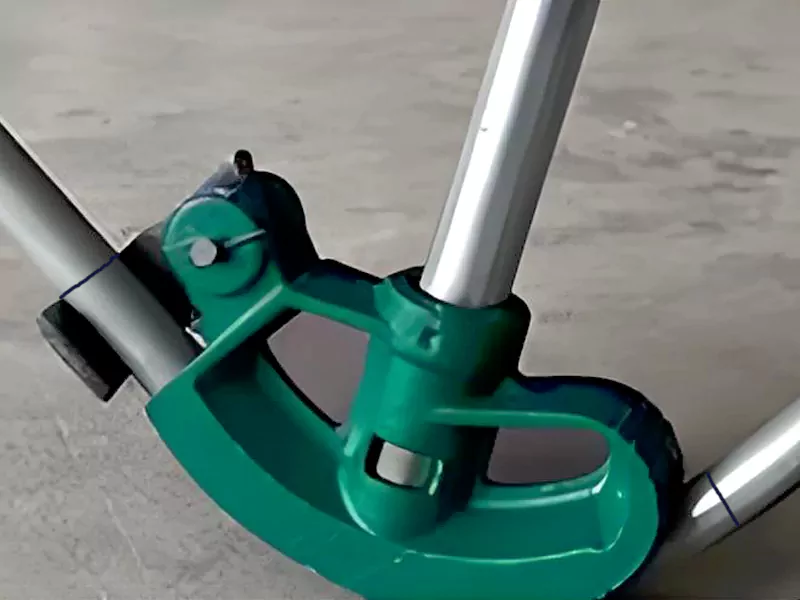
Setup and Alignment
Start by setting up your workspace carefully. Measure the conduit to get the length you need. Use a tape measure and mark the spot for the bend. Cut the conduit with a hacksaw. File the edges so they are not sharp. Put the conduit on a strong surface like a workbench or concrete step. This helps you get good leverage.
Check your marks before you bend. Use a green cross-line laser level to make sure your marks are straight. Make marks every two inches along the conduit. This helps you keep the bend even. Line up the conduit with the arrow on your bender for normal bends. Use the star mark for back-to-back bends. Always check your measurements and marks again before bending. This helps you avoid mistakes and keeps your bends neat.
Tip: AFI Industrial Co., Ltd. uses special alignment tools and CNC benders for perfect bends. You can do well by working carefully and checking your setup before each bend.
Using Body Weight
You can use your body weight to bend emt conduit well. Put the conduit on a strong surface for support. Hold it steady with your knee or press it against a corner. Grab the bender handle with both hands. Pull the longer side down slowly and steadily. Bend the conduit a little at a time. Do not bend it all at once. This helps you control the bend and stops you from bending too much.
Check the angle often with a square or level. You can use a smartphone app to check the angle if you want. Change the bend as needed to keep it smooth and round. Using your body weight helps you make bends that look the same every time.
Note: Experts say you should bend emt conduit in small steps. This keeps your bends accurate and helps you avoid mistakes.
Avoiding Kinks
You need to stop kinks and damage when you bend emt conduit. Kinks make the conduit weak and unsafe. Use the right bending tools made for emt. Put a mandrel inside the conduit for extra support, especially if the tube is thin. Push firmly and evenly while you bend. Do not bend the conduit on soft things like carpet. This can make it flat.
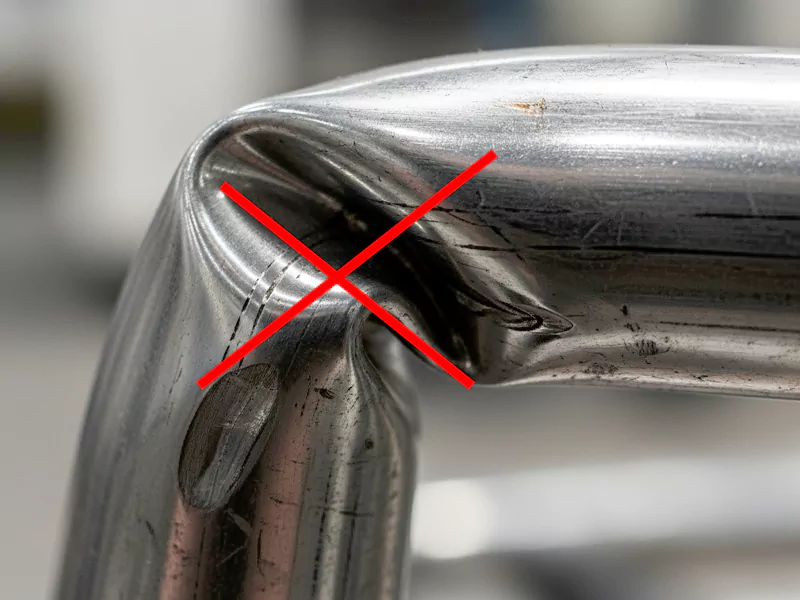
Keep the conduit lined up and supported while you bend. Use wiper dies or matching materials to stop buckling and wrinkling inside the bend. Always measure and mark your conduit before you bend it. This lowers the chance of damage. Check your bend when you finish to make sure it is smooth and correct.
Tip: AFI Industrial Co., Ltd. uses special equipment and checks every bend to avoid kinks. You can get good results by following these steps and using the right tools.
| Best Practice | How It Helps |
|---|---|
| Use mandrels | Stops flattening |
| Apply steady pressure | Prevents kinks and cracks |
| Check alignment | Keeps bends smooth and round |
| Use proper tools | Protects conduit strength |
You can bend emt conduit well by setting up your workspace, using your body weight, and following ways to avoid kinks. These steps help you make safe and professional conduit runs.
How to Bend a Box Offset
A box offset conduit bend helps you connect conduit to an electrical box with a neat, professional look. You create a small Z-shaped bend so the conduit lines up perfectly with the box. This adjustment is important for keeping your wiring safe and making sure everything fits without gaps. You need to follow a few steps to get a true offset conduit bend that works every time.
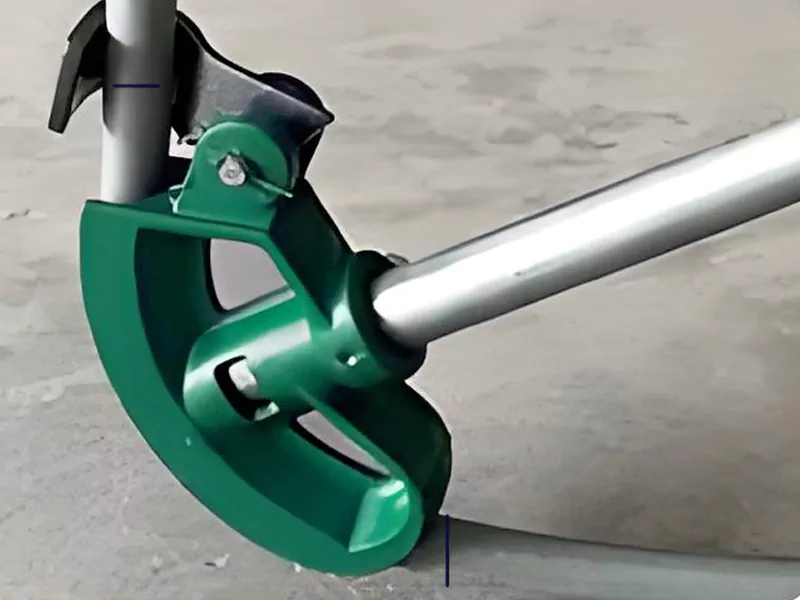
Marking for Offsets
Start by measuring the distance you need to raise or lower the conduit. Use a tape measure to find the height of the offset. Mark the start of your first bend on the conduit. Next, calculate the center-to-center distance between bends. For example, if you have a 2-inch obstacle, you mark the first spot, then measure the spacing for the second mark. You can use a handy emt conduit bending calculator to help with these measurements.
Here is a simple way to mark for a box offset conduit bend:
- Measure the offset height you need.
- Mark the first bend point on the conduit.
- Use the multiplier for your chosen bend angle to find the second mark.
- Mark the second bend point at the calculated distance.
Tip: Always double-check your marks before you start bending. Accurate marking helps you avoid mistakes and keeps your bends clean.
Using Multipliers
Multipliers make it easy to figure out how far apart to place your marks for a true offset conduit bend. Each bend angle has its own multiplier. For example, a 30-degree bend uses a multiplier of 2. If you want a 4-inch offset, multiply 4 by 2. Mark your bends 8 inches apart. This method helps you get the right spacing and keeps your conduit straight.
Multipliers also help you plan for shrinkage. When you bend the conduit, it gets a little shorter. You can use the shrinkage factor to adjust your measurements. For a 30-degree bend, the shrinkage is about 1/4 inch per inch of offset. This step helps you make a box offset conduit bend that fits perfectly on the first try.
| Bend Angle | Multiplier | Shrinkage per Inch |
|---|---|---|
| 10° | 6 | 1/16″ |
| 22.5° | 2.6 | 3/16″ |
| 30° | 2 | 1/4″ |
| 45° | 1.4 | 3/8″ |
Note: Using multipliers saves time and helps you avoid guesswork when you learn how to bend an offset.
Checking Alignment
After you finish bending, you need to check the alignment. Remove the conduit from the bender. Place it against the electrical box to see if it sits flush. Use a level or protractor to check the angle and plane of the bend. Make sure the conduit runs parallel to the box and does not twist. If you see any gaps or misalignment, adjust the bend or redo it.
Follow these steps for a true offset conduit bend:
- Place the bent conduit against the box.
- Check that the conduit sits flat and lines up with the box opening.
- Use a level to confirm the conduit is straight.
- Sight down the pipe to avoid doglegs or twists.
- Make small adjustments if needed for a perfect fit.
Tip: Companies like AFI Industrial Co., Ltd. use advanced equipment to achieve precise box offset conduit bends. You can get similar results by measuring carefully and checking your work.
A box offset conduit bend helps you create safe, reliable, and professional electrical installations. When you use the right tools and follow these steps, you can master how to bend a box offset and make every project look great.
Conduit Bending Accuracy
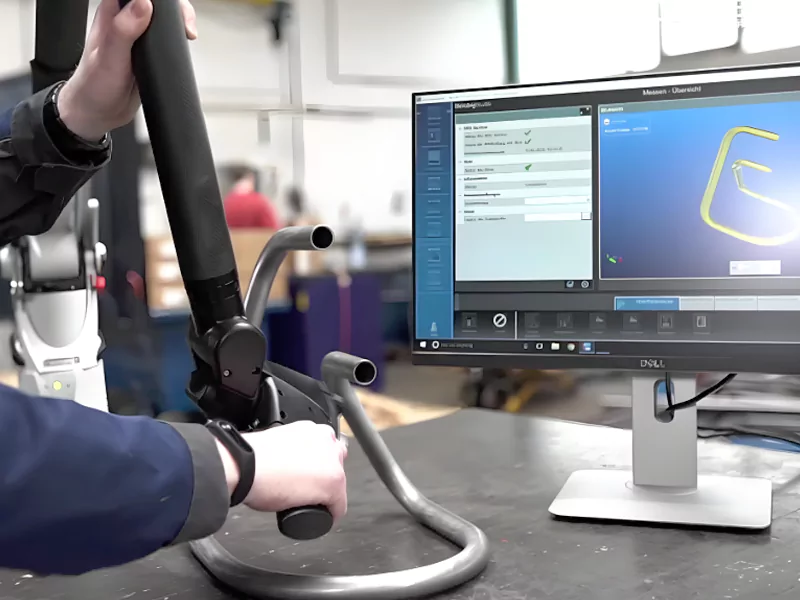
Measuring Angles
You must measure angles carefully when bending conduit. Getting the right angle helps your work look neat and avoids mistakes. First, measure how far you need to go past any obstacles. Mark the conduit where you want to bend it. Figure out the takeoff by subtracting a certain length for your conduit size. For example, use 6 inches if you have 3/4″ conduit. Mark this new spot as the place to start your bend.
Precision Dimensional Tolerance Chart

Use an EMT conduit bender with easy-to-read marks. Line up your mark with the arrow or star on the bender. Push down with your foot on the bender’s heel. Watch the degree marks as you bend the conduit. Stop when you reach the angle you need. Look at the bend to see if it is right. If you bent too much, use the end of the bender handle to fix it.
Here is a simple checklist for measuring angles and making set radius bends:
- Measure how far you need to go past the obstacle.
- Mark the conduit at the right place.
- Figure out and mark the takeoff spot.
- Line up the bender’s arrow with your mark.
- Push down evenly and watch the degree marks.
- Check the angle and fix it if needed.
Tip: Try a digital angle gauge for better measurements. This tool helps you get the right angle and makes your work easier.
Adjusting for Springback
Springback happens when the conduit tries to go back to its old shape after you bend it. This can change your bend angle and curve. You need to plan for springback to keep your bends correct. Bend the conduit a little more than you need. When you let go, the conduit will move back to the angle you want.
The type of metal and how thick it is can change how much springback you get. The bend radius and the tools you use also matter. If you are air forming, always bend a bit extra. If you are bottom bending, push harder to get the right angle. Digital angle gauges help you check and fix springback.
Note: AFI Industrial Co., Ltd. uses special CNC benders and digital tools to control springback. You can do the same by using good tools and careful steps.
Using Templates
Templates help you make the same bend every time. You can use a real template or a digital one. Mark the conduit before you bend it and match it to the template. This way, each bend has the same curve and angle. Experts say to use templates for tricky bends and box offsets.
Special offset benders and shoe groups let you bend more than one conduit at once. This makes your work faster and keeps all the bends the same. Books and calculators give you formulas for good measurements. Digital angle gauges and bending stations make bending easier.
| Tool/Technique | Benefit |
|---|---|
| Physical templates | Same curve and angle each time |
| Digital angle gauges | Very accurate measurements |
| Offset benders | Same box offsets |
| Reference calculators | Good formulas and conversions |
Tip: Always measure and mark your conduit before you bend it. Use a template to check your work and make sure every bend is right.
AFI Industrial Co., Ltd. is known for very accurate conduit bending. Their team uses advanced machines and checks their work carefully. You can get good results too by following these steps and using the right tools.
Troubleshooting and Tips
Common Mistakes
When you bend conduit, you might run into some common problems. These mistakes can make your installation harder and less safe. Here are some issues you should watch for:
- Overbending the conduit can flatten or damage the pipe. This makes it hard to pull wires through.
- Underbending creates sharp angles. Wires may get caught or damaged inside these bends.
- Using the wrong size bender can crush or kink the conduit.
- Ignoring the recommended bending radius can weaken the conduit and make it unsafe.
- Not marking the conduit clearly leads to misaligned bends and wasted material.
To avoid these mistakes, always use a conduit bender designed for your pipe size. Follow the manufacturer’s guidelines for bending radius and angle. Careful measuring and marking help you keep your bends accurate and your conduit strong.
Fixing Errors
If you make a mistake while bending conduit, you can often fix it without starting over. Here are some ways to correct errors:
- If you overbend, use the back pusher or the end of the bender handle to gently push the conduit back.
- For underbends, place the conduit back in the bender and add a little more angle.
- If you see a kink, try to straighten the conduit by hand or with the bender. If the kink is severe, you may need to cut out the damaged section.
- When bends do not line up, check your marks and use a level to realign the conduit.
- For misaligned back to back bends, measure the distance between bends again and rebend as needed.
Always double-check your work after each bend. Taking your time helps you catch errors early and keeps your project on track.
Pro Tips
You can improve your conduit bending skills with a few expert tips:
- Mark your conduit precisely. Start with a first mark at three inches for half-inch pipe.
- Align your mark with the arrow on the bender and pull down slowly to avoid kinks.
- Flip the conduit and align the second mark for consistent bends.
- Use the angle markings on your bender (10°, 20°, 30°) to keep bends uniform.
- Place your thumb on the bender to control pressure and prevent overbending.
- Use a pencil for marks if you might need to erase; use a sharpie for permanent marks.
- Try a cosine chart to calculate offset bends for parallel alignment.
- Keep the conduit parallel to an imaginary guideline during bending.
- Apply multipliers to refine bends and get a professional finish.
- Secure the conduit with your foot when floor bending. When bending in the air, keep the bender close to your body for better control.
- Double-check angles with a level or protractor for precision.
- Practice different bends, such as offsets, saddles, and back to back bends, to build your skill.
AFI Industrial Co., Ltd. uses advanced tools and careful measurement to achieve perfect bends every time. You can follow their example by practicing regularly and using the right techniques.
You can make accurate conduit bends if you set up your workspace first, measure everything carefully, and use the right tools.
- Use a permanent marker to make clear marks on the conduit so you can line it up easily.
- Take away the bender’s take-up length from your stub measurement before you bend.
- Press down with your foot in a steady way and use a level to check your angles.
- Keep practicing so you get better at bending conduit for both home and work projects.
If your project is tricky or needs to be very exact, ask experts like AFI Industrial Co., Ltd. for help. Their special machines and support can help you get professional results.
FAQ
You pick a bender that matches your conduit size. For EMT, use a manual bender. For thick or rigid conduit, use a hydraulic or CNC bender. AFI Industrial Co., Ltd. offers advanced bending equipment for precise results.
You keep steady pressure and use the correct bender shoe. Mark your conduit before bending. Support the pipe during the bend. AFI Industrial Co., Ltd. uses special tools to prevent kinks in every project.
You can bend flexible conduit by hand. For EMT or rigid conduit, you need a bender. Using the right tool helps you get smooth and safe bends.
You measure the stub length, subtract the bender’s take-up, and mark the spot. Align the mark with the bender arrow. Bend until you reach 90 degrees. Check with a level for accuracy.
You wear safety glasses, gloves, and steel-toe boots. Use a dust mask if you cut or grind conduit. AFI Industrial Co., Ltd. always follows strict safety rules for every job.
You can rebend the conduit if the angle is wrong. For kinks, try to straighten the pipe or cut out the damaged part. Always check your work after each bend.
Bend radius keeps the conduit strong and protects wires inside. You follow manufacturer guidelines for each conduit type. AFI Industrial Co., Ltd. uses advanced machines to control bend radius for every project.
You can ask experts or use professional services. AFI Industrial Co., Ltd. provides technical advice and precision bending for complex shapes and high-accuracy needs.

