Sheet metal stamping forms metal into exact parts for many uses. First, you pick the right material and use special tools. Careful planning and strong quality checks help stop errors. If you follow all steps, you will make strong and exact parts for cars, electronics, and planes. The world market for sheet metal stamping was $236.83 billion in 2023. It is expected to continue growing, demonstrating its importance for cars, electronics, and other products.
Tip: Picking the best sheet metal stamping process makes parts last longer and work better.
Key Takeaways
- Pick the right metal sheet by looking at strength and rust resistance. Think about how you will use the part. Use clear CAD designs with good drawings and correct tolerances. This helps make sure parts are made right. Choose accurate dies and tools to shape metal sheets well. This helps tools last longer and keeps parts exact. Make and test sample parts early. This helps you find and fix problems before making many parts. Follow each stamping step in order: blanking, piercing, forming, trimming, and cut-off. This makes parts strong and correct. Check quality at every step by looking and measuring. This helps you find mistakes early. Finish parts by cleaning, removing sharp edges, coating, and plating. This keeps parts safe and looking nice. Take care of the tools and presses often. Teach your team well to keep work fast and good.
Table of Contents
Planning
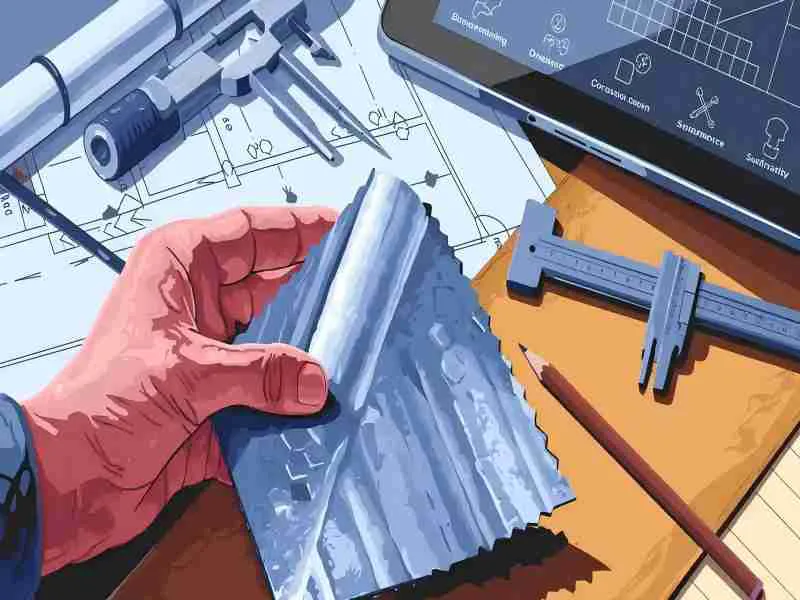
Choosing the right material and design is the first step in successful sheet metal stamping. You need to think about how the part will be used, what conditions it will face, and how it must perform.
Material Choice
Sheet Types
You must pick a metal sheet that matches your needs. Each type has unique properties. Some are strong and resist rust, while others are easy to shape or conduct electricity well. Here are some common types and their uses:
| Material Category | Common Grades/Alloys | Typical Properties & Uses |
|---|---|---|
| Carbon Steel | AISI 1008, 1010, HSLA | Strong, affordable, easy to form; used in car panels, brackets |
| Stainless Steel | 304, 316, 301, 430, 17-4 PH | Resists corrosion, strong; used in medical, kitchen, telecom |
| Aluminum Alloys | 1100, 3003, 5052, 6061 | Light, resists rust; used in cars, planes, lighting |
| Copper & Brass | C110, C260, C360 | Conducts electricity, antimicrobial; used in electronics |
| Coated Steels | Galvanized, Aluminized | Built-in rust protection; used in HVAC, appliances |
| Specialty Alloys | Titanium, Nickel Alloys | Light, strong, resists heat; used in aerospace, medical |
Tip: Always match the metal sheet to the job. For example, use stainless steel for parts that need to resist rust, or copper for parts that must conduct electricity.
Alloys
Alloys are mixes of metals that give special properties to your metal sheet. For example, adding chromium to steel makes it resistant to rust. Aluminum alloys are light and easy to form, which helps when you need to shape complex parts. Brass and bronze offer good looks and strong conductivity.
When you select a metal sheet, consider these factors:
- Workability and formability: The metal sheet must bend and shape without cracking.
- Strength and durability: Pick a sheet that can handle stress and last a long time.
- Environmental resistance: Choose a sheet that stands up to moisture or chemicals.
- End-use application: Match the sheet to the job, like using copper for wires.
- Cost and availability: Balance quality with your budget.
If you pick the wrong metal sheet, you may see early wear, tool damage, or poor results.
CAD Design
Drawings
You need clear drawings to make sure your metal sheet parts come out right. CAD software lets you create detailed 3D models and shop drawings. These tools help you see the part before you make it. You can check if the part fits, if the bends are right, and if the holes line up.
- 3D CAD models let you change designs quickly and see how parts fit together.
- Drawings show flat patterns, bend lines, and where to cut or punch holes.
- CAD drawings help you use the metal sheet wisely, reducing waste.
Tolerances
Tolerances tell you how much a part can vary from the design and still work. You must set these limits in your CAD drawings. Tight tolerances mean parts fit better but may cost more.
Note: Always include material type, thickness, and finish in your CAD drawings. This helps the shop pick the right metal sheet and process.
Good planning with the right metal sheet and strong CAD design leads to better, longer-lasting parts.
Tooling
Having the right tooling is very important for sheet metal stamping. You need exact dies and a good tool and die set. These help shape metal sheets into the right parts. AFI Industrial Co., Ltd. uses advanced die technology. This helps you get tight tolerances, as close as ±0.03mm. Such precision makes sure your stamped parts fit and work well every time.
Die Design
Types
There are different types of dies in stamping. Each type does a special job:
- Blanking dies cut flat shapes from metal sheets.
- Piercing dies make holes or slots in the metal.
- Forming dies bend or shape the metal into 3D parts.
- Progressive dies do many jobs in one pass, making things faster.
- Compound dies cut and form in one stroke.
Picking the right die type helps you work faster and waste less.

Features
Die design needs to be very precise for stamping. You want dies that last long and give the same results each time. Here are the key features:
- Material Properties: Use metals with strong tensile strength for your dies. This helps them handle stamping forces without breaking.
- Work Hardening Rate: Know how your die material changes as you use it. This stops cracks and keeps the stamping smooth.
- Quality and Quantity: Make your dies accurate. This helps you stamp many parts with fewer mistakes.
- Adjustability: Add features so you can fine-tune your dies. This lets you adjust for changes in material and tool wear.
- Maintenance: Check and clean your dies often. This makes them last longer and keeps the stamping accurate.
Tip: Always check die alignment and pressure before stamping. This stops damage and makes sure every part is made right.
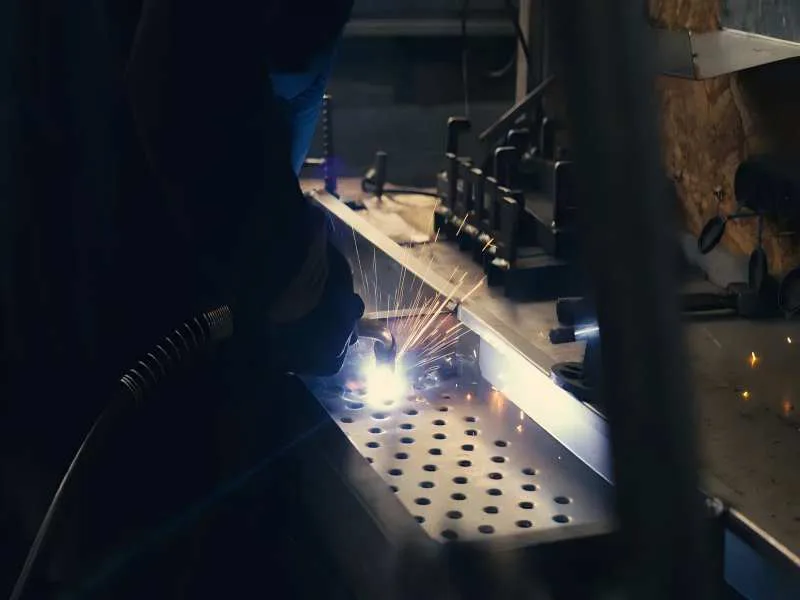
Fabrication
Materials
The die material you pick affects how long it lasts and how well it works. Harder materials like tool steel and carbide last longer. Here is a quick look:
| Material Type | Hardness | Wear Resistance | Cost | Suitability |
|---|---|---|---|---|
| Carbon Steel | Medium | Low | Low | Good for cheap, short jobs |
| Alloy Steel | High | Medium | Medium | Good for medium jobs |
| Tool Steel | High | High | High | Best for precise, long jobs |
| Carbide | Very High | Very High | Very High | Lasts longest, costs most |
Choosing the best die material helps you save time and money. AFI’s dies use top materials for long mold life, up to 500,000 stamping cycles.
Assembly
You need skilled workers to build a good tool and die set. High-precision engineering makes sure all parts fit together well. AFI uses CNC machining, grinding, and wire EDM. These methods help make dies with tight tolerances. Regular care and calibration keep your dies working well and reduce mistakes.
Modern die making uses real-time checks and advanced measuring tools. These steps help you find problems early and keep quality high. When you use strong materials, expert assembly, and new technology, your dies give you steady, high-quality stamping results.
Prototyping
Prototyping is an important step before making many parts. You use this step to check your design, tools, and process.
Test Runs
Setup
First, set up your stamping press with your custom dies. Make sure the dies fit well and line up right. Set the right pressure and speed for your job. Always check safety guards and emergency stops before starting. Careful setup helps you stop problems later.
Adjustments
After setup, run a few test pieces. These samples show if your process works well. Check each piece for shape, size, and finish. If you see problems, fix the die or machine settings. You might need to change pressure, speed, or the die itself. This step helps you fix issues early and saves time and materials.
Tip: Fast prototyping helps you find design problems quickly. You can make changes before making lots of parts.
Evaluation
Inspection
When you have your prototype parts, check them closely. Focus on four main things:
- Fit: See if your part connects well with other parts. Check if holes and spaces are in the right place.
- Form: Measure the shape, thickness, and size. Make sure they match your drawings.
- Function: Test if the part works as it should. Look for strength and how long it lasts.
- Feasibility: Decide if you can make this part easily and at a good price.
You can use different ways to make your prototype. Here is a table to help you pick:
| Fabrication Method | Suitable Part Features and Conditions | Notes |
|---|---|---|
| Punch Press | Louvers, countersinks, 0.030″-0.80″ thick, high volume | Fast for big jobs, good for shapes lasers cannot do |
| Laser Cutter | Free-form shapes, thick materials, stainless steel, low volume | Good for tricky shapes, quick for small batches |
Refinement
After checking, you may see things to improve. Change your design or process if needed. Use what you learn from tests to make your prototype better. This step helps you get a part ready for production. Using the same company for both steps lowers mistakes and speeds up your work.
- Fast prototyping makes your project move quicker.
- You save money by fixing problems early.
- You can test real materials and see how your part works.
- Tools like CNC machining and laser cutting give you exact results.
By following these steps, you make sure your prototype fits your needs. You also get ready to make many parts.
Sheet Metal Stamping Steps
Sheet metal stamping uses a series of steps to turn a flat metal sheet into a finished part. Each step shapes, cuts, or forms the metal to match your design. You need to follow the right order to get strong, accurate parts.
Blanking

Blanking is the first step in the metal stamping process. You start by cutting the metal sheet into flat pieces called blanks. These blanks become the base for your final parts.
Cutting
Cutting the metal sheet is a key part of blanking. You use a die and a stamping press to shear the metal into the right shape. The die acts like a cookie cutter, pressing down with great force to separate the blank from the rest of the sheet. This step sets the size and outline of your part.
| Operation Type | Specific Operations | Contribution to Final Product |
|---|---|---|
| Cutting Dies | Shearing, Blanking, Trimming, Notching, Piercing | Separate metal into blanks, create holes, remove excess material, and prepare edges for further forming or assembly, ensuring accurate part dimensions and fit. |
You must control the force and speed during cutting. Too much force can damage the die. Too little force leaves rough edges.
Preparation
After cutting, you prepare the blanks for the next steps. You check each blank for size, shape, and surface quality. You remove any sharp edges or burrs. This helps prevent problems in later steps. Good preparation keeps your production smooth and reduces waste.
Tip: Always inspect blanks before moving to the next stage. Clean, accurate blanks lead to better results in the metal stamping process.
Piercing
Piercing comes after blanking. You use this step to punch holes or slots in the blank. Piercing is common in many metal stamping techniques, especially for parts that need fasteners or wiring.
Punching

Punching uses a die and a punch tool. The punch pushes through the metal blank, making a hole. The slug, or leftover piece, falls away. You must set the right clearance between the punch and die. Too much clearance causes burrs. Too little can break the punch.
Common challenges in piercing include die wear, burr formation, and slug jamming. You can solve these by:
- Regularly sharpening and inspecting punches and dies.
- Adjusting punch-to-die clearance to reduce burrs.
- Adding small cutouts or voids in the die to prevent slug jams.
| Challenge | Description | Solutions |
|---|---|---|
| Die wear | Inaccurate cuts from worn dies | Regular maintenance and sharpening |
| Burrs | Rough edges from poor clearance | Adjust punch-to-die clearance |
| Slug jams | Slugs get stuck in the die | Add voids or slug shedders |
Hole Placement
You must place holes in the right spots for your part to work. Use your CAD drawings to guide the process. Accurate hole placement helps with assembly and function.
Note: Always check hole size and location after piercing. Small errors can cause big problems later in the metal stamping process.
Forming
Forming changes the flat blank into a 3D shape. You use forming dies to bend, stretch, or draw the metal. This step gives your part its final look and strength.
Bending
Bending is a common forming technique. You use a die to fold the metal along a straight line. The stamping press pushes the blank into the die, creating an angle or curve. You must control the angle and force to avoid cracks or springback.
Key parameters for bending include:
- Friction between the die and the metal sheet.
- Stamping speed.
- Mold gap.
The best results come from a stamping speed of about 10 mm/s, a friction coefficient of 0.16, and a mold gap of 2.2 mm. These settings help you get accurate bends and reduce springback.
Drawing
Drawing pulls the metal sheet into a die to make deep or hollow shapes. You use this technique for cups, cans, or complex covers. The stamping press stretches the metal without breaking it. You must balance force, speed, and lubrication to avoid tears or wrinkles.
| Operation Type | Specific Operations | Contribution to Final Product |
|---|---|---|
| Forming Dies | Bending, Flanging, Drawing, Stretching, Coining, Ironing | Shape metal into precise geometries, create curves, hollow parts, imprint details, and standardize thickness, enhancing strength and design complexity. |
Tip: Always test your forming process with a prototype. This helps you find the best settings for your metal stamping process.
You can use many metal stamping techniques in forming, such as flanging, coining, and ironing. Each technique shapes the metal differently.
Trimming
Trimming is a key step in the metal stamping process. You use trimming to remove extra metal from the edges of your stamped part. This step helps you get clean, smooth edges and the exact final shape you want. If you skip trimming or do it poorly, your parts may have sharp edges or not fit together well.
Edge Removal
You start edge removal after forming. The goal is to cut away any leftover metal, burrs, or rough spots from the edges. Clean edges help your parts look better and work better in their final use. You can use different metal stamping techniques for edge removal, such as shearing or fine blanking.
To get the best results, follow these best practices:
- Use a large, flat cutting surface to keep your metal sheet stable during trimming.
- Align the edges of your part with guides or grid lines to make sure your cuts are straight and accurate.
- Keep your cutting tools sharp. Dull blades can leave rough edges or cause fraying.
- Hold your workpiece steady with clamps or weights to prevent shifting.
- For tricky shapes, use laser-guided tools or custom dies to follow the right path.
- Remove burrs and sharp spots right after trimming to avoid problems in later steps.
Tip: Always inspect the edges after trimming. Smooth, clean edges help you avoid injuries and make assembly easier.
Final Shape
After edge removal, you focus on getting the final shape of your part. This step makes sure your stamped part matches your design exactly. You may need to trim small sections or fine-tune curves and corners.
You can use these techniques to achieve the final shape:
- Use rulers or templates to guide your cuts for straight lines and precise angles.
- For large or complex parts, fold the metal to reduce movement and use longer cutting strokes.
- If your part has slippery surfaces, place a layer of paper between the metal and the cutting tool to prevent slipping.
By following these steps, you get parts that fit together well and look professional. Clean, accurate trimming is a sign of a high-quality metal stamping process.
Cut-Off
Cut-off is the last main step in the sheet metal stamping process. You use a cut-off to separate the finished part from the rest of the metal sheet or strip. This step gives you the final, usable piece.
Separation
During separation, you cut the stamped part away from the leftover material. You need to use the right tools and settings to avoid damaging your part.
Here are some best practices for cut-off operations:
- Choose the right cut-off wheel or tool based on the thickness and coating of your metal. This reduces the need for extra polishing or grinding.
- Clap your workpiece securely with special tools to prevent pinching or deformation.
- Use support blocks or custom clamps for odd-shaped parts to keep them steady.
- Control the feed speed. A slower speed helps you avoid cutting into the finished surface and reduces stress on your tools.
- Adjust the RPM or use softer wheels if you see deflection or damage during cutting.
Note: Always check the cut-off area for clean edges and the correct shape. Small mistakes here can affect the whole part.

Idle
After separation, you may have idle time while waiting for the next batch or inspection. Use this time to check your tools, clean your workspace, and prepare for the next run. Regular maintenance keeps your stamping process smooth and helps you avoid delays.
You can also use idle time to:
- Inspect finished parts for quality.
- Replace or sharpen cutting tools.
- Review your process settings and make improvements.
By managing idle time well, you keep your metal stamping process efficient and ready for high-volume production.
Tip: Good organization during idle time helps you catch problems early and keeps your stamping line running smoothly.
Metal Stamping Process Quality
You need to check the quality at every step. This makes sure your stamped metal parts are good.
In-Process Checks
You must check your work during each step. These checks help you find mistakes before they get worse.
Visual
Look at each part as it moves along. Watch for cracks, burrs, or rough spots. If you see a problem, fix it right away. Looking at parts helps you keep quality high and waste low.
- Measure important sizes at different steps.
- Look for scratches or dents as soon as they show up.
- Test if each part works the way it should.
Tip: Checking early helps you avoid big mistakes and keeps things running well.
Measurement
You need to measure parts to match your drawings. Use calipers, micrometers, and gauges for quick checks. For more exact checks, use digital machines or CMMs. These tools help you keep tight size limits and good quality.
Final Inspection
After stamping, check each part before shipping. This step makes sure your parts meet all rules.
Tolerances
Check that every part is the right size. Use CMMs, calipers, and micrometers to measure length, width, and thickness. AFI’s team uses 3D checks to make sure each part fits right. Good stamping can reach a pass rate of over 98%.
Surface
Look at the surface for scratches, dents, or rough spots. Use your eyes, hands, and sometimes oil or whetstone grinding to find small problems. Here is a table of common ways to check:
| Inspection Method | Description |
|---|---|
| Visual Inspection | Checks for visible problems like burrs and rough spots. |
| Touching Inspection | Uses hands to feel for surface issues, sometimes with whetstone grinding. |
| Oil Test | Shows tiny pits and dents under bright light. |
| Whetstone Grinding | Polishes spots to find hidden problems. |
| Precision Instruments | Measures size and hardness with calipers, micrometers, and other tools. |
Troubleshooting
If you find problems, fix them fast to keep quality high.
Defects
Common problems are burrs, cracks, wrinkling, folding, and scratches. These can happen from dull tools, wrong materials, or bad settings.
- Keep cutting edges sharp and lined up to stop burrs and folding.
- Change the blank holder force and use draw beads to stop wrinkling.
- Pick the right materials and control the force to avoid cracks.
- Check and fix the equipment to stop mismatched edges.
- Teach your team good stamping and tool care.
- Clean and oil tools to lower surface problems.
Corrections
You can fix problems by changing your process or tools. Sharpen or swap out old dies. Change stamping speed and force. Use better materials and keep tools clean. Try overbending or bottoming to stop springback and warping. Make sure you use the right grain direction and balanced die design for flat parts.
Note: Regular checks and quick fixes help you keep quality high and avoid delays.
AFI Industrial Co., Ltd. uses strong quality checks at every stage. Their team checks raw materials, stamping steps, and finished parts. You get parts that meet strict rules and keep your process working well.
Finishing
After stamping, you need to finish the metal parts. Finishing makes parts safe, strong, and nice-looking. These steps help remove sharp edges and clean surfaces. They also protect against rust and get parts ready to use.

Cleaning
Cleaning takes away oil, dust, and leftover metal. You want clean parts before moving on.
Deburring
Deburring gets rid of sharp edges and burrs. You pick a method based on part size and shape.
| Deburring Method | Description | Suitable For |
|---|---|---|
| Mechanical Deburring | Uses vibration or blasting to grind burrs. | Good for making lots of parts |
| Thermal Deburring (TEM) | Burns off burrs with gas very fast. | Works well for tricky shapes |
| Electrochemical Deburring | Uses electricity to dissolve burrs. | Best for delicate parts |
| Manual Deburring | Uses hand tools like files or knives. | Good for small batches |
| Cryogenic Deburring | Freezes burrs with liquid nitrogen, then shakes them off. | Works for metals and plastics |
Vibratory tumbling is used a lot. You put parts in a vibrating machine. The parts rub together and lose rough edges. This makes them safer and easier to use. It also gives a smoother look.
Tip: Machines for deburring help finish many parts fast and save work.
Washing
Washing takes away oil, dust, and leftover fluids. You can use water cleaners, vapor cleaning, or passivation.
| Cleaning Method | How It Works | Advantages and Suitability |
|---|---|---|
| Aqueous Degreasing | Sprays or dips parts in water cleaner; may use sound waves. | Removes fluids; good for water-based lubricants. |
| Vapor Degreasing | Solvent vapors clean parts, then heat dries them. | Good for fragile parts and many metals. |
| Passivation | Acid bath removes iron, forms a rust-proof film. | Helps stop rust, best for stainless steel. |
Clean parts last longer and look better. You also lower the chance of rust and damage.
Surface Treatment
Surface treatment protects parts and makes them look good.
Coating
Coatings add a layer to your metal part. This layer blocks water and chemicals. You can pick powder coating, painting, or spraying. These finishes help stop rust and wear. You also get more color and style choices.
- Grinding and polishing smooth surfaces help paint stick.
- Chemical treatments like etching and anodizing make protective layers.
Plating
Plating covers your part with another metal. Zinc, chrome, and nickel plating protect against rust. Electroplating and electroless plating are common ways. AFI offers custom plating, like anodizing for aluminum and electroplating for steel and copper.
Note: Treatments like anodizing, sandblasting, brushing, and polishing make parts stronger and look better.
Assembly
You need to join and pack the finished parts before shipping.
Joining
Joining connects stamped parts into final products. You can use welding, riveting, or screwing. Sometimes, nuts or studs are added during stamping. AFI can help with in-die assembly for faster work.
Packaging
Packaging keeps parts safe during shipping. You wrap, box, or stack parts to stop scratches and dents. Good packaging keeps parts clean and ready to use.
Tip: Careful finishing and assembly help parts last longer and look professional.
Tips for Success
Optimization
Waste
You can make less waste in sheet metal stamping by using smart ideas. Lean manufacturing helps you use less material and work better. Many companies use special software to fit more parts on each metal sheet. This can help you use up to 95% of the sheet, instead of just 70%. You can also recycle scrap metal. This lets you get back up to 30% and save money. Checking your process often helps you find problems and use less energy. Teaching your team and giving rewards helps everyone work to cut waste. If you focus on better design and process, you use more of your material and throw away less.
- Use special software to fit more parts on each sheet.
- Recycle scrap metal to save money.
- Check your process often to find waste.
- Teach your team to spot and fix waste.
Efficiency
You can make stamping faster and better by using new machines and smart planning. CNC machines and checking tools before they break can cut waste by 15%. Using job planning software can make setup time shorter by 30%. SMED helps you change dies faster, making production 60% quicker. Sensors that watch your machines can find problems early and cut scrap by 30%. If you keep your dies in good shape and fix presses, you keep things running and stop delays.
Maintenance
Tools
You must take care of your stamping tools to keep parts good. Clean dies often to get rid of dirt. Put oil on them to stop wear. Check dies for cracks or dull spots so you can fix them before they break. Store and move dies carefully so they do not get damaged. Make a plan to check tools often so they last longer and do not break down.
- Clean and oil the dies often.
- Check for cracks and dull spots.
- Store tools safely when not using them.
Press
Presses need checks to work correctly. Look at and change old parts like punches, springs, and lifters. Keep notes on what you fix so you remember. Use charts to check if parts are made right and keep your process steady. Count how many times each press is used and change parts before they break. Make clear goals for your team to keep getting better.
Improvement
Training
You can get better results by teaching your team new things. Learning all the time helps workers get new skills and solve problems. Hands-on lessons and having older workers teach new ones help everyone learn. Safety lessons keep people safe and working well. Training in quality helps stop mistakes and waste.
| Training Focus | Benefit |
|---|---|
| Cross-training | Helps when work gets busy |
| Mentorship | Shares skills and builds teamwork |
| Safety | Stops accidents and helps work speed |
| Quality management | Makes customers happier |
Technology
Using new technology keeps your work up to date. Smart sensors and computer programs help you find problems early and stop delays. Robots and machines that work by themselves make things faster and steadier. Using special planning software helps you plan jobs and check quality. Always trying to get better, with new tech and training, helps you work faster, spend less, and make customers happy.
You can achieve professional results in sheet metal stamping by following each step with care. Remember these key points:
- Pick materials for thickness, hardness, and ductility to match your needs.
- Design simple shapes to lower scrap and tool wear.
- Choose the right die and press for your part and volume.
- Keep tools sharp and clean to avoid defects.
- Use automation and robotics for better safety and quality.
When you work with experienced providers like AFI, you gain:
- Custom dies that fit your part and reduce defects.
- Faster production and less downtime.
- Lower costs from less scrap and rework.
- Strong quality checks from start to finish.
- Expert help with design, materials, and tooling.
Apply these tips to get reliable, high-quality stamped parts every time.
FAQ
Sheet metal stamping shapes flat metal sheets into parts using dies and presses. You use this process to make car parts, electronics, and many other products. It gives you strong, precise, and repeatable results.
You can use stainless steel, aluminum, copper, brass, bronze, and many alloys. Each metal has special properties. Pick the one that matches your part’s needs for strength, weight, and corrosion resistance.
You look at how the part will be used. Think about strength, weight, and if it needs to resist rust. AFI Industrial Co., Ltd. can help you pick the best metal for your project.
Tight tolerances make sure your parts fit and work well. You avoid problems during assembly. AFI can achieve tolerances as close as ±0.03mm for high precision.
Blanking cuts out the main shape from the metal sheet. Piercing makes holes or slots in the blank. You often use both steps to create the final part.
You check the parts at every step. Use sharp tools and set machines correctly. Clean and maintain your equipment. AFI uses strong quality checks to keep defects low.
You can pick from anodizing, electroplating, spraying, brushing, sandblasting, and polishing. These finishes protect your parts and improve their look.
Yes, you can. AFI Industrial Co., Ltd. offers rapid prototyping for samples and high-volume production for big orders. You get fast service and reliable results.
Need more help? Contact AFI’s team for expert advice on your next metal stamping project!