You can use an X-ray fluorescence spectrometer to study materials; this is a non-destructive elemental analysis. First, you need to prepare the sample well. Set up the X-ray fluorescence spectrometer the right way and make sure it is calibrated. Run the test and look at the results carefully. The X-ray fluorescence spectrometer does not damage your sample. XRF gives quick and trustworthy results for many materials. This non-destructive analytical technique keeps your sample safe and gives you exact information.
Key Takeaways
- Clean, grind, and dry your samples before testing. This helps you get good XRF results. Set up your X-ray fluorescence spectrometer with certified standards. This makes sure your measurements are correct. Place your samples flat and steady in the machine. This helps you avoid mistakes and get the same results each time.
- Pick the right analysis mode for your test. Look at the XRF spectrum carefully to find elements and avoid errors. Watch out for overlapping peaks and other problems in the spectrum. Use software tools to fix these issues. Always follow safety rules to protect yourself from X-ray exposure. Take care of your spectrometer by cleaning it and checking its parts. Keep records to make sure it works well. Keep learning about XRF techniques and new updates. This will help you get better and trust your results.
Table of Contents
X-ray Fluorescence Basics
X-ray Fluorescence Principles
X-ray fluorescence helps you study what elements are in things. This method does not harm or change your sample. When X-rays hit a material, the atoms inside get excited. The X-rays knock out some inner electrons. This leaves a space, so an electron from higher up drops down. When this happens, the atom gives off energy as a new X-ray.
The energy depends on the difference between the two shells. Scientists use a formula: E = hν = E_i – E_f. E is the energy of the X-ray. h is Planck’s constant. ν is the frequency. E_i is the starting energy. E_f is the final energy. Each element gives off X-rays with its own energy. This helps you know which elements are in your sample.
X-ray Fluorescence Spectroscopy Process
X-ray fluorescence spectroscopy uses this idea to study materials. You put your sample in the XRF analyzer. The machine sends X-rays into the sample. The atoms give off their own X-rays. The analyzer checks the energy and strength of these X-rays. This works for metals, powders, liquids, and rocks.
Energy-dispersive X-ray fluorescence is a common way to do this. It collects all the X-rays at once and sorts them by energy. This makes the test quick and easy. You can use X-ray fluorescence spectroscopy to find out what elements are in unknown samples. Field-portable XRF analyzers let you do this outside the lab, like at a mine or factory.
Tip: Always keep your sample clean and free from dust or oil. This helps you get the best results from your xrf analyzers.
X-ray fluorescence spectrometer Applications
You can use XRF in many jobs. Here are some ways people use it:
- Mining and exploration: You can check ores and minerals at the site.
- Oil and fuel industry: You can look for sulfur and other things.
- Chemical industry: You can check the quality of raw materials and products.
- Environmental monitoring: You can test waste and soil for harmful elements.
- Precious metal recycling: You can sort metals like gold and silver.
- Metals industry: You can sort alloys and check materials.
- Compliance screening: You can look for banned substances in electronics.
- On-site metal testing: You can use field-portable XRF in scrapyards, factories, and foundries.
- Laboratory analysis: You can test many things, like fuels, chemicals, medicine, food, glass, ceramics, and more.
Energy-dispersive x-ray fluorescence and x-ray fluorescence spectroscopy both give fast, reliable results. You can use them to study metals, powders, and liquids. XRF is a safe way to learn about what elements are in almost any material.
X-ray fluorescence spectrometer Sample Preparation
Solid Samples
You must get solid samples ready with care for XRF analysis. The sample’s surface should be flat and smooth. If you have hard metals like iron or steel, use grinding tools to make the surface shiny. For softer metals like copper or aluminum alloys, use a lathe or milling machine. Always clean the surface with a file that is only for that metal. This stops you from mixing up elements from other samples. After cleaning, check the surface by measuring it.
If the numbers change after grinding, do the steps again until the readings stay the same. Flat and even samples give the best results. If your sample is not the same all over, crush and mix it well. You can press it into a pellet or melt it into a glass bead.
Tip: A flat and clean surface helps the xrf instrument show what metals are really there.
Powder Samples
Powder samples need extra care so they do not get dirty. Before you start, clean the die surface to get rid of old powder. Put a thin film between the powder and the die. This keeps the powder from sticking and stops other elements from mixing in. Pick the right die material for your sample. If your powder grows bigger after pressing, use aluminum rings.
When you press the powder, slowly push and let go of the pressure a few times. This keeps the pellet from breaking. Always weigh and mix your sample with a binder. The binder should not have any elements you want to test for. Good binders are wax, boric acid, or cellulose powder. Mixing well helps you get even pellets and makes your XRF results better.
Liquid Samples
Liquid samples also need careful steps. Pick the right sample cup for your XRF spectrometer. Some cups have one open end, and some have two. Fill the cup with enough liquid and take out any solid bits if you need to. Pick a thin film window like Kapton, polypropylene, or Mylar. The film must let X-rays go through, stay strong, and not react with your sample.
Stretch the film flat over the cup and lock it in place. Make sure there are no wrinkles or holes. Put the sealed cup in the XRF instrument so the liquid sits on the film. This lets you test the liquid without spills or leaks.
Here is a table that shows how well XRF analysis works for different sample types:
| Sample Type | Accuracy (Recovery) | Precision (RSD or Variability) | Notes / Limitations |
|---|---|---|---|
| NIST 2783 (air particulate) | Usually within ±10% of certified values; Zn recovery at 85% | Not clearly stated; intercomparison supports accuracy | Some elements (Ni) show differences; not many repeats |
| Arizona Test Dust (ATD) | No big difference for 6 of 8 elements vs. results from 11 labs; exceptions: Ni (68% less), Zn (50% more) | RSD was 6% to 19%, like other labs | Good for very small particles |
| Marine Suspended Particulate Matter (SPM) | About the same accuracy and precision as ICP-MS for many elements; not as good for Cu, Ni, Zn at low levels near detection limits | Precision about the same as ICP-MS; not as good at low levels | Hard to find trace elements (Cu, Ni, Zn) at low amounts |
Note: Xrf is good for checking metals, powders, and liquids. You get fast and trustworthy results, but it is harder to find very tiny amounts of some elements.
Avoiding Contamination
You want your XRF results to be correct. Contamination can mess up your test. You need to keep your sample clean. Many things in the lab can add extra elements. If you know where contamination comes from, you can stop it.
Here are some common ways your sample can get dirty and how to stop them:
- Water
Water can have small bits of metals or other elements. Always use the cleanest water you can find for your sample or when cleaning labware. - Acids
Acids help break down materials, but they can have bad stuff in them. Only use very pure acids and check their labels before using them. - Labware
Glassware can let out things like boron, silicon, or sodium. Use labware made from FEP or quartz. Clean all labware with special washers to get rid of anything left behind. - Sample Preparation Techniques
Tools and containers can add dirt to your sample. Get your sample ready in a clean hood or clean room. Touch your sample as little as you can and use the right tools for each step. - Laboratory Environment
Dust, air, and even walls can make your sample dirty. Work in a clean room or under a hood with HEPA filters. Wipe down tables with deionized water and keep the area neat. - Laboratory Personnel
People can bring in dirt from makeup, jewelry, or gloves. Wear powder-free gloves and do not use lotions, makeup, or jewelry when working with your sample. - Storage
Keep your sample and standards in clean, closed containers. This keeps out dust and other things you do not want.
Tip: Always look at your workspace before you start. A clean space helps you avoid mistakes and keeps your sample safe.
You can use this checklist to help keep your sample clean:
| Step | What to Do |
|---|---|
| Water and Acids | Use the cleanest you can get |
| Labware | Pick FEP or quartz; clean very well |
| Sample Handling | Touch as little as possible; use clean gloves |
| Environment | Work in clean rooms or hoods; wipe tables |
| Personal Care | Do not use makeup, lotions, or jewelry |
| Storage | Keep samples in clean, closed containers |
If you do these things, you will lower the chance of contamination. Good habits and careful work help you get the best XRF results.
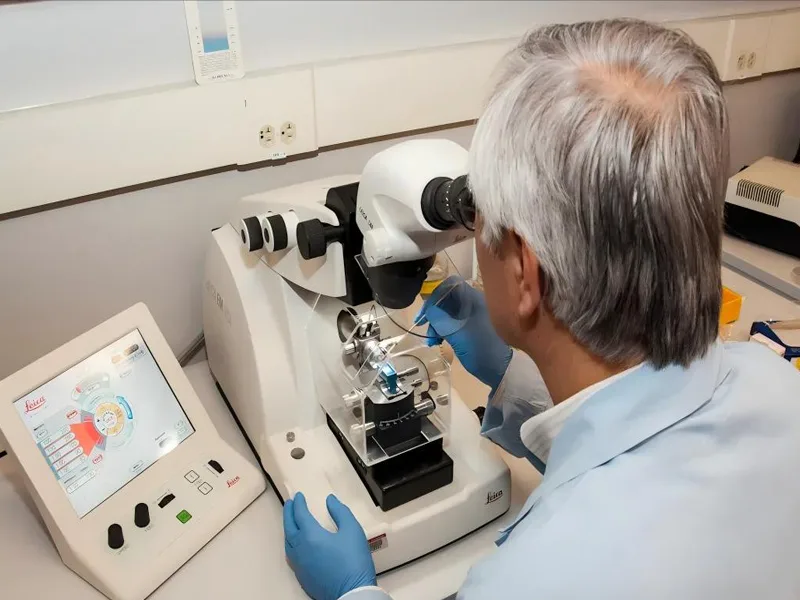
X-ray Fluorescence Spectrometer Setup
Power and Checks
You must check the X-ray fluorescence spectrometer before using it. Turn on the power and let it warm up. This helps the detectors work right. Always check if the detector shows the right energy range. If your analyzer has moving parts, look at them. Make sure the source, sample holder, and detector are lined up. This stops mistakes when you measure.
Follow these steps for setup:
- Turn on the x-ray fluorescence spectrometer and let it warm up.
- Check if the detector works and is steady.
- Make sure the source, sample, and detector are lined up.
- Use a blank sample to see if the instrument reads zero.
- Test with a certified reference material to check if the results are right.
Tip: Always follow your lab’s rules. Doing things the same way helps you get good results.
Calibration
Calibration is important for getting the right results. You need to use reference materials with known elements. Put these standards in the X-ray fluorescence spectrometer and write down the readings. The instrument uses this to match unknown samples to real numbers. Pick calibration standards that are flat, smooth, and clean. Quartz reflectors are good for many tests. Only use pure chemicals that do not add extra elements.
Add an internal calibration standard if you can. This standard should not be the same as the elements you want to measure. It helps the instrument fix small changes during testing. Keep the sample mass low and spread it out evenly. Thin, even samples give better results. Do your measurements more than once to check if they are the same. Find the total uncertainty by looking at how you prepare the sample, set the instrument, and check the data.
Note: Good calibration helps your xrf analyzers give results you can trust.
Measurement Parameters
You can get better results by picking the right settings. Particle size and water in your sample can change your readings. Big particles make the surface rough and leave spaces. Water can fill these spaces and soak up X-rays, making the signal weaker. You should grind and dry your samples to fix this.
Here are some things to remember:
- Smaller particles make the surface smoother and result in better.
- Dry samples help you avoid problems from water.
- Use the Berry-Furuta-Rhodes equation to fix for particle size.
- Find attenuation coefficients for each element to fix water problems.
- For light elements, use a vacuum and special detectors like silicon drift detectors.
- Change excitation energy and counting time to get a strong signal, but not too much for the detector.
You can also use correction models and normalization to make results better. Compton Normalization helps when you test soil with different water levels. Always check your results with other methods to see if your analyzers work well.
Remember: Controlling measurement settings helps your xrf give good and correct results every time.
X-ray fluorescence spectrometer Measurement Steps

Sample Placement
You must put your sample in the X-ray fluorescence spectrometer carefully. This step is important for getting correct and repeatable results. Here are some steps to help you get your sample ready and put it in the right way:
1. Pick a sample that shows what the whole material is like. This helps your results match the main material.
2. Make sure your sample is flat and smooth. If the surface is bumpy, you might get wrong XRF measurements.
3. If you have powder, grind it until it is very fine, less than 200 mesh. Fine powders help you get better results.
4. If you use pressed pellets, dry the powder first. You can mix in a binder like starch, cellulose, or boric acid if you need to. Use about 5% to 20% binder by weight.
5. Press the powder into a strong, flat pellet. Most samples need 20–30 tons of pressure. Some materials, like ferroalloys, might need up to 40 tons.
6. Keep pressing for 10 to 60 seconds. Most people press for about 20 seconds.
7. Wipe off any dust from the pellet before you put it in the spectrometer.
8. Always use clean gloves to handle the sample. Do not touch or breathe on the surface.
9. Put the sample in the holder so it sits flat and does not move. The flat side should face the detector.
10. If you want to measure powder directly, use a liquid cup and helium. This works best for very fine powders.
Tip: Make sure your standards and unknown samples have the same density, particle size, and thickness. This helps you get results that are always the same.
If you work with metals, you should cut or sand the surface to make it new. If your instrument has a sample spinner, use it. This helps stop mistakes from lines or marks on the surface. For some minerals, you might need to make a fusion bead. This means you melt the sample with a flux to make a glass disk. Fusion beads are very flat and even.
Analysis Modes
Modern X-ray fluorescence spectrometers have different ways to test samples. You can pick the way that works best for what you need.
- Material Analysis Mode: Use this mode to find out what elements are in your sample. It works for metals, powders, liquids, and more. You get a list of all the elements inside.
- Thickness Measurement Mode: Use this mode to check how thick layers are. You can test coatings, films, or layers of alloys. The instrument tells you how deep each layer is.
Some spectrometers have special tools. Movable X-Y stages help you put your sample in the right spot. Variable Z-axis sources let you change how far the source is from the sample. Video cameras show you where you are testing. These tools help you get better and more exact results.
Note: The mode you pick changes what kind of information you get. Material analysis mode gives you data about what is inside. Thickness mode tells you how deep the layers are. Choose the mode that matches what you want to learn.
New detectors and optics have made XRF even better. Now you can do micro XRF mapping. This lets you see where elements are in a small area. These new tools help you get better results, whether you use a lab machine or a field-portable XRF.
Running the Test
After you put your sample in and pick the mode, you can run the test. How you do the test can change your results.
- Make sure your sample is clean and close to the analyzer. Touching the analyzer gives the best results, even for odd shapes.
- Check the room temperature. The instrument works from -10 °C to 50 °C. You can test samples up to 100 °C. For hotter samples, use special windows.
- Take off any paint, sealers, or dirt from the surface. XRF only checks the top layer, so dirt can change your results.
- Start the test. For alloys, you only need a few seconds. For rocks, you might need one or two minutes. If you are testing for small amounts, you may need more time.
- Watch the screen for the spectrum and results. The instrument shows you the energy and amount for each element.
- Save your data so you can look at it later. You can compare your results with standards or use them to check what material you have.
Remember: Clean samples and careful placement help you get the best results. Always do the same steps for every test to keep your results good.
If you use a field-portable XRF, you can test samples right where you find them. This is good for mining, recycling, or checking the environment. Field-portable XRF gives you fast answers without sending samples to a lab.
XRF analysis lets you check many materials quickly. You can use it for quality control, research, or checking what a material is. If you place your sample carefully, pick the right mode, and run the test the right way, your XRF results will be correct and reliable.
Analysis and Interpretation
Reading X-ray fluorescence spectrometer Spectra
When you look at an XRF spectrum, you see a graph. The x-axis shows energy. The y-axis shows intensity. Each peak on the graph means an element is in your sample. The taller the peak, the more of that element is there. You use this graph to find out what is in your sample and how much.
Here are some things to notice when you read an XRF spectrum: Each element has peaks at certain energy spots. These help you know which elements are in your sample. Sometimes, two peaks are close together and overlap. XRF software can help you tell them apart. You might see extra peaks called artifacts. These can be Rayleigh or Compton lines, X-ray diffraction peaks, or sum and escape peaks.
You need to know about these so you do not mix them up with real elements. How deep X-rays go and how far fluorescent X-rays can escape changes what you see. Heavier metals make higher-energy X-rays. These come from deeper in the sample. The software often labels peaks and helps with overlapping ones.
Tip: Always look for artifacts and overlapping peaks in the spectrum. This helps you avoid mistakes when you study your sample.
Identifying Elements
You can find out what elements are in your sample by looking at the special energy peaks in the XRF spectrum. When X-rays hit your sample, atoms inside get excited. They lose electrons from the inside. Electrons from higher shells drop down to fill the empty spots. This gives off X-ray photons with certain energies. Each element has its own set of energy peaks. You match these peaks to known values to see which elements are there.
Micro-XRF and macro-XRF let you see different details. You use qualitative analysis to spot which elements are present by looking at the lines in the spectrum. For quantitative analysis, you compare your results to standards with known amounts. Calibration can use real samples or mathematical rules. This lets you find elements from very small to large amounts. You can also measure how thick the layers are in samples with more than one layer.
Atoms have different electron shells, like K, L, and M. When electrons move between these shells, you see peaks at certain energies. Where the peak is tells you which element it is. How tall the peak is shows how much of that element is there.
Note: Always use the software to help match peaks to elements. This makes your results more trustworthy.
Quantitative Analysis
You use quantitative analysis to find out how much of each element is in your sample. This turns the XRF spectrum into real numbers for how much is there. Here are the steps you should follow:
First, fit the spectrum to change photon counts into concentrations. This is important when peaks overlap.
Next, use reference standards tested in the same way as your sample. This helps you get the right numbers.
Then, fix problems from absorption and other effects with matrix effect corrections. Use tools like ROI filtering or PCA to tell real signals from noise and overlapping peaks.
Make extra fixes for sample thickness, beam weakening, and secondary fluorescence. These are important for samples with more than one layer. Use certified reference materials or outside standards to check your results and make sure they are right.
Matrix effect correction is very important, especially for rocks or tricky samples. You can use methods like the fundamental parameter method, empirical coefficients, or influence coefficients. Sometimes, you use more than one method to get the best answer. These fixes help you get the right numbers for heavy metals and other elements.
Tip: Always check your results with certified standards. This helps you trust your numbers for heavy metals and other metals in your sample.
You can use XRF to find out what elements are in your sample and how much. This makes XRF a strong tool for checking heavy metals and other metals in many kinds of samples.
Dealing with Interferences
When you use an X-ray fluorescence spectrometer, you might see extra signals. These extra signals are called interferences. Interferences can make it hard to know which elements are in your sample. They can also make it hard to tell how much of each element is there. You need to learn how to find and fix these problems. This helps you get the right results.
Common Types of Spectral Interferences:
- Spectral Overlap: Sometimes, two elements give off X-rays with almost the same energy. Their peaks can mix on the spectrum. For example, iron can excite chromium, and their signals can blend.
- Secondary and Higher-Order Fluorescence: One element’s X-rays can excite another element in your sample. This makes extra peaks that do not belong to the main element you want to measure.
- Sum Peaks: If your detector gets too many X-rays at once, it may add their energies together. This makes a fake peak at a higher energy.
- Matrix Effects: Other elements in your sample can change how X-rays move and escape. This can make some peaks look bigger or smaller than they really are.
Tip: Always look for peaks that overlap and extra signals. These can hide the real amount of an element in your sample.

How to Recognize and Fix Interferences:
You can use different ways to deal with interferences:
- Mathematical Peak Fitting: Use software to fit each peak with a special curve, like a Gaussian or Voigt shape. This helps you separate peaks that are close together.
- Baseline Evaluation: Check the background under the peaks. A good baseline helps you see real peaks and ignore noise.
- Least-Squares Fitting: The software can change the fit to match your data as closely as possible. This makes your results better.
- Multilinear Correction Matrices: These tools help fix overlapping signals in places where more than one element gives off X-rays.
- Control Detector Count Rate: Lower the X-ray tube current if you see some peaks. This stops the detector from getting too many X-rays at once.
- Use Regions of Interest (ROIs): Portable XRF devices often use ROIs to focus on the energy range for each element. This helps lower mistakes from overlaps.
Here is a table that shows some common interferences and ways to fix them:
| Interference Type | What Happens | How to Fix It |
|---|---|---|
| Spectral Overlap | Peaks from two elements blend | Use peak fitting and correction matrix |
| Secondary Fluorescence | Extra peaks from excited elements | Check sample makeup and adjust settings |
| Sum Peaks | False peaks at higher energy | Lower tube current, control count rate |
| Matrix Effects | Peaks look too big or too small | Use matrix correction in software |
Spectral interference in XRF analysis is often missed. If you do not fix these problems, your results may not show the true amount of each element. You should always use the tools in your XRF software to check for and fix interferences. In the lab, you can use expert-supervised methods to get the best results. Portable XRF devices use real-time corrections, but you still need to watch for mistakes.
Note: Paying close attention to interferences helps you trust your XRF results. Always check your spectra and use correction tools for the most accurate analysis.
Maximizing Accuracy
Calibration Tips
You can make your X-ray fluorescence spectrometer more accurate by using good calibration steps. Manufacturers have some smart tips to help you:
- Use certified reference materials (CRMs) that are like your sample. These should have the same elements you want to measure.
- Pick synthetic reference standards made for your sample type, such as ones for battery materials.
- Follow fusion recipes and method templates from the manufacturer. These help you get steady and correct calibration.
- Use CRMs with the right sample prep tools and your XRF instrument. This gives you results you can trust.
- Try turnkey solutions. These systems need less sample prep and fewer special skills. They also avoid dangerous chemicals. You get faster and more steady results.
- Use solid reference materials that match your sample’s shape and chemistry. This helps fix mistakes during calibration.
- Make a thickness calibration curve with the Lambert Law of Absorption. This helps fix changes in sample thickness.
- Check your calibration results with other methods, like LA-ICP-MS, to make sure your numbers are right.
- For plastics with brominated flame retardants, use custom ABS reference materials. These match your real sample and help with matrix matching.
- Use empirical corrections, like matrix-matched thickness correction, to make your results better.
- Show limit values for elements like bromine as elemental concentration. This makes it easier to check quickly and correctly.
Tip: Always pick calibration standards that are as close as possible to your real samples. This helps you get the best numbers.
Matrix Effects
Matrix effects can change your XRF results. The way your sample is made can change how X-rays move and how strong the signals are. You need to know about these effects to get good measurements. Here is a table that shows what can change your results and how to fix it:
| Matrix Effect Factor | Influence on XRF Measurement Accuracy | Correction Strategy |
|---|---|---|
| Density (with moisture) | Moisture soaks up X-rays and makes the signal weaker. Counts go up in a non-straight way as density changes. | Use formulas from Monte Carlo simulations to fix absorption. Dry your samples to lower moisture. |
| Particle Size | Small particles soak up more X-rays and scatter them. Counts go up with particle size until a point. | Grind or polish your sample. Use models to fix for particle size. |
| Specimen Thickness | Thickness changes how much X-rays are soaked up or scattered. | Use Monte Carlo models and formulas to fix for thickness. |
You can also fix matrix effects by measuring both the strength of the fluorescent X-rays and how much they are absorbed at the same time. Some machines use a second emitter to help with this. These fixes help you measure small amounts of elements, even in tricky samples.
Common Challenges
You may run into some problems when using XRF for measuring amounts. Some of the most common problems are:
- Backscattered radiation can get in the way. This can mess up your measurements.
- Matrix effects from tricky samples can make your results less accurate.
- Field-portable XRF devices may not find very small amounts.
You can fix these problems in different ways:
- Use filters or polarization in your spectrometer to lower backscattered radiation.
- Follow careful calibration steps. Use standard additions and standard reference materials to fix matrix effects.
- Use field-portable XRF mostly for quick checks. For measuring amounts, use lab instruments with strong calibration and checking.
- Double-check your results with other methods, like atomic absorption spectroscopy or ICP techniques.
Note: The method of standard additions can help you get better numbers, but it might change the non-destructive part of XRF.
If you know about these problems and use the right fixes, you can get more correct and steady results from your XRF analysis.
Maintenance
You need to take care of your X-ray fluorescence spectrometer if you want it to give you accurate results for a long time. Good maintenance helps you avoid problems and keeps your instrument working well. Here are some important steps you should follow:
- Prepare Before Service
Always check the service history of your spectrometer. Talk with the people who use it every day. They can tell you if anything seems wrong or different. This helps you know what to look for during maintenance. - Clean and Inspect Regularly
Clean both the outside and inside of your spectrometer. Dust and dirt can cause problems. Lubricate any moving parts so they do not wear out. Check and replace fan filters if they look dirty. Look at all the parts to see if anything is getting old or worn out. Make sure the room has good air flow and is free from dust. - Check for Safety
You must make sure your spectrometer is safe. Use a radiation survey meter to check for leaks around the instrument. Test all safety locks and switches. Make sure your spectrometer meets all local safety rules. - Re-Calibrate and Test Accuracy
After cleaning and checking, you need to recalibrate your spectrometer. Check the voltages, offsets, and gains. Make sure the optical parts line up right. Use standards that come from trusted sources, like NIST, to make calibration curves. Run stability tests to see if the instrument gives the same results over time. Your spectrometer should stay within a ±5% accuracy range. - Keep Good Records
Write down everything you do during maintenance. Keep all papers that show your spectrometer meets ISO/IEC 17025 rules. Good records help you track problems and prove your instrument is accurate.
Tip: Keep your spectrometer in a room with a steady temperature around 22°C and humidity below 60%. Use a clean, quiet room with no shaking or strong vibrations. Make sure the power supply is stable. When you are not using the spectrometer, lower the X-ray tube current and voltage instead of turning it off. This helps the tube last longer. If your spectrometer uses water cooling, always use high-purity deionized water with ion exchange resin. This keeps the X-ray tube safe from damage.
Regular maintenance gives you many benefits:
- You can make your spectrometer last longer by finding and fixing small problems early.
- You keep your results accurate and steady by following the same calibration steps each time.
- You avoid sudden breakdowns because you catch issues before they get worse.
- You can plan your budget better since you know when to expect maintenance costs.
- You get help from expert technicians who know how to check your instrument and set up a good maintenance schedule.

If you follow these steps, your X-ray fluorescence spectrometer will stay accurate and reliable for many years. Good maintenance is the key to getting the best results from your XRF analysis.
Safety Guidelines
Radiation Safety
You must be careful with X-ray fluorescence spectrometers. X-rays can hurt your skin and body if you do not follow the rules. The main X-ray beam is very strong. Never put your hands or any body part near the nose or beam shutter. Always look for warning lights to see if X-rays are on. These lights tell you when the device is working.
Many spectrometers have safety parts. Some use infrared sensors to stop X-rays if there is no sample. Others have shields or covers to block extra radiation. Always point the device away from you and others. Stay at least three feet away from the beam. Use barriers or stands to keep safe, especially with low-density samples. These samples can scatter more X-rays and raise your risk.
Tip: Always get radiation safety training before using an XRF spectrometer. Training helps you learn the risks and how to stay safe.
Sample Handling
Safe sample handling keeps everyone protected during XRF analysis. Never hold samples in your hand while testing. Use a benchtop stand or shield to keep your hands away from the beam. Always check that the area is clear before you start. Make a safe zone for testing and tell others to stay back.
Here are some best ways to handle samples safely:
- Keep all body parts away from the main beam path.
- Never point the device at yourself or anyone else.
- Use shields or stands for small or low-density samples.
- Watch for the X-ray lights to know when the device is on.
- Store the device in a safe place when not using it.
- Follow all instructions from the manufacturer for safe use.
- Wear dosimetry badges to track your radiation exposure.
- Tell your Radiation Safety Officer and the analyzer vendor if you have a safety concern.
Note: Too much exposure can hurt your skin. Always follow strict safety rules to protect yourself.
Instrument Care
Taking care of your XRF spectrometer keeps it safe and working well. Clean the device often to get rid of dust and dirt. Check all safety locks and warning lights to ensure they are functioning properly. Look at the beam shutter and shields for damage. Replace broken parts right away.
You should keep a record of all maintenance and safety checks. Store the spectrometer in a dry, cool place. Only let trained people use the device. Always follow your lab’s safety plan and local rules for radiation protection.
| Instrument Care Task | What You Should Do |
|---|---|
| Clean the device | Wipe surfaces and remove dust often |
| Inspect safety features | Check locks, lights, and shields |
| Replace worn parts | Fix or change broken parts quickly |
| Store safely | Keep in a safe, dry, and cool place |
| Record maintenance | Write down all checks and repairs |
Keeping your instrument in good shape helps you avoid accidents and makes sure you get correct results every time.
You can get good material analysis with an X-ray fluorescence spectrometer if you follow some important steps:
- Get your samples ready the right way. Make sure they are clean and dry. Grind them so they are smooth. This helps stop mistakes from water or big pieces.
- Set up your instrument using certified standards. This helps your results match real numbers.
- Look at your spectra closely. Watch out for peaks that are close together. Matrix effects can also change your results.
- Always use safety rules and do things the right way. This keeps you and your results safe.
- Keep learning new things. Read textbooks, take vendor classes, and look at science articles. This helps you know more about your instrument and what it can and cannot do.
Remember, XRF gives the best results when you know what it can and cannot do. Learning more helps you trust your results every time.
FAQ
You can analyze metals, powders, rocks, soils, liquids, plastics, and ceramics. An X-ray fluorescence spectrometer works best for solid and powdered samples. You can also test thin films and coatings.
Use a clean brush or lint-free cloth to remove dust. For metals, grind or polish the surface. Always wear gloves. Avoid touching the sample with your hands.
You can detect trace elements, but XRF may miss very low levels. For tiny amounts, use longer measurement times or lab-based XRF. Portable XRF may not find very small traces.
Yes, you should calibrate the instrument regularly. Use certified reference materials. Calibration helps you get accurate and repeatable results.
XRF is safe if you follow safety rules. Never put your hands near the X-ray beam. Always use shields and warning lights. Get proper training before using the instrument.
Use the XRF software to separate overlapping peaks. The software can fit curves and help you identify each element. Always check the results with standards.
Most XRF tests take from a few seconds to a few minutes. Metals and alloys need less time. Rocks and soils may need longer for better accuracy.
Yes, you can use portable XRF analyzers in the field. You can test samples at mines, factories, or recycling sites. Field XRF gives fast results on-site.


