You can see that Rockwell, Brinell, and Vickers hardness tests are different. Each test uses its own indenter and way to measure. This changes how accurate, fast, and costly the test is. For example, Rockwell testing is quick and gives results right away. Brinell and Vickers take longer and need special tools. The table below shows which test works best for certain materials and jobs. This guide helps you pick the right hardness tester for your needs.
| Test Type | Speed | Accuracy | Best For |
|---|---|---|---|
| Rockwell | Fast | Moderate | Routine quality control |
| Brinell | Slow | Moderate | Soft, coarse materials |
| Vickers | Slow | High | Thin, micro materials |
Key Takeaways
- Rockwell, Brinell, and Vickers hardness tests use different tools and methods. This changes how fast, correct, and expensive the tests are.
- Rockwell test is quick and simple. It is good for checking metals and plastics that are thick and flat.
- Brinell test works well for big, rough, or soft metal parts. It gives an average hardness over a large area but takes longer.
- Vickers test is very exact for small, thin, or fragile samples. It is used for things like coatings and tiny parts. But it needs smooth surfaces and microscopes.
- Pick your hardness test by looking at the material, sample size, how exact you need to be, and how fast you want results. Rockwell testers cost less and are good for fast, repeated checks. Brinell testers can test rough surfaces, but are slower. Vickers testers cost more but give very exact results.
- Always get your sample ready the right way. Make sure it is clean, flat, and thick enough. This helps you get good hardness numbers. No one test is best for everything. Choose the test that fits your project. Think about speed, accuracy, and how much you can spend.
Table of Contents
Hardness Testing Methods
Overview
When you choose materials for a project, you want to know how they will perform. Hardness testing methods help you find out if a material can resist scratches, dents, or wear. These tests measure how much a material resists permanent changes when you press a harder object into it. You use a hardness tester to check if a material is strong enough for its job. This process is important in quality control. It helps you make sure that parts meet safety and performance standards.
Hardness testing is not just about finding out if something is hard or soft. It also tells you about other properties, like strength and wear resistance. You can use these results to compare different materials. For example, if you work in the automotive or aerospace industry, you need to know if a part will last under stress. Hardness testers give you quick, reliable answers. You can use them on metals, plastics, and even ceramics. Most tests do not damage the sample much, so you can keep using it after testing.
You will find that Rockwell, Brinell, and Vickers are the most common hardness testing methods. Each method uses a different tool and process. Some methods work better for certain materials or shapes. For example, you might use one method for a thick steel plate and another for a thin coating. By choosing the right hardness tester, you make sure your results are accurate and useful.
Tip: Always match the hardness tester to your material and the type of information you need. This helps you get the best results for your project.
Key Differences
You might wonder what sets these metal hardness tests apart. Each method has its own strengths and best uses. Here is a quick look at how they compare:
- Rockwell Hardness Test:
You get fast results with this method. The Rockwell tester measures how deeply an indenter goes into the material. You do not need to do any extra calculations. This method works well for metals and plastics. You can use it for routine checks in factories because it is quick and easy. - Brinell Hardness Test:
This method uses a heavy load and a round ball to make a large dent. You can use it on big, rough, or uneven samples. It is great for checking castings or parts with coarse grains. The Brinell tester helps you see if the material is the same all over. You might use it in gear manufacturing to make sure parts will last. - Vickers Hardness Test:
The Vickers tester uses a diamond pyramid to make a small, square mark. You measure the size of this mark with a microscope. This method gives you very high accuracy. You can use it on thin layers, coatings, or tiny samples. It works for almost any solid material, not just metals.
| Method | Best For | Main Benefit |
|---|---|---|
| Rockwell | Metals, plastics, quick checks | Fast, easy readings |
| Brinell | Large, rough, soft materials | Good for big samples |
| Vickers | Thin, hard, or small materials | High accuracy |
When you pick a hardness tester, think about your material, the size of your sample, and how precise you need your results to be. Each method gives you different information, so choose the one that fits your needs best.
Rockwell Hardness Test
How It Works
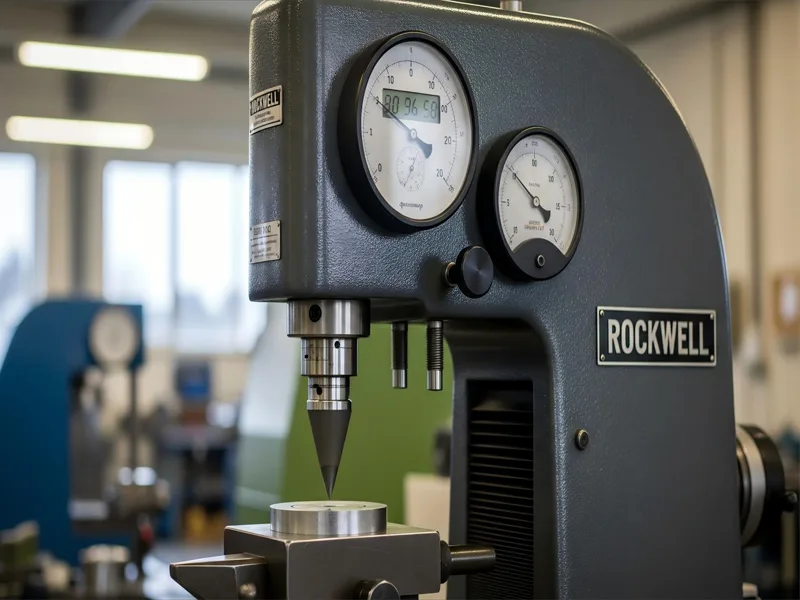
You use the Rockwell hardness test to measure how deeply an indenter presses into a material. This method gives you a quick way to check the strength of metals and alloys. The process follows these steps:
- Place your sample on the tester and apply a small preload, usually 10 kgf (98 N), to set a reference point.
- Add the main load based on the chosen Rockwell scale. The load depends on the material and the indenter type.
- Hold the main load for a short time. This dwell time lets the indentation settle.
- Remove the main load, leaving only the preload. The tester measures how deep the indenter went.
- Read the hardness value directly from the machine. You do not need to do extra calculations.
You can use two types of indenters: a diamond cone for hard materials like hardened steel, or a carbide ball for softer metals such as brass or aluminum. The Rockwell hardness test measures indentation hardness by depth, not by the size of the mark. The test works best when your sample is at least ten times thicker than the indentation depth. Flat, smooth surfaces give you the most accurate results.
| Aspect | Description |
|---|---|
| Indenters | Diamond cone (for hard materials), carbide balls (for softer metals) |
| Measurement principle | Measures indentation depth, not surface area |
| Suitable materials | Hardened steels, construction steels, brass, aluminum alloys, copper alloys |
| Preload force | 98 N (10 kgf) |
| Main load | Varies by scale and material (e.g., 490 N, 883 N, 1373 N) |
Tip: Always check that your sample is thick enough and the surface is flat before testing. This helps you get the most reliable results.
Advantages
You will find that the Rockwell hardness test offers several benefits:
- Fast results: You get the hardness value right away, which saves time.
- Cost-effective: The equipment is affordable, and you do not need extra tools like microscopes.
- Simple process: You do not need to polish or prepare the sample much. Minor surface imperfections do not affect the test.
- Easy to use: The tester gives you a direct reading, so you avoid calculation errors.
- High throughput: You can test many samples quickly, making it ideal for routine quality control.
These features make the Rockwell hardness test popular in factories and labs. You can use it for metals, alloys, and even some plastics.
Disadvantages
The Rockwell hardness test does have some limits. You should know these before choosing this method:
- Not suitable for very thin samples: The sample must be much thicker than the indentation depth. Thin materials can give you false readings.
- Limited for very soft or very hard materials: If the material is too soft or too hard, the test may not give accurate results.
- Not ideal for small parts: Small or delicate pieces may not fit well in the tester or may deform during testing.
- Requires the right scale: You must pick the correct Rockwell scale and load for your material. Using the wrong settings can lead to errors.
You should always match the test settings to your sample. This helps you avoid mistakes and get the best results from your hardness testing.
Best Uses
You want to know when to use the Rockwell hardness test. This method works best in certain situations. You can use it for many types of metals and some plastics. It gives you quick results, so you can check materials fast during production or quality control.
Here are the best uses for the Rockwell hardness test:
- Routine Quality Control:
You can use this test on the factory floor. It helps you check if parts meet hardness standards. You get results in seconds, so you can test many samples each day. - Metals and Alloys:
This test works well for steel, aluminum, brass, copper, and other alloys. You can use it for both hard and soft metals, as long as the sample is thick enough. - Finished Parts:
You do not need to cut or change the part much. You can test finished products like gears, bolts, rods, and sheets. This saves you time and keeps your parts in good shape. - Large or Heavy Samples:
The Rockwell tester can handle big or heavy items. You do not need to move the sample much. This makes it easy to test large machine parts or tools. - Production Lines:
You can set up the tester right next to your machines. Workers can test parts as they come off the line. This helps you catch problems early and keep quality high. - Comparing Materials:
You can use the test to compare different batches of metal. If you get a new shipment of steel, you can check if it matches your usual hardness.
Tip: Always make sure your sample is flat and thick enough. Thin or uneven samples can give you wrong results.
Common Industries That Use the Rockwell Hardness Test:
| Industry | Example Applications |
|---|---|
| Automotive | Engine parts, gears, axles |
| Aerospace | Fasteners, landing gear, brackets |
| Manufacturing | Tools, dies, machine components |
| Construction | Structural steel, bolts, plates |
| Electronics | Metal contacts, connectors |
You should choose the Rockwell hardness test if you need fast, repeatable results on metals or hard plastics. It fits best when you want to test many samples quickly and do not want to spend much time on sample prep. If your parts are large, finished, or need regular checks, this test gives you the answers you need.
Brinell Hardness Test
How It Works
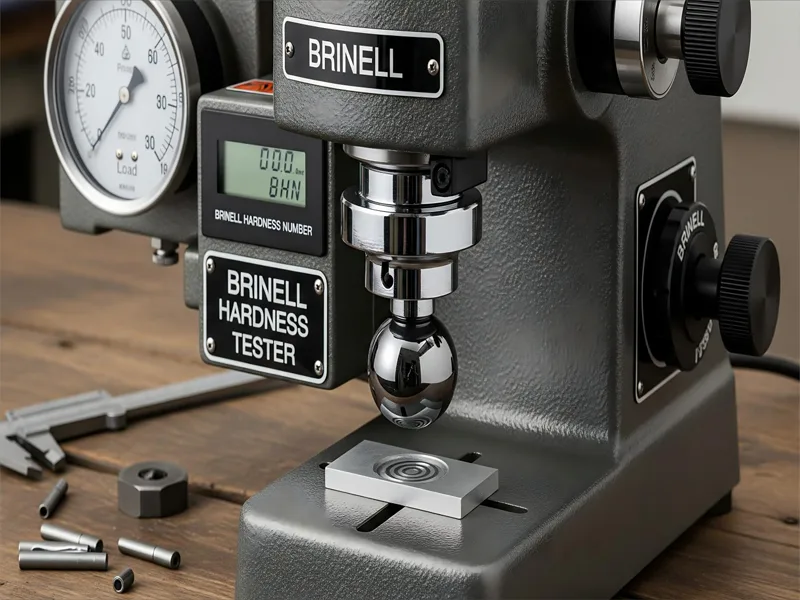
You use the Brinell hardness test when you want to measure the hardness of large or rough materials. This test uses a hard, round ball called a spherical indenter. The ball is usually made of tungsten carbide or hardened steel. You press this ball into the surface of your sample with a set force. The process follows these steps:
- Place the spherical indenter perpendicularly on the surface of your material.
- Gradually apply the test force, usually within 1 to 8 seconds.
- Hold the force steady for about 10 to 15 seconds. This lets the material settle and form a clear indentation.
- Remove the load and measure the diameter of the round mark left behind. You measure in at least two directions to get an average.
- Calculate the Brinell hardness value using the average diameter, the size of the ball, and the force you used.
The Brinell method works best when you need to test materials with uneven or coarse-grain structures. The large indentation gives you an average hardness value for the whole area, not just one spot. This makes your results more reliable for big or rough samples.
Tip: Always use the right ball size and load for your material. This helps you get accurate and repeatable results.
Advantages
You will find several benefits when you use the Brinell hardness test, especially for large or coarse materials:
- You can apply very high loads, up to 3000 kgf. This lets you test hard metals like cast iron and mild steel.
- The test makes a large indentation. This reduces the effect of small surface flaws and gives you a better average hardness value.
- The Brinell hardness test works well for castings, forgings, and other heavy-duty parts. You can use it on engine blocks, pipes, and other big items.
- The method follows international standards, so your results are consistent and trusted in many industries.
- You can use this test for softer metals like aluminum alloys, lead, bronze, and brass. The large mark makes it easy to see and measure, even on softer surfaces.
- Many factories and labs use this test for quality control. It helps you check if your materials are strong and uniform.
| Metal Type | Recommended Load (kgf) | Ball Size (mm) | Suitability Notes |
|---|---|---|---|
| Aluminum alloys | 500 | 2.5 to 5 | Good for soft metals; use smaller ball and lower load for thin samples. |
| Lead | 500 | 2.5 to 5 | Best for soft metal testing. |
| Bronze | 1500 | 10 | Medium hardness; higher load needed. |
| Brass | 1500 | 10 | Medium hardness; works well with Brinell testing. |
| Cast iron | 3000 | 10 | Harder metal; use higher load. |
| Mild steel | 3000 | 10 | Medium-hard metal; gives clear indentations. |
Disadvantages
You should know the limits of the Brinell hardness test before you choose it for your project:
- The test does not work well for small or thin samples. The large indentation can damage thin materials or cause them to bulge.
- Thin sheets cannot be tested because the mark may go through or deform the whole piece.
- Large test balls are not good for thin surface layers. The ball might press the surface into the base material, giving you a false reading.
- You need your sample to be at least eight times thicker than the indentation depth. If not, your results may not be accurate.
- The Brinell method is slower than other hardness tests. You need to wait for the load to settle and then measure the mark carefully.
- For small or delicate parts, you should use a different hardness test, like Rockwell or Vickers.
Note: Always check your sample size and thickness before using the brinell hardness test. This helps you avoid errors and get the best results.
Best Uses
You want to know when the Brinell method works best. This test shines when you need to check the hardness of large, rough, or uneven materials. You often see it used in heavy industries. The test gives you a clear picture of how strong a material is across a wide area.
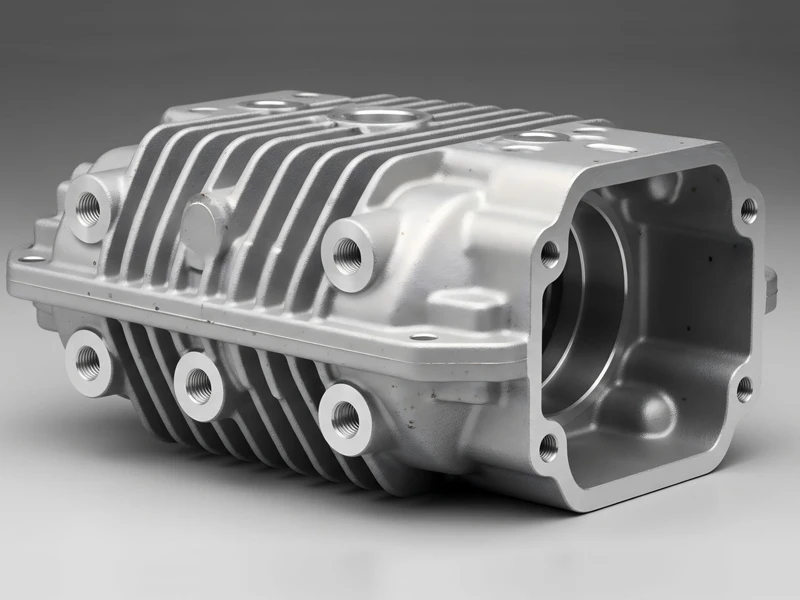
Here are the most common situations where you should use the Brinell method:
- Testing Castings and Forgings:
You often work with big metal parts like engine blocks, gears, or pipes. These parts have coarse grains and uneven surfaces. The Brinell method gives you an average hardness value over a large area. This helps you spot weak spots in the material. - Quality Control for Heavy Equipment:
You need to make sure that parts for trucks, trains, or construction machines meet safety standards. The Brinell method helps you check if the metal is strong enough to handle heavy loads and stress. - Checking Uniformity in Large Samples:
You want to know if a big piece of metal has the same hardness all over. The large indentation from the Brinell test covers more area than other methods. This makes it easier to find areas that might be softer or harder than the rest. - Testing Soft Metals:
You often work with materials like aluminum, lead, or copper alloys. These metals are softer and need a test that does not damage them too much. The Brinell method uses lower loads and bigger balls for these metals. This keeps the sample in good shape. - Evaluating Welds and Heat-Affected Zones:
You need to check if a weld is as strong as the rest of the part. The Brinell method lets you test the weld and the area around it. You can see if the heat from welding changed the hardness.
Tip: Always use the right ball size and load for your material. This helps you get results you can trust.
Industries that rely on the Brinell method:
| Industry | Typical Applications |
|---|---|
| Automotive | Engine blocks, axles, gears |
| Construction | Steel beams, heavy machinery |
| Shipbuilding | Hull plates, propeller shafts |
| Railways | Wheels, rails, couplings |
| Metal Foundries | Castings, forgings, pipes |
You should choose the Brinell method when you need to test big, heavy, or rough samples. It works best for softer metals and parts with uneven surfaces. If you want an average hardness value over a large area, this test gives you reliable results. You will find it most useful in industries where safety and strength matter most.
Vickers Hardness Test
How It Works
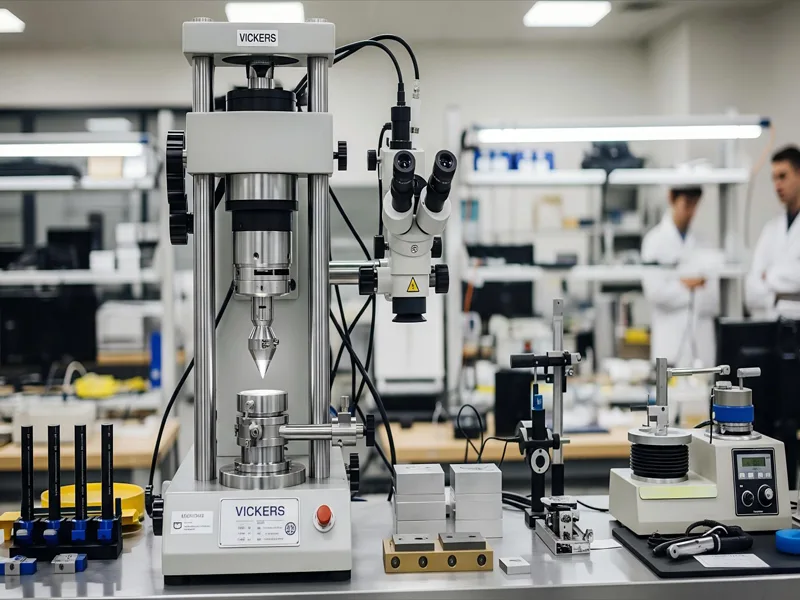
You use the Vickers hardness test for small or thin materials. This test gives very exact results. It uses a diamond pyramid indenter with a square base and a 136° angle. First, you polish your sample until it is flat and smooth. Clean it to get rid of dust or dirt. Next, put the sample in the Vickers tester and set up the machine with special test blocks. Then, press the diamond indenter onto the surface with a chosen load. The load can be as light as 10 grams or as heavy as 100 kilograms.
The right load depends on your material. Hold the load for about 10 to 15 seconds. This helps make a clear mark. After that, take off the load. Use a microscope or camera to measure the two sides of the square mark. Find the average of the two diagonal lengths. Use the Vickers formula to get the hardness value. Write the result as a number, then HV, and the load used, like 450HV10. The mark is small and easy to see, even on thin coatings or tiny parts. You can use the Vickers test on almost any solid material, from soft plastics to hard ceramics.
Tip: Always polish and clean your sample before testing. This helps you get the best results.
Advantages
The Vickers hardness test has many good points. It gives high accuracy because the diamond makes a clear, square mark. You get reliable measurements every time. You can use this test on almost any material, like metals, ceramics, and plastics. It is great for small or thin samples. The small mark lets you test thin coatings, films, or tiny parts without damage. You can use very low loads to check the hardness of delicate materials or surface layers. The same indenter works for all materials, so you do not need to change tools. The Vickers test is perfect when you need to test small, thin, or coated samples. It gives results you can trust, even for delicate materials.
Disadvantages
You should know some limits of the Vickers hardness test.
| Disadvantage Aspect | Description |
|---|---|
| Surface Quality | You must prepare the sample well. The surface needs to be flat and polished for good results. |
| Speed of Testing | The process is slower than other tests. You have to measure the mark with a microscope, which takes more time. |
| Cost and Equipment | The tester uses optical systems, so it costs more than simple machines like Rockwell testers. |
Testing very small or thin samples can be hard. The equipment is bigger, and you must measure the mark carefully. The Vickers test depends on how well the person measures the diagonals. This can cause small mistakes. Using machines to help can fix this, but it costs more.
Note: If you want fast results or need to test many samples quickly, you may want to pick a different hardness test.
Best Uses
The Vickers hardness test is great for small or thin things. You can use it on metals, ceramics, and some plastics. The diamond indenter makes a tiny mark. This means your sample does not get much damage. You can check thin coatings or micro-parts with good accuracy.
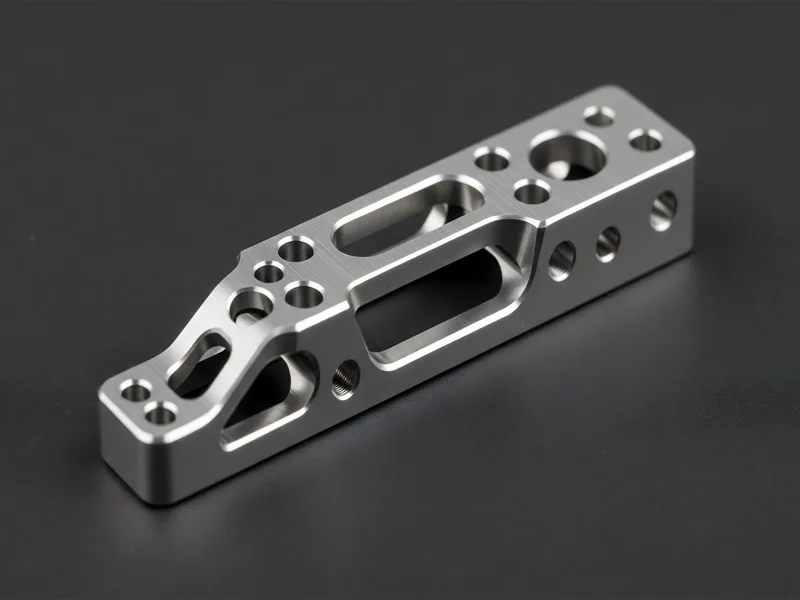
Here are times when the Vickers hardness test is best:
- Testing Thin Coatings and Surface Layers:
You may need to check thin films or surface treatments. The Vickers method lets you do this without hurting the rest of the material. You can test paint, plating, or hard layers on metal parts. - Microhardness Testing:
Sometimes you work with very small samples. You might want to see how hardness changes in a tiny spot. The Vickers test helps you measure microhardness. It is good for electronics, medical devices, or research. - Checking Hardness of Brittle Materials:
Some things like ceramics or glass, break easily. The Vickers test uses a small load. This means you can test these without causing cracks or damage. - Quality Control in Manufacturing:
You want your products to meet strict rules. The Vickers test gives you exact results. You can use it to check parts in aerospace, automotive, or electronics. - Comparing Different Materials:
You may need to compare the hardness of metals, alloys, or coatings. The Vickers test uses the same indenter and method for all. This makes it easy to compare your results.
Tip: Always make your sample flat and polished. This helps you get the best results.
The Vickers hardness test works for many needs. The table below shows where you might use it and why it is a good choice:
| Application Area | Why Use Vickers? |
|---|---|
| Thin coatings | Accurate, does not damage layers |
| Micro-parts | Small mark, high precision |
| Ceramics and glass | Gentle test, avoids cracks |
| Research and labs | Works for many materials, easy to compare |
| Quality control | Reliable, repeatable results |
Pick the Vickers hardness test if you need high accuracy. It is good for small or thin samples. It also helps when you want to compare different materials. This method gives you clear and trusted results for many jobs.
Hardness Tester Selection
Material Suitability
When you pick a hardness tester, match it to your material. Each method works best for certain samples. You want your results to be right and trustworthy. Look at the shape, size, and how hard your material is. The table below shows which tester is best for your needs:
| Factor | Explanation | Example/Application |
|---|---|---|
| Test Load | Harder materials need bigger test loads for good results. | Steel and alloys: up to 3,000 kgf; soft metals: about 500 kgf. |
| Hardness Range | The indenter changes with hardness. Harder things use diamond, softer ones use steel. | Over 650 HB/30: diamond indenter; below 650 HB/30: steel or hard metal indenters. |
| Adaptability | The tester must fit your sample’s shape and size. | Brinell tester works well for rough, flat metal, but not for round parts. |
| Surface Preparation | Clean, flat surfaces help you get better results. Some testers need special surfaces. | Brinell test needs a clean, flat surface; not good for round surfaces. |
You should use a Rockwell tester for metals and hard plastics. Brinell testers are best for big, rough, or soft metal samples. Vickers testers give more accurate results on thin sheets, coatings, or tiny parts. Always check your material before picking a hardness testing method.
Accuracy and Speed
You need to think about speed and accuracy when picking a tester. Some testers give fast results, but others take longer and are more exact. The table below shows how each tester compares:
| Hardness Tester | Accuracy | Speed | Typical Applications |
|---|---|---|---|
| Rockwell | Not as accurate on uneven materials because of small marks | Fast, simple, quick direct-read results | Finished products, harder or thinner workpieces, metals and hard plastics |
| Brinell | More accurate and steady on big, rough, or uneven samples | Slower because you have to measure the mark | Cast iron, non-ferrous alloys, steels, large or rough parts |
| Vickers | Very exact with small marks, good for thin materials | Usually slower, used in labs | Thin sheets, coatings, microstructures needing close checks |
If you need answers fast for lots of samples, Rockwell testers are good. Brinell testers take more time but give steady results on big, rough samples. Vickers testers are the slowest but give the most exact results, especially for thin or delicate things. Always think about how fast you need answers and how much detail you want.
Tip: Pick your tester based on if you need speed or more detail.
Cost Factors
Cost is important when you choose a hardness tester. You want one that fits your budget and your testing needs. Rockwell testers usually cost less and are good for testing many things quickly. They give fast results and do not need much care. Brinell testers cost more because they use optical tools and take more time for each test. Vickers testers cost the most because they use advanced optics and need careful prep.
If you work in a busy factory, a Rockwell tester like the AXE440 model is a good choice. It works for both labs and production. You can test many samples each day. Portable testers also save money. They let you test parts without moving them, which saves time and helps with quality control.
Note: Always think about how many tests you do and what kind of results you need. This helps you pick the best option for your money.
When you pick a hardness testing method, look at your material, how fast you need results, and your budget. Rockwell testers are good for routine checks and lots of work. Brinell testers are best for big, rough samples. Vickers testers give the most exact results for thin or delicate things. You get the best results by matching your needs to the right tester.
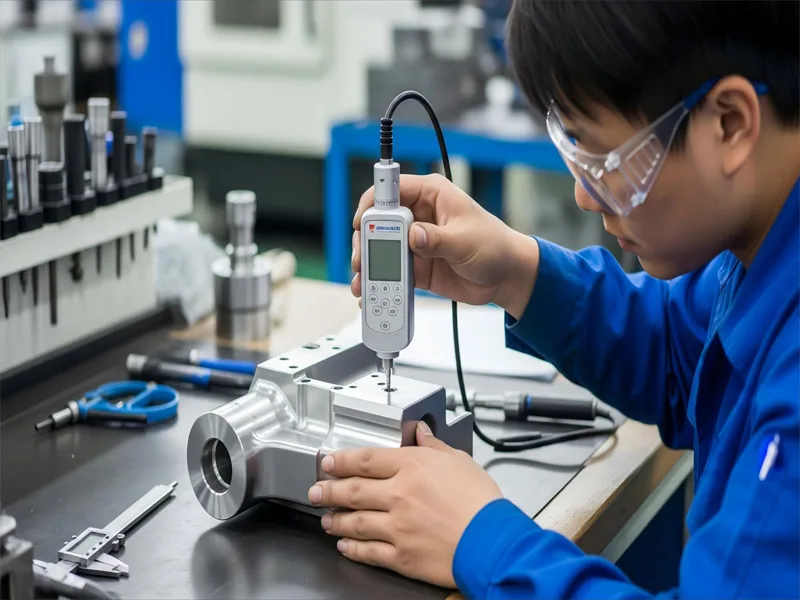
Comparing Hardness Tests
Summary Table
It helps to see the main points of each method together. The table below shows how Rockwell, Brinell, and Vickers work. You can see what materials each test works on. The table also lists the main strengths and limits. This makes it easier for you to pick the right method.
| Aspect | Rockwell Hardness Test | Brinell Hardness Test | Vickers Hardness Test |
|---|---|---|---|
| Testing Procedure | Uses a preload and bigger load with a ball or diamond indenter. It measures how deep the mark is. No microscope is needed. | Uses a heavy load and a round tungsten carbide ball. You measure the mark with a microscope. | Uses light loads and a diamond indenter. Needs a polished surface and a microscope to measure the mark. |
| Suitable Materials | Works on many metals and plastics. Good for round shapes. Not as good for very hard materials. | Good for rough and coarse surfaces. Works on ferrous and non-ferrous metals. | Good for small or thin things. Works on hard and soft materials. Used in labs. |
| Advantages | Fast test. No microscope needed. Not much affected by rough surfaces. Accurate for plastics. | Accurate for rough surfaces. Can use many loads. The round ball spreads the load. Works for many hardness levels. | Works on many materials. Uses the same diamond for all. Simple test. Good for labs. |
| Disadvantages | Has a small load range. Not as good for very hard things. Needs good contact. Dirt or flaws can change results. | Needs a microscope, which can cause mistakes. Slower test. Costs more. Takes longer to prepare. | Needs a polished surface. Needs a microscope. Slow and takes work. Load can be uneven. |
| Typical Applications | Used in factories and in the field when you need fast and easy tests. Good for plastics and metals. | Used for rough or big metal parts. Good when you need accuracy on uneven surfaces. | Used for tiny or thin samples. Good for lab work and careful checks. |
Note: Each method uses its own scale. You cannot compare the numbers without a conversion chart.
Method Comparison
You want to know when to use each test and what you get or lose. Here is a simple comparison to help you choose:
1. When to Use Each Method
- Rockwell Method
- Use this when you need fast results and easy steps.
- It works for metals, plastics, and parts that are not too rough.
- You get the number right away. No extra tools needed.
- This is best for quick checks in factories or on the line.
- Brinell Method
- Pick this for big, rough, or uneven samples.
- It is best for castings, forgings, and heavy metal parts.
- The big ball and heavy load give an average hardness for a large area.
- Use this when you want to check if thick or rough materials are even.
- Vickers Method
- Choose this for thin, small, or delicate samples.
- It is great for coatings, foils, and tiny parts.
- You get very exact results, but you need a polished surface and a microscope.
- This is common in labs, research, and quality checks for aerospace or electronics.
2. Main Trade-Offs
You need to balance speed, accuracy, and cost when you pick a tester. Here are the main trade-offs:
- Speed
- Rockwell is the fastest. You can test many samples quickly.
- Brinell is slower because you must use a microscope to check the mark.
- Vickers is the slowest. You need to prepare the sample and use a microscope.
- Accuracy
- Vickers gives the most exact results, especially for thin or small things.
- Brinell is good for rough or uneven surfaces, but not for thin samples.
- Rockwell is good for most metals and plastics, but not for very hard or soft things.
- Cost
- Rockwell testers cost less and are easy to use.
- Brinell testers cost more because of the microscope and longer test time.
- Vickers testers cost the most because they use special optics and need careful prep.
3. Material and Application Suitability
- Rockwell is good for steel, aluminum, and titanium alloys. It is great for fast checks in production.
- Brinell works best for aluminum castings, forged parts, and other big or rough materials.
- Vickers is best for coatings, foils, and special alloys. It is used for thin sections and small parts.
4. Differences in Results and Scales
Each test uses a different scale. Rockwell uses HRC or HRB. Brinell uses HB. Vickers uses HV. The numbers do not match. If you test the same thing with all three, you get different numbers. You need a chart to compare them.
Tip: Always pick the method that fits your sample, the detail you need, and how fast you need results.
5. Strengths and Limitations
- Rockwell testers are easy to move and use, but not good for very thin or delicate things.
- Brinell testers work on big, rough surfaces but cannot test thin parts.
- Vickers testers give detailed results for small or thin things, but need careful prep and cost more.
6. Quick Reference Table
| Hardness Test | Speed | Accuracy & Resolution | Cost | Best For | Main Limitation |
|---|---|---|---|---|---|
| Rockwell | Fast | High (±0.5% to ±1%) | Moderate | Metals, plastics, production checks | Not for very hard/soft or thin items |
| Brinell | Slow | Moderate | Moderate | Large, rough, or soft metal samples | Not for thin or small parts |
| Vickers | Slowest | Very High (±1 HV) | Highest | Thin, small, or coated samples; lab testing | Needs polished surface, slow process |
Remember: No single test is best for every job. Always match your choice to your sample and what you need.
You should pick the test that fits your material and project. Rockwell is good for hard metals and gives quick results. Brinell works best for rough or big samples. Vickers is best for small or thin parts. Think about how big your sample is and if the surface is smooth. Also, check what tools you have. The table below can help you choose:
| Material Type | Best Test | Why Use It |
|---|---|---|
| Hard metals | Rockwell | Fast, reliable readings |
| Coarse surfaces | Brinell | Handles uneven textures |
| Small or thin samples | Vickers | High accuracy, low loads |
Tip: Always think about what matters most—speed, accuracy, cost, or sample type—before you pick a test.
FAQ
You will see that each test uses a different indenter and method. Rockwell measures depth, Brinell uses a ball and measures the mark, and Vickers uses a diamond pyramid and a microscope.
You can use Rockwell for some hard plastics. Vickers works well for ceramics and thin coatings. Brinell is best for metals. Always check if your material matches the test method.
You get the fastest results with the Rockwell test. The machine gives you a direct reading. You do not need to measure or calculate anything.
You should always clean and flatten the sample. Vickers needs a polished surface. Rockwell and Brinell can handle minor surface flaws, but smooth samples give better results.
You should look at your material type, sample size, and how accurate you need the results. Use Rockwell for quick checks, Brinell for large rough parts, and Vickers for thin or small samples.
You cannot compare values directly. Each test uses its own scale. You need a conversion chart to match numbers from Rockwell, Brinell, and Vickers tests.
You may get false readings if your sample is too thin. Rockwell and Brinell need thick samples. Vickers works better for thin or small samples.
You need a microscope for Brinell and Vickers tests. Rockwell testers do not need extra tools. Vickers testers often cost the most because of the optical system.
Tip: Always match your test method to your sample and your accuracy needs.


