To become proficient at coloring anodized aluminum parts, you need to follow a careful process. You must care about doing things right and staying safe. Getting ready is crucial for achieving good results. You should watch every detail and use the right safety tools when you work with anodizing. It does not matter if you are new or have done this before. You can do a great job if you learn how to anodize aluminum the right way. AFI Industrial Co., Ltd. is a trusted expert in anodizing and helps you do your anodized aluminum projects well.
Key Takeaways
- Clean and get aluminum parts ready before anodizing. This helps make strong and even coatings.
- Wear safety gear like goggles, gloves, and aprons. These protect you from chemicals and electricity.
- Watch the acid bath temperature and electrical settings. This helps make a tough oxide layer.
- Pick the coloring method that works best for you. Use dye for bright colors. Use electrolytic for dark, long-lasting shades.
- Always seal anodized parts after coloring. This keeps the color in and protects the surface from harm.
- Check the oxide layer thickness with the 720 Rule. This makes sure the part wears well and the color looks good.
- Keep your workspace clean, dry, and with fresh air. This keeps you safe and helps stop accidents.
- Look at your finished parts for even color and the right thickness. Check for any surface problems to make sure they are of high quality.
Table of Contents
Anodizing Basics
What Is Anodizing
Anodizing is a way to change aluminum’s surface. First, you clean the aluminum part very well. Then, you put it in an acid bath. Electricity is used to help oxygen ions react with the metal. This makes a thick, porous oxide layer on top. The new layer is much stronger than the thin layer that forms in the air. It becomes part of the metal, not just a layer on top. After anodizing, you rinse and seal the part. Sealing closes the pores and makes the surface harder. This helps the part last longer and keeps it from rusting.
Here is a table that lists the main steps and how anodizing changes the surface:
| Step | Description |
|---|---|
| Surface Preparation | Clean the part and remove any grease or dirt. Use a base and acid to get the surface ready. |
| Anodizing Process | Put the aluminum in an acid bath. Use electricity to make a thick, porous oxide layer. |
| Coloring (Optional) | The porous layer can soak up dyes or get colored in other ways. |
| Sealing | Close the pores with hot water or chemicals. This makes the surface strong and long-lasting. |
| Surface Property Changes | Effects |
|---|---|
| Corrosion Resistance | The new oxide layer keeps the metal safe from rust and damage. |
| Wear Resistance & Hardness | The surface gets harder and does not scratch easily. |
| Aesthetic Appeal | The metal stays shiny and can have many colors. |
| Durability | The sealed layer lasts a long time and does not peel or fade. |
Why Color Aluminum

You may ask why people color anodized aluminum. Many companies do this to make parts look nice and last longer. The color becomes part of the metal during anodizing. It does not chip or peel like paint. You can pick from many colors and finishes, like shiny or matte. That is why anodized aluminum is used in cars, planes, electronics, and buildings.
- You get a strong color that stays bright.
- The surface does not fade, scratch, or get damaged by weather.
- You can match colors for design or branding.
- The color helps tell parts apart or adds style.
- The finish lasts longer than paint or powder coating.
You can choose the best color for where you will use the part, how you want it to look, and your budget. The anodizing process makes sure the color is even and meets your needs.
Coloring Methods
There are a few ways to color anodized aluminum. Each way gives a different look and strength. Here is a table to compare the main methods:
| Coloring Method | Process Description | Typical Colors Produced | Durability and Appearance Characteristics |
|---|---|---|---|
| Dye Coloring | Soak the anodized part in a dye bath. Change the color by using different dye strength, time, or temperature. | Bright reds, blues, greens, purples, browns, grays, beiges | Gives bright colors. Needs good sealing to last. Not as strong if not sealed well. |
| Electrolytic Coloring | Use electricity and metal salts to fill the oxide pores with color. | Yellow, red, green, blue, black | Very strong. Good for outdoor use. Does not fade or rust easily. |
| Overall Coloring | Control the alloy and process to make metallic luster colors. | Golden bronze, dark bronze | Makes shiny, metallic colors. Strength depends on the anodizing type. |
| Interference Coloring | Change the oxide layer thickness to make special effects. | Blue-gray, rainbow hues | Gives unique, shifting colors. Strength is like the anodized layer. |
Tip: Always seal the anodized layer after coloring. Sealing keeps the color in and protects the surface from damage.
Preparation Steps
Workspace Setup
You need to get your workspace ready before you start. Pick a place with lots of fresh air. Good airflow helps get rid of fumes. This keeps the air safe for you. Do not work near fire or flames. Anodizing makes hydrogen gas, which can burn fast. Make sure your area is clean and dry. Use tables or counters that do not conduct electricity. This helps stop electrical accidents. Put down sheets to catch any spills. Rinse and dry your parts after every step. This keeps your space safe and your work neat.
Tip: Having good airflow keeps you safe from fumes. It also helps keep the bath at the right temperature and chemical level.
Safety Gear

You must stay safe when you work with anodizing. Always wear the right safety gear. You need safety glasses or goggles to protect your eyes. Wear gloves that keep out chemicals, like rubber or nitrile. An apron keeps your skin and clothes safe. Use a respirator mask if you use strong acids or if the air is not good. These things help stop burns and breathing problems.
Note: Always be careful and follow safety rules. Turn off and unplug your power before you set up or change anything. Keep your workspace dry so you do not get shocked.
Here is a table to help you remember what to wear:
| Protective Gear | Purpose |
|---|---|
| Safety goggles | Protects eyes from acid splashes |
| Chemical-resistant gloves | Shields hands from chemicals |
| Apron | Guards skin and clothes |
| Respirator mask | Blocks harmful fumes |
Wearing the right gear keeps you safe. It also helps you do a better job with anodizing.
Cleaning and Surface Prep

Before you start anodizing, you must clean and prepare the aluminum surface. This step is very important. If you skip it or do it poorly, the anodizing layer may not stick well. You could see spots, streaks, or weak color. Good cleaning helps you get a strong, even finish.
Degreasing
Start by removing all grease, oil, and dirt from the aluminum part. You can soak the part in a mild detergent or a commercial degreaser. These solutions break down oils and organic soils that come from handling or machining. After soaking, rinse the part with hot water. This step washes away any leftover cleaner and dirt. Specialized cleaning agents or alkaline solutions work best for degreasing. They remove oils and grease without leaving residue. If you leave any oil or dirt, the anodizing process will not work well. You may see poor color or weak spots on the finished part.
Tip: Always use clean gloves when you handle parts after degreasing. This keeps new oils from getting on the surface.
Acid Pickling
After degreasing, you need to remove the thin oxide layer and any stains. This step is called acid pickling. You place the aluminum part in an acid bath. The most common acids for pickling are sulfuric acid, nitric acid, and hydrochloric acid. Each acid helps clean the surface differently.

| Acid Used | Effect on Aluminum Surface Quality |
|---|---|
| Sulfuric Acid | Reacts with oxide layers to form soluble aluminum sulfate and water; breaks down oil stains for a clean surface. |
| Nitric Acid | Dissolves surface oxides and contaminants, making the part very clean. |
| Hydrochloric Acid | Removes oxide layers and oils, improving the surface for anodizing. |
You must control the acid strength, temperature, and time. If you use too much acid or leave the part in too long, you can damage the surface. If you do not pickle enough, the anodizing layer may not form well. Always follow safety rules when you work with acids.
Rinsing and Drying
After acid pickling, rinse the part with clean water. Rinsing removes any leftover acid and dirt. Use deionized water if you can. This keeps the part free from minerals and spots. Pay special attention to blind holes and threads. These areas can trap water or chemicals. Blow them out with air or use a spray bottle to flush them. Dry the part right away. You can stack parts on towels or hang them so water drips off. Make sure the part is fully dry before you start anodizing. If you leave water or chemicals, you may see spots or poor color after anodizing.
- Rinse with clean water after each step.
- Use deionized water for best results.
- Blow out blind holes and threads.
- Dry parts on absorbent towels or racks.
- Check for water spots before moving to anodizing.
Note: Good rinsing and drying help you get a smooth, even anodized finish. Skipping these steps can lead to defects that are hard to fix later.
How to Anodize Aluminum
Electrolyte Bath
You need to get the electrolyte bath ready before you start. The bath is a special liquid that helps make the oxide layer on aluminum. Most people use sulfuric acid mixed with water for this. Always measure the acid and water carefully. If you use too much acid or water, the oxide layer may not form right.
AFI Industrial Co., Ltd. uses special machines to control the bath’s mix and temperature. This makes sure every part looks the same and has a good finish. The table below shows how different bath temperatures change the anodizing process:
| Temperature Range | Impact on Anodizing Process | Characteristics of Oxide Film Layer |
|---|---|---|
| Below 10°C | Slower reaction rate | Thicker layer but poor adhesion |
| 10°C to 20°C | Optimal conditions | Strong adhesion and good porosity |
| Above 20°C | Increased dissolution | Thin layer with poor durability |
Keep the bath between 10°C and 20°C for best results. This gives you a strong oxide layer that holds color well. If the bath is too cold, the layer gets thick but does not stick well. If it is too warm, the layer is thin and weak.
Some factories add things like orthophosphate salts or glycerine to the bath. These help stop the bath from drying out and make the oxide layer better. For most jobs, just using sulfuric acid and water works fine.
Tip: Always use plastic or glass tanks for your bath. Metal tanks can react with the acid and cause trouble.
Electrical Setup
You need electricity to start anodizing. The power supply sends direct current (DC) through the bath. This helps build the oxide layer on the aluminum. Connect the positive side of the power supply to the aluminum part. This makes the part the anode. The negative side goes to the cathode, which is usually lead or graphite.
Here is a simple way to set it up:
- Use a power supply that lets you change voltage and current.
- Attach the aluminum part to the positive side.
- Attach the cathode to the negative side.
- Put both in the bath, but do not let them touch.
AFI Industrial Co., Ltd. uses machines to control voltage and current. This keeps the process steady and easy to repeat. The table below shows the best electrical settings:
| Anodizing Type | Voltage (V) | Current Density | Electrolyte Concentration | Temperature Range |
|---|---|---|---|---|
| Standard Anodizing | 12 – 18 | Controlled within range | Sulfuric acid 15-20% (volume) | 20°C to 25°C |
| Hard Anodizing | 40 – 100 | Controlled within range | Sulfuric acid 15-40% (volume) | -5°C to 5°C |
Keep the voltage steady while anodizing. If the voltage changes a lot, the oxide layer may not form evenly. Always check your wires before turning on the power.

Note: Never touch the bath or wires when the power is on. Always turn off the power before you change anything.
Anodizing Process
Now you can start anodizing. This step builds the protective oxide layer on the aluminum. You need to follow each step to get good results.
- Hang the clean aluminum part on a rack or wire. Make sure it is fully under the liquid in the bath.
- Put the cathode in the bath, across from the aluminum part.
- Turn on the power supply. Set the voltage and current to the right numbers for your project.
- Look for bubbles on the cathode. This means the reaction has started.
- Leave the part in the bath for the right time. Most parts need 30 to 60 minutes. The time depends on how thick you want the layer.
- When you finish, turn off the power and take the part out of the bath.
- Rinse the part with distilled water to wash off any acid.
AFI Industrial Co., Ltd. uses ultrasonic cleaning and machines to control the process. This removes tiny dirt and keeps the oxide layer even. Their team checks each part for thickness and hardness.
Tip: Always rinse your part after every step. This stops acid from staying on the part and causing problems.
Here are the main steps for anodizing:
- Clean and get the aluminum part ready.
- Set up the bath and connect the wires.
- Start anodizing by turning on the power.
- Watch the process and keep the temperature steady.
- Rinse and check the part after anodizing.
Learning to anodize aluminum takes practice. You must control the bath, electricity, and time to get a strong, colorful finish. With careful work, you can get results like AFI Industrial Co., Ltd.

Monitoring Thickness
When you learn how to anodize aluminum, you must pay close attention to the thickness of the oxide layer. The thickness affects how strong, durable, and colorful your finished part will be. If the layer is too thin, the part may not resist wear or corrosion. If it is too thick, the surface can become brittle or lose color quality.
You can use a simple rule called the 720 Rule to help you control the thickness during anodizing. This rule gives you a way to predict how long you need to run the process to get the right film thickness. Here is how the 720 Rule works:
- The 720 Rule says that 720 ampere-minutes for each square foot of aluminum will create a 1 mil (0.001 inch) thick oxide layer.
- You keep the current density steady during anodizing. This lets you use a formula to find out how long to run the process:
Time (minutes) = (720 × Thickness in mils) ÷ Current Density (Amps/ft²) - This formula helps you plan and control the thickness by linking the current and the time.
- You must keep the current density constant. If you see changes, adjust the voltage to bring it back to the right level.
- Watch the current and temperature during the whole process. This helps you use the 720 Rule correctly and get the thickness you want.
- The 720 Rule works best when you keep the current steady and the bath temperature stable. If these change, your results may not match your plan.
- Using this rule makes it easier to plan your work and check the quality of your anodizing.
Tip: Always measure the surface area of your aluminum parts before you start. This helps you set the right current and time for the process.
AFI Industrial Co., Ltd. uses advanced machines to monitor thickness in real time. Their automated lines and quality control tools check every part for the right oxide layer. You can use thickness gauges or test strips at home to check your results. If you want to master how to anodize aluminum, you must learn to monitor and control the thickness every time.
A table can help you see how changing the current or time affects the final thickness:
| Desired Thickness (mil) | Current Density (Amps/ft²) | Required Time (minutes) |
|---|---|---|
| 0.5 | 12 | 30 |
| 1.0 | 12 | 60 |
| 1.5 | 12 | 90 |
If you want a thicker layer, you increase the time. If you want a thinner layer, you use less time. Always check your parts after anodizing to make sure you reached your goal.
Note: Good thickness control gives you better color, longer life, and stronger protection for your anodized aluminum parts.
Coloring Process

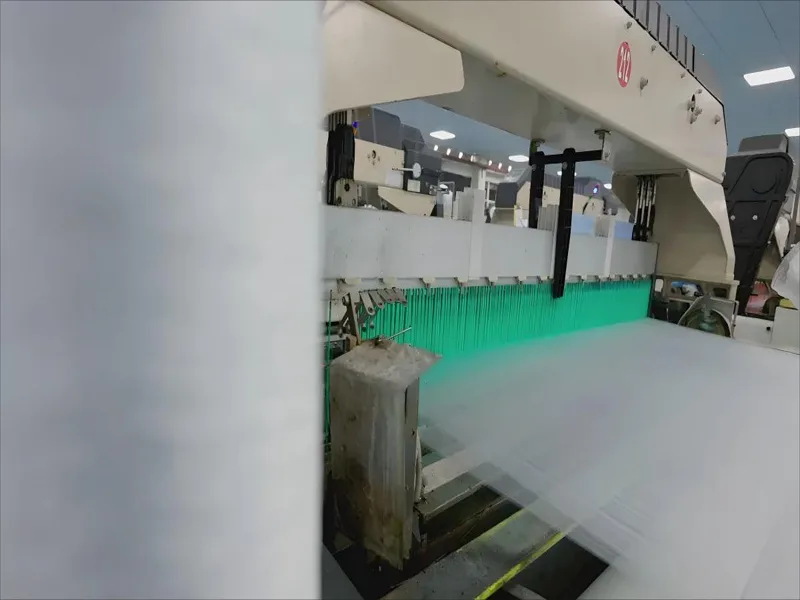
Dye Coloring
You can use dye coloring to add bright and vivid colors to anodized aluminum parts. After you finish the anodizing step, the surface has tiny pores. These pores soak up the anodizing dye like a sponge. You place the part in a warm dye bath. The dye fills the pores and gives the metal its color.
You can choose from many different dyes. Most people use organic dyes because they offer a wide range of colors. However, organic dyes do not last as long in sunlight or heat. They can fade if you use the part outside or in hot places. Some red dyes last longer than others, but you should always check the dye’s rating before you pick one. If you want the color to last, you need to seal the part after dyeing. Hot nickel acetate sealing works well to keep the dye from washing out or fading.
- Organic dyes give you many color choices but may fade in sunlight or heat.
- Inorganic pigments and metal salt dyes last longer and resist fading.
- Black anodized parts keep their color best when you use inorganic or metal salt dyes.
- Sealing the part after dyeing is very important for color durability.
- Thicker anodized layers hold dye better and help the color last longer.
Tip: If you want your anodized part to keep its color outdoors, pick inorganic dyes or use the electrolytic coloring process.
Electrolytic Coloring

You can use the electrolytic coloring process to make anodized aluminum parts with strong, fade-resistant colors. This method works in two steps. First, you anodize the aluminum to create a porous oxide layer. Next, you place the part in a bath with metal salts, such as tin, cobalt, or nickel. You apply an alternating current to the bath. The current moves metal ions into the pores of the oxide layer.
This process creates colors that range from bronze to black. Tin is the most common metal used for this method. The color depends on how much metal goes into the pores and how long you keep the part in the bath. Electrolytic coloring gives you colors that do not fade easily in sunlight. This makes it a good choice for outdoor or high-use parts.
You must control the voltage, bath composition, and time to get even color. Factories use special machines to keep these settings steady. You can use tin, nickel, or cobalt electrodes to add the right metal ions to the bath.
Note: Electrolytic coloring works best for bronze, brown, and black shades. It gives you excellent UV resistance and long-lasting color.
Immersion and Timing
The time you leave your part in the dye or coloring bath changes how the final color looks. Longer immersion lets more dye or metal ions fill the pores. This makes the color deeper and richer. Shorter times give you lighter shades.
Several things affect the final color intensity:
- The thickness of the anodized oxide layer
- The time you keep the part in the dye or coloring bath
- The strength of the dye or metal salt solution
- The power level during electrolytic coloring
If you want a strong, even color, you must control these factors. For most anodizing projects, you keep the current steady for about 45 minutes. This builds a thick, uniform oxide layer. As you increase the immersion time, you see the color change from light to dark. You can watch the part and stop when you reach the shade you want.
Tip: Always test a sample part first. This helps you find the right time and settings for your desired color.

A table can help you see how immersion time affects color intensity:
| Immersion Time (minutes) | Color Intensity |
|---|---|
| 5 | Light shade |
| 15 | Medium shade |
| 30 | Deep, rich shade |
| 45+ | Very dark or black |
You can adjust the time and solution strength to get the exact color you want. Careful timing gives you consistent results every time you anodize and color aluminum parts.
Color Options
When you color anodized aluminum, you have many choices. You can pick colors like blue, red, black, or gold. The color goes into the metal, not just on top. This makes the finish strong and helps it last a long time. The color will not peel or fade fast.
The kind of anodizing you use changes your color options. Type II anodizing uses sulfuric acid and makes a thin, porous layer. This layer soaks up dye well. You can get bright colors with this method. Type III anodizing is called hard coat. It makes a thick layer that is less porous. This gives you darker colors and great wear resistance. But some colors are not as bright. Type I anodizing uses chromic acid. It only gives you a few color choices.
Here is a table to compare the main types of anodizing and their color features:
| Property | Type I (Chromic Acid) | Type II (Sulfuric Acid) | Type III (Hard Coat) |
|---|---|---|---|
| Color Absorption | Minimal | Good | Excellent |
| Color Range | Limited | Wide | Wide |
| Coating Thickness | Thin | Moderate | Thick |
| Wear Resistance | Poor | Good | Excellent |
| Decorative Options | Limited | Varied | Varied |
You can also pick different ways to add color. Dye coloring gives you the most bright colors. Electrolytic coloring makes deep blacks and bronzes that last long. Interference coloring creates rainbow effects that change with the light. Integral coloring puts color inside the anodic layer, but you only get dark shades.
Many things can change the final color. The type of aluminum alloy matters. The surface finish and process settings also make a difference. A shiny part looks brighter. A matte part looks softer. The temperature and current during anodizing change the color, too. Even how you seal the part can affect how strong and long the color lasts.
Tip: If you want a certain color or need to match parts, work with an expert. They can help you get the right shade and keep your results the same every time.
Think about where you will use the part. Some dyes fade in sunlight. Pick a dye that does not fade if the part will be outside. Always test a sample before you start a big job. This helps you see what the color will look like.
Sealing and Finishing
Rinsing
When you finish coloring your anodized aluminum part, you must rinse it well. Rinsing gets rid of any extra dye or chemicals on the surface. Use clean, distilled water for this job. Make sure you rinse every spot, even small holes and corners. If you leave dye or acid, it can make stains or weaken the finish. You can dip the part in water or use a gentle spray. Dry the part with a soft cloth or let it air dry before the next step.
Tip: Rinse after every stage of anodizing. This stops mixing of chemicals and keeps your finish clean.
Sealing Methods
Sealing is an important step in anodizing. You need to close the tiny pores in the oxide layer to keep the color and protect the surface. If you skip sealing, the color can fade, and the part may not fight off rust.
You can seal anodized aluminum in a few ways:
- Put the part in hot water. The heat closes the pores.
- Use a nickel acetate solution. This also closes the pores and gives more protection.
- Steam sealing is another way. The steam shuts the pores and keeps the dye inside.
Sealing makes your anodized part last longer. It helps the surface fight stains, weather, and damage from the environment. You also get better rust protection, and the color stays bright. Many people use an anodizing sealant for the best results. This helps make sure the pores close all the way and the finish lasts longer.
Note: Always seal your anodized aluminum right after coloring. This step is needed for a strong and lasting finish.
Final Inspection
You should always check your finished part before using it. Checking helps you find problems early and makes sure you have good quality. Look for even color and a smooth surface. Check for scratches, dents, or spots that could hurt how the part looks or works.
Here are some common steps for checking:
- Measure the thickness of the oxide layer. This makes sure the coating protects the part.
- Test if the seal is good. Some tests use special tools to see if the pores are closed.
- Check if the color looks the same everywhere.
- Look for surface problems. Use your eyes or a magnifier to find cracks or spots.
- Test if the oxide layer sticks well to the aluminum.
- Do a salt spray test if you need to check for rust in tough places.
- Write down your inspection results. Good records help you track quality and meet rules.
Careful checking gives you trust in your anodizing work. You can be sure your colored aluminum parts will last and look nice.
Safety and Quality
Chemical Handling
You need to be careful with all chemicals in anodizing. Pick alloys that do not have many impurities. This helps stop rust and problems. Only use the chemicals you really need. Never mix things if you do not know what they are. Choose chemicals that are not toxic for cleaning and coloring. Stay away from hexavalent chromium because it is bad for nature.
Here are some good ways to handle chemicals:
- Wear gloves, goggles, and an apron to keep safe.
- Work where the air moves well so fumes go away.
- Use sulfuric acid at the right strength, between 10% and 30%.
- Rinse parts well after anodizing to wash off acid.
- Seal the surface in hot water or nickel acetate to close pores.
- Recycle or make waste acids safe before throwing them out.
- Keep chemicals in a dry, safe spot away from heat or fire.
Take care of all waste the right way. Try to recycle aluminum hydroxide and sulfuric acid if you can. Make leftover acid safe before you get rid of it. Always follow your town’s rules for throwing out chemicals. These steps keep you and the Earth safe.
Tip: Clean the metal before you put on masking. Test masking tape to see if it stands up to chemicals. Take off masks slowly so you do not scratch the part.
Electrical Safety
You use electricity when you anodize, so be careful. Always wear the right safety gear. This means face shields, rubber gloves, goggles, and boots. Make sure your gear fits and is easy to clean.
Here are steps for staying safe with electricity:
- Read the Safety Data Sheets for all chemicals and tools.
- Keep your work area dry and neat.
- Never touch wires or tanks when power is on.
- Use tanks that do not carry electricity and the right cathodes, like lead or stainless steel.
- Turn off all machines before fixing anything.
- Only use machines if you know how.
- Never take off safety covers from machines.
- If there is a spill or fire, use the right way to clean it. Do not use water on electrical fires.
Keep your hands clean and pay attention while you work. Good habits help stop accidents and keep your workspace safe.
Note: Make sure your work area has good airflow. This keeps you safe from fumes and electric dangers.
Quality Checks
Quality checks help make sure your anodized aluminum parts last and look nice. At AFI Industrial Co., Ltd., workers check quality at every step. They use special tools to test how thick, hard, and tough the coating is. At home, you can use simple tools like thickness gauges or test strips.

Here is a table of common quality checks:
| Quality Check | What It Measures | Why It Matters |
|---|---|---|
| Thickness Test | Oxide layer depth | Makes sure the part is protected and colored right |
| Hardness Test | Surface strength | Checks if the part can resist wear |
| Adhesion Test | Bond to base metal | Stops the coating from peeling or flaking |
| Color Uniformity | Evenness of color | Makes the part look better |
| Sealing Test | Closed pores | Keeps color from fading and stops rust |
Write down your results for each group of parts. This helps you find problems early and keep your work steady. If you do these checks, your anodized parts will be strong, colorful, and last a long time.
Troubleshooting
Common Issues
Sometimes, problems happen when you anodize and color aluminum parts. These problems can change how your part looks or how strong it is. If you know what can go wrong, you can stop mistakes before they start. Here is a table that lists the most common problems, why they happen, and how to stop them:
| Common Issue | Cause/Description | Prevention Method/Strategy |
|---|---|---|
| Improper Surface Cleaning | Oil, grease, or chemical residues left on the surface | Use multi-stage cleaning, fresh solutions, and water break tests |
| Incorrect Electrical Contact | Loose or dirty contact points | Ensure tight, clean contacts and monitor connections |
| Poor Racking Techniques | Parts arranged poorly, causing uneven current | Use proper racking for uniform current flow |
| Wrong Process Parameters | Incorrect voltage, current, or acid concentration | Adjust and control all process settings |
| Inadequate Solution Control | Bath pH or temperature not controlled | Monitor and adjust bath chemistry and temperature |
| Improper Sealing Practices | Sealing step skipped or done incorrectly | Follow correct sealing procedures |
| Masking Failures | Masking tape or material fails | Use proper masking materials and techniques |
| Wrong Anodizing Type Selection | Using the wrong anodizing type for your alloy | Choose the right anodizing type for your material and use |
| Insufficient Quality Inspection | Not checking for defects early | Inspect parts at every stage |
| Improper Post-treatment Handling | Rough handling after anodizing | Handle and store parts carefully |
Tip: Check your work after each step. Small mistakes can turn into big problems if you do not catch them early.
Fixing Color Problems
If your part has color problems, you can fix them by following some easy steps. Color problems often happen if the oxide layer is too thin, the part is not clean, or the dye is not right. Here is what you should do:
- Make sure the oxide layer is thick enough. Try to get at least 0.0005 to 0.001 inches.
- Pick the right dye and use the right amount for your color and coating thickness.
- Keep the dye bath pH between 3.5 and 6 so the dye works well.
- Clean and rinse your parts well before and after anodizing. This helps stop streaks or spots.
- Hang your parts so the current flows evenly. This helps the coating look the same everywhere.
- If you see color problems, take off the old coating and anodize the part again. Do not paint over it.
- If there is no color or the color is bad, use new dye and color the part right after anodizing.
- If only part of the part has color, clean off oil and hang the parts better.
- If the color is too light or faded, use more dye or leave the part in the dye longer.
Note: Always test a sample part before you do a big batch. This helps you find problems before you make a lot of parts.
Maintenance Tips
Taking care of your anodizing tools helps you get good results every time. Clean racks and tools after you use them. Wipe racks dry so they do not rust. Wash them with mild soap and water. Dry them well before you put them away. Put a little oil on them to keep water away.
Check your racks and tools for rust or damage often. Store them in a dry, clean place. Use covers to keep dust off. Put racks on shelves so they do not touch the floor or scratch each other.
You should also watch your process settings. Check voltage, current, temperature, and acid levels often. Keep these in the right range to stop problems like pitting or color changes. Follow a regular schedule to take care of your machines. Clean nozzles, drain tanks, and check fasteners. These steps help your tools last longer and keep your anodized parts looking good.
Tip: Good care and careful checks help you stop mistakes and keep your anodizing process working well.
Quick Checklist
This checklist helps you color anodized aluminum parts step by step. Follow each part to get strong, bright, and long-lasting results.
🛠️ Preparation
- Work in a place with lots of fresh air.
- Get all your tools and supplies before you begin.
- Put on safety goggles, gloves, an apron, and a mask.
- Keep your workspace dry and clean at all times.
🧼 Cleaning and Surface Prep
- Clean the aluminum part with a gentle soap or degreaser.
- Rinse it well with clean, distilled water.
- Put the part in an acid bath to take off old oxides.
- Rinse and dry the part fully before the next step.
⚡ Anodizing
- Mix sulfuric acid and water for the electrolyte bath.
- Set up wires: the aluminum part is the anode, the lead or graphite is the cathode.
- Put the part in the bath and turn on the power.
- Watch the temperature and current while you work.
- Use the 720 Rule to make the oxide layer the right thickness.
- Rinse the part with distilled water after this step.
🎨 Coloring
- Pick the dye or electrolytic coloring that fits your needs.
- Put the anodized part in the dye or coloring bath.
- Change how long you leave it in to get the color you want.
- Rinse the part well after you finish coloring.
🔒 Sealing and Finishing
- Seal the colored part in hot water or nickel acetate to close the pores.
- Rinse and dry the part after sealing it.
- Check the part for even color, smoothness, and the right thickness.
✅ Safety and Quality
- Always be careful with chemicals and wear your safety gear.
- Keep electrical tools dry and check wires before using them.
- Throw away waste chemicals the right way and follow local rules.
- Write down your settings and inspection notes for every batch.
Tip: Try your process on a sample part first. This helps you see if everything works and stops big mistakes.
| Step | Key Action | Safety Reminder |
|---|---|---|
| Preparation | Set up workspace and gear | Wear goggles and gloves |
| Cleaning | Degrease, pickle, rinse, dry | Use chemicals safely |
| Anodizing | Bath setup, power on, watch | Never touch live wires |
| Coloring | Dye or electrolytic coloring | Rinse after coloring |
| Sealing | Hot water or nickel seal | Watch out for steam burns |
| Inspection | Check color, thickness, finish | Handle parts gently |

Keep this checklist close every time you work on anodized aluminum. If you follow each step, you will get better results and stay safe.
You can learn to color anodized aluminum if you follow each step carefully. First, make sure the surface is clean and ready. Next, control your anodizing settings to get a good oxide layer. Pick the right dye and seal the part to keep the color strong. Always wear safety gear to protect yourself. Check your work as you go. Use the checklist for every project you do. The more you practice, the better your results will be. If you need help or have a big job, AFI Industrial Co., Ltd. can do professional anodizing for you.
FAQ
You should use a degreaser or mild soap with warm water. Scrub the part with a soft brush. Rinse it well with distilled water. Dry it completely before starting the anodizing process.
Most aluminum alloys work well for anodizing. Alloys with high copper or silicon may not give the best results. Always check the alloy type before you start your project.
Pick a dye made for anodizing. Choose a color that matches your needs. For outdoor use, select dyes that resist fading. Always test the dye on a sample part first.
Uneven color often means the surface was not clean or the oxide layer is not even. Make sure you clean the part well and control the anodizing time and current.
If you seal the part well, the color can last for many years. Outdoor parts may fade faster if you use dyes that are not UV-resistant. Sealing helps protect the color.
Yes, you can strip the anodized layer using a caustic solution. After removing the old layer, you can re-anodize and re-color the part. Always wear safety gear when stripping anodized coatings.
Always wear goggles, gloves, and an apron. Work in a place with good airflow. Never touch wires or tanks when the power is on. Handle all chemicals with care and follow local disposal rules.


