Do you want a better surface finish on your parts after CNC turning? It is essential to use a tool made of the correct material. Check if the tool is worn out. Change cutting settings if needed. Ensure the lathe is properly aligned. Hold the workpiece steady during taper turning. Stop vibration by making the machine stronger. Use coolant on the taper turning area. Select the most effective method for adding lubrication. A good surface finish on taper parts means better product quality. It also makes customers happy. AFI Industrial Co., Ltd. uses advanced CNC turning machines. They check their work carefully. This helps them get great taper turning results in every CNC project.
Key Takeaways
- Pick the best tool material and shape for your workpiece. This helps you get a smooth taper surface. Keep your tools sharp and change them when they get old. This stops rough finishes and problems. Ensure your machine and workpiece are properly aligned. This helps stop shaking and uneven cuts. Stop vibration by using strong tool holders. Support long or thin parts the right way. Set cutting speed, feed, and depth of cut to lower numbers. This gives you a smoother surface finish. Use the right coolant and put it right on the cutting area. This helps lower heat and friction. Program your CNC lathe with smooth tool paths. Use compensation to keep your taper accurate. Do regular maintenance and train operators well. This keeps your taper turning process
- steady.
Table of Contents
Tool Choice in CNC Taper Turning
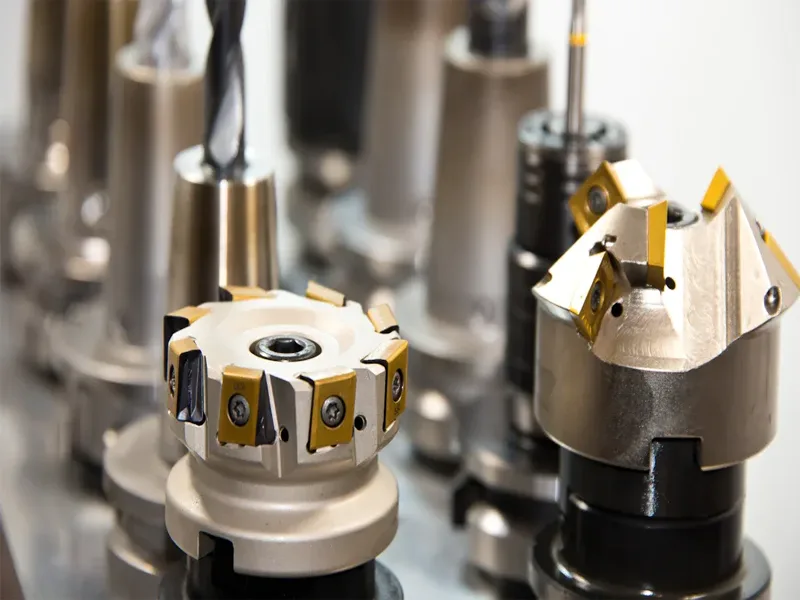
Choosing the right tool is one of the most important steps for getting a smooth surface in taper turning. You need to think about the tool material, the shape of the tool, and how much the tool has worn down. Each of these factors can change the way your taper looks and feels after turning.
Tool Material
Start by picking a tool material that matches the part you want to make. Harder tool materials, like carbide or coated carbide, last longer and keep a sharp edge during taper turning. These tools work well for tough metals such as steel or titanium. For softer materials, like aluminum or plastics, you can use high-speed steel. Using the right tool material helps you avoid tool wear and keeps the surface of your taper smooth. AFI Industrial Co., Ltd. uses advanced tool materials and coatings to make sure every taper turning job meets strict quality standards.
Tool Geometry
The shape of your tool affects how the taper surface turns out. You should pay close attention to the nose radius and the rake and clearance angles.
Nose Radius
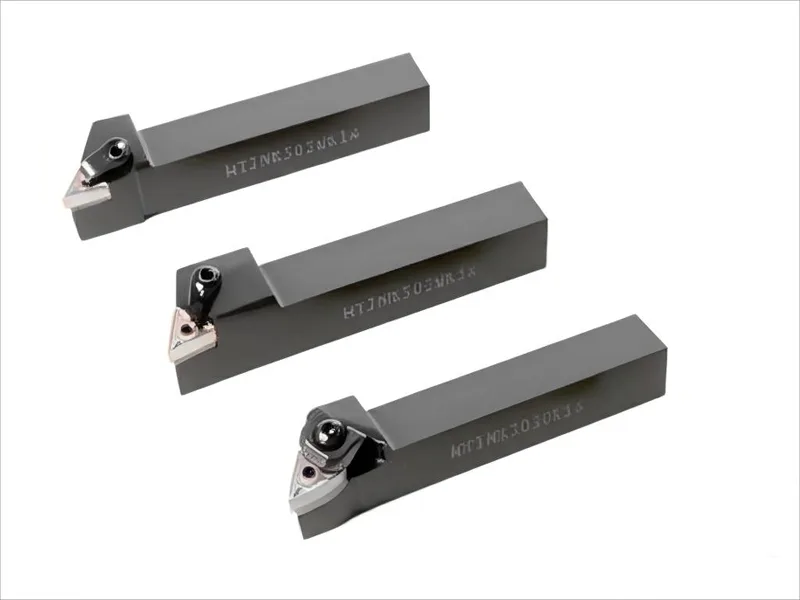
The nose radius is the rounded tip of your turning tool. A moderate nose radius, around 0.4 to 0.5 mm, gives you the best surface finish for most taper turning jobs. If you use a nose radius that is too large, you might see more tool chatter and a rougher surface. If the nose radius is too small, the tool can dig into the part and leave marks. The table below shows how nose radius affects surface finish:
| Nose Radius (mm) | Effect on Surface Finish | Observations |
|---|---|---|
| 0.3 – 0.5 | Optimal surface finish | Reduced tool chatter, smoother taper surface |
| > 0.5 | Increased surface roughness | More run out, rougher taper, possible chatter |
Rake and Clearance
The rake angle is the tilt of the cutting edge. A positive rake angle, such as 20°, 30°, or 40°, helps the tool cut more smoothly. This reduces cutting forces and makes the chip flow better. When you use a positive rake angle, you get a smoother taper surface. The clearance angle keeps the tool from rubbing against the part. Enough clearance prevents heat build-up and keeps the taper surface clean.
Tool Wear
Tool wear happens when the cutting edge gets dull from use. As the tool wears down, the surface finish of your taper gets worse. You might see scratches, rough spots, or even damage to the part. You can slow down tool wear by using coated tools and the right coolant. Regularly check your tools for signs of wear, like changes in cutting sound or visible dullness. Advanced shops, like AFI Industrial Co., Ltd., use both direct and indirect methods to monitor tool wear. They use optical systems and sensors to catch wear early and keep every taper turning job consistent.
Tip: Always inspect your tool before starting a new taper turning job. Replace worn tools right away to keep your surface finish high.
By choosing the right tool material, geometry, and keeping your tools in good shape, you can improve the surface finish of every taper you turn. AFI’s use of advanced tooling and strict inspection helps them deliver top-quality taper turning results for every CNC project.
Machine Setup for Taper Turning
Getting your machine ready is very important for a smooth taper surface. You need to check alignment, vibration, and the spindle and chuck quality. Each setup step can change how your taper looks in the end.
Alignment
You must line up the workpiece and tool very carefully. When you clamp the part, make sure it is straight and does not shake. Pneumatic or hydraulic clamps help spread force evenly. This lowers the chance of bending or shaking while turning. Using automatic clamps can make machining more accurate by 15%. It can also make setup faster by 40%. Sensor-based clamps let you change force while you work. This keeps the part steady and helps the taper look better.
Tip: Always watch for bending in thin parts. Even small moves can make the surface rough or the shape wrong.
Good alignment stops the tool and part from moving too much. This keeps cutting forces even and makes the taper smoother and more accurate.
Vibration Control
Vibration is a big problem in taper turning. If the machine shakes, the taper will have marks and rough spots. You can stop vibration by making the setup stronger and holding the part well.
Rigidity
A strong setup means less shaking when you turn. Use tough tool holders and make sure the lathe bed is firm. Some shops use special holders that soak up vibration. These holders let you cut faster and get a smoother taper. They also help tools last longer.
Workpiece Support
Long or thin parts need extra help. Use a tailstock or steady rest to keep the part from bending. This stops the part from shaking or moving during turning. Good support means fewer marks and a nicer finish on your taper.
Note: Changing the tool path or using low-frequency vibration can help break chips and make the surface smoother. These methods change how the tool moves and help the taper look better.
Spindle and Chuck
The spindle and chuck hold your part while you turn the taper. Their quality and setup matter a lot for the surface finish. A steady spindle keeps the part spinning straight. This is important for tight sizes and smooth tapers. Hydraulic chucks hold the part tight and are easy to change. Collets are best for small or very exact parts because they hold them very well. For long parts, use a tailstock to stop bending and shaking.
Here is a table that shows how each part affects the surface finish in taper turning:
| Component | Influence on Surface Finish and Quality | Example/Details |
|---|---|---|
| Spindle | Keeps rotation stable and concentric | Tolerance within ±0.01 mm |
| Chuck | Holds part firmly, reduces runout | 3-jaw hydraulic chuck: ≤0.03 mm TIR |
| Collets | Best for small, precise tapers | Concentricity within 0.01 mm |
| Tailstock | Supports long tapers, stops bending | Needed for parts >200 mm |
| Bed | Adds rigidity, cuts vibration | Surface roughness below 3.2 μm Ra |
| Monitoring | Tracks vibration, keeps finish high | Surface finish Ra ≤ 0.4 μm, tolerance ±0.005 mm |
AFI Industrial Co., Ltd. uses advanced lathes with very accurate spindles and chucks. They check their work to make sure every taper turning job meets high standards. You can use these steps to get a better surface finish in your taper turning work.
Cutting Parameters in CNC
Setting the right cutting parameters is key to getting a smooth surface in taper turning. You can control the finish by adjusting speed, feed, and depth of cut. Each setting changes how the tool moves across the taper and how the material reacts during turning. When you understand these factors, you can make better choices for your taper turning projects.
Speed and Feed
You should always start by checking your speed and feed settings. Speed means how fast the lathe spindle turns. Feed is how quickly the tool moves along the taper. If you use a high speed or a fast feed, you can remove more material, but the surface may turn out rough. Lower speeds and slower feeds usually give you a finer finish on your taper.
Experimental studies show that the best surface finish comes from using lower speeds and feeds. For example, a spindle speed of about 1686 revolutions per minute and a feed rate of 10.6 micrometers per revolution produced a very smooth surface, with roughness as low as 0.031 micrometers. If you increase the feed too much, you will see more marks and rough spots on the taper. Feed rate has the biggest effect on surface roughness, so always adjust it carefully.
Tip: Start with a lower feed rate when you want a smooth finish on your taper. Increase speed only if you need to save time and the surface quality is still good.
Depth of Cut
Depth of cut is how deep the tool goes into the material during each pass. A smaller depth of cut helps you get a better finish on your taper. If you use a large depth of cut, the tool may push too hard and leave marks or even cause vibration. For finishing passes, use a light depth of cut. This will help you avoid tool deflection and keep the taper surface smooth.
You can use a table like this to guide your choices:
| Parameter | Roughing Pass | Finishing Pass |
|---|---|---|
| Speed (rpm) | Medium to High | Low to Medium |
| Feed (mm/rev) | Higher | Lower |
| Depth of Cut | Deeper | Shallow (light cut) |
Taper Profiles
Different taper profiles need different settings. If you work with a steep taper, you may need to slow down the feed and use a lighter depth of cut. For long, gentle tapers, keep the tool steady and avoid sudden changes in direction. Here are some best practices for taper turning:
- Use sharp inserts and positive rake angles to reduce cutting forces.
- Choose a higher lead angle, like 45 degrees, to get a smoother finish.
- Make sure your toolholder is rigid to stop vibration.
- Roll into and out of cuts smoothly to avoid marks on the taper.
- Avoid stopping the tool while it touches the workpiece, as this can leave marks.
- Try wiper inserts or round inserts for a better finish on the taper.
AFI Industrial Co., Ltd. uses advanced CNC machines and smart control systems to set the best parameters for each material and taper profile. Their team checks every setting to keep tolerances tight and surfaces smooth, no matter the size or shape of the taper.
Coolant and Lubrication
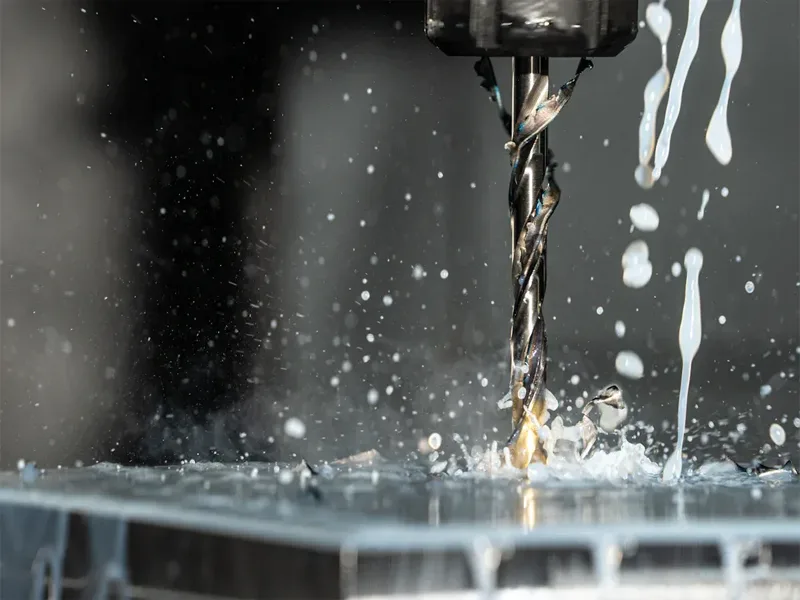
If you want a smoother surface in taper turning, you need to use the right coolant and lubrication. Picking the best coolant and using it well can really help your finished part look better.
Coolant Type
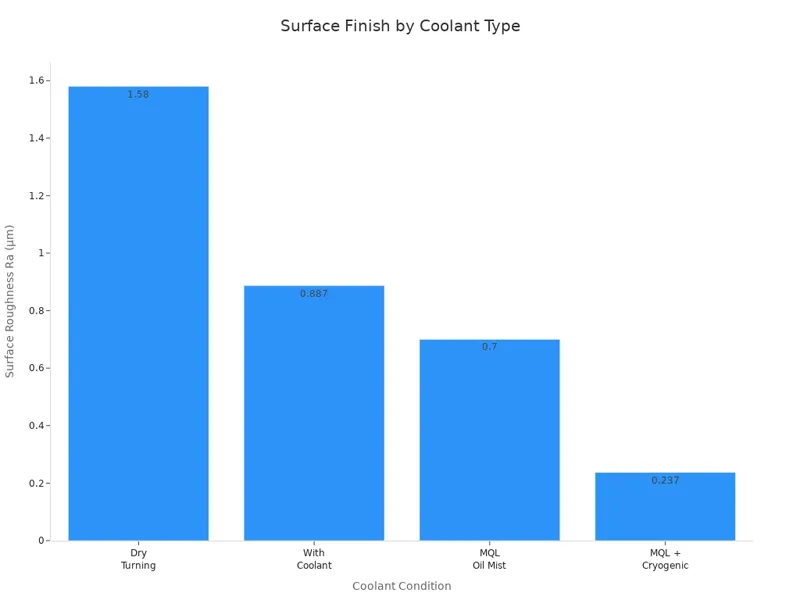
There are different coolants you can use in taper turning. Each one changes the surface finish in its way. Coolant helps by lowering friction and heat where the tool cuts. This means the tool lasts longer and the surface is smoother. The table below shows how different coolants change surface roughness:
| Coolant Condition | Surface Roughness Ra (µm) | Surface Roughness Rz (µm) | Improvement Compared to Dry Turning |
|---|---|---|---|
| Dry Turning | 1.580 | 6.497 | Baseline |
| With Coolant | 0.887 | 3.842 | ~70-80% improvement |
Minimum quantity lubrication, or MQL, uses oil mist and works even better than regular wet coolant. If you add cryogenic cooling to MQL, you get the smoothest surface. This can make the surface about 85% better than dry turning.
Application Methods
How you put coolant on the part is just as important as which one you pick. You should always try to get coolant right where the tool touches the workpiece. This cools things down and helps move chips away, so the surface stays smooth. Here are some good ways to use coolant:
- Use flood or high-pressure coolant to keep things cool and move chips fast.
- Put coolant right at the cutting spot for the best results.
- Try high-pressure coolant for hard jobs, but be careful with small tools.
- Use MQL if you want to save coolant and help the environment.
- Pick air, mist, flood, high pressure, or MQL based on your job and material.
- Coolant breaks long chips into small ones, so the tool lasts longer and the finish is better.
AFI Industrial Co., Ltd. uses smart controls and special surface treatments to make sure every CNC part is high quality. Their team picks the best coolant and way to use it for each job.
Surface Quality
Coolant and lubrication change how smooth your taper turning work is. When you use coolant, the cutting area stays cooler and there is less rubbing. This makes the tool last longer and the part smoother. Studies show that the right coolant can make the surface much better. For example, using coolant instead of no coolant can make the finish up to 80% smoother. MQL and cryogenic cooling can make it even better.
Always check your coolant system before you start. Make sure the coolant flows well and is clean. If you see rough spots or marks, try a different coolant or change how you use it. AFI checks every step to keep the surface quality high on all CNC projects.
Tip: To get the best surface finish, use the right coolant and the best way to apply it. Always watch your results and change things if you need to.
How to Program a Taper on a CNC Lathe
Programming a taper on a CNC lathe takes careful planning and attention to detail. You want to make sure every step leads to a smooth finish and exact shape. If you follow the right process, you can achieve perfect tapers every time. AFI Industrial Co., Ltd. uses advanced CNC programming and intelligent control systems to help you reach this goal.

G-Code Basics
You start by learning the basics of how to program a taper on a CNC lathe. G-code is the language that tells your CNC machine what to do. For taper turning, you often use G01 for straight lines and G02 or G03 for arcs. You need to change both the X and Z axes at the same time to create the taper shape.
Here is a simple example of how to program a taper on a CNC lathe using G-code:
G00 X30 Z0      ; Rapid move to start point
G01 X20 Z-50 F0.1 ; Linear move to end point of taper
This code moves the tool from a larger diameter to a smaller one while moving along the length of the part. You can adjust the numbers to match your taper size. Always double-check your code before running the machine.
Tip: Use simulation software to check your program before you cut the real part. This helps you avoid mistakes and keeps your taper smooth.
Tool Path Optimization
Optimizing your tool path is key to achieving perfect tapers and a fine surface finish. You want to plan your programming so the tool moves smoothly and does not leave marks. Here are some ways tool path optimization helps:
- Adjust feed rate and cutting speed for each section of the taper.
- Use finishing toolpaths after roughing to remove small amounts of material and get a smooth surface.
- Add a semi-finishing pass to even out the material before the final cut.
- Try adaptive clearing to keep tool pressure steady and reduce tool wear.
- Use simulation and advanced programming to refine tool movement and avoid errors.
When you optimize your tool path, you make it easier to achieve perfect tapers and keep the surface finish high. AFI’s CNC programming team uses these methods to deliver top-quality results.
Compensation
Compensation in CNC programming helps you correct for tool deflection and wear. This is important for maintaining the right taper angle and a smooth finish. You can use several techniques:
- Program both X and Z axes together using G01 and slope calculations to match the taper angle.
- Control feed rates closely, such as keeping them within 0.05 mm/rev, to hold tight tolerances.
- Use minimum feed and bidirectional turning at the end of the taper to remove tool marks.
- Choose the largest possible tool diameter and necked tooling for more rigidity.
- Step down with lighter cuts to reduce deflection and avoid taper errors.
- Use tool offset and cutter compensation codes (G41/G42) to adjust for tool wear and diameter changes.
If you follow these compensation steps in your programming, you can keep your tapers accurate and your surface finish smooth. AFI’s intelligent numerical control systems help you apply these techniques to every CNC project.
Note: Always check your finished part with precise measuring tools. This ensures your programming gives you the taper and finish you want.
Troubleshooting Surface Finish in Taper Turning
When you do taper turning, you might see problems with the surface finish. These problems can lower the quality of your taper and how well your parts work. It is important to spot these problems, know what causes them, and fix them step by step. This part will help you find and solve surface finish problems in taper turning. It will also help you keep your results the same each time.
Common Defects
You can find many types of surface finish problems during taper turning. Each problem looks different and has its own cause. Here is a table that lists the most common defects and what usually causes them:
| Surface Finish Defect | Typical Causes |
|---|---|
| Taper dimensional inaccuracies | Misalignment of spindle or guide rails, tool wear, improper cutting parameters, thermal deformation |
| Regular ripples on surface (periodic) | Gear or shaft misalignment, damaged gears, bent rods |
| Regular ripples on circumferential surface | Worn gears, incorrect bearing clearance, machine vibration |
| Chaotic ripples on circumference | Worn bearings, excessive spindle clearance, unstable support or clamping, loose tool holder |
| Vibration marks on circumferential surface | Severely worn bearings, spindle gear vibration |
| Convex end face after machining | Uneven spindle centerline, guide rail errors |
| Non-parallelism of end face | Non-straight guide rails, non-concentric screw rod and nut |
| End face vibration exceeding tolerance | Excessive spindle clearance or displacement |
| Ripples at regular intervals in diameter | Worn guide rails, bent or worn screws and nuts |
| Uneven pitch and irregular thread patterns | Worn or bent screws and nuts, excessive clearance, incorrect installation |
Roughness
Roughness is a very common problem in taper turning. You might see a dull or bumpy surface on your taper. This can happen if your tool is old, your cutting speed is too fast, or your feed rate is not right. Sometimes, roughness comes from bad coolant flow or chips sticking to the tool.
Chatter
Chatter looks like wavy lines or shaking marks on the taper. You might hear loud sounds or feel the machine shake. Chatter often happens when the setup is weak, the tool is not tight, or the spindle bearings are worn out. It can also happen if you cut too deep or use the wrong tool shape.
Root Causes
You need to find out why each surface finish problem happens in taper turning. Here are the main reasons you might get a bad surface finish:
- Tool wear and damage, like built-up edge, chipping, or cracks, can change how your tool cuts the taper.
- Misalignment of the spindle or guide rails can make the tool cut unevenly.
- Machine vibration from worn bearings, loose tool holders, or weak workpiece support can leave marks on the taper.
- Wrong cutting settings, like high feed rates or deep cuts, can make the surface rough.
- Bad coolant flow or poor chip removal can make heat build up and hurt the taper surface.
- Not doing regular maintenance, like checking spindle alignment or cleaning tool holders, can cause problems.
You can stop many of these problems by keeping your CNC machine in good condition. Regular checks, calibration, and alignment help you avoid most surface finish issues.
Solutions
You can fix surface finish problems in taper turning by following these steps:
- Identify the Problem
Watch your CNC machine while it works. Listen for odd sounds or feel for shaking. Look at the taper surface for roughness, ripples, or chatter marks. - Isolate the Cause
Check your tool for wear or damage. Make sure the spindle and guide rails are lined up. Look at the workpiece support and clamping. Check your cutting settings and coolant flow. - Consult Technical Resources
Read your machine’s manual or ask an expert for help. Look for the best settings for taper turning and surface finish. - Implement Corrective Actions
- Change old or damaged tools.
- Adjust spindle speed and feed rate for your material and taper.
- Realign the spindle and guide rails if needed.
- Tighten tool holders and check workpiece clamping.
- Improve coolant flow and chip removal.
- Use the right tool shape and coatings for your material.
- Verify and Test
Run a test part after making changes. Check the tapered surface with a gauge or surface tester. Make sure the problem is gone before you start full production.
Tip: You can stop most surface finish problems by keeping your cnc machine clean, well-maintained, and lined up right. Regular checks and maintenance help you find problems early.
AFI Industrial Co., Ltd. always aims for high quality in taper turning. Their team checks every step, from raw material to shipping. They keep defect rates very low, under 0.05%. You can use their way as a good example for your taper turning work.
Best Practices for CNC Taper Turning
To get the best results in taper turning, you need to follow some important best practices. These steps help you keep your taper surfaces smooth and your parts accurate every time.
How to taper turn on a lathe

There are two main methods for taper turning: the tailstock offset method and the compound slide swiveling method. Each has its own best use case and operational nuances.
Method One: Tailstock Offset Method (Best for Long, Slight Tapers)
Here’s how to do it:
- Calculate the Offset: This is the most critical step.
- First, determine your required taper. You’ll typically have the large diameter (D), small diameter (d), and taper length (L).
- Taper Ratio = (D-d) / L.
- Tailstock Offset = (D-d) / 2 * (Total Workpiece Length / Taper Length).
- Example: If you need to turn a taper with a large end diameter of 20mm, a small end diameter of 10mm, and a taper length of 100mm, and your total workpiece length is 200mm.
- Taper Ratio = (20 – 10) / 100 = 0.1
- Offset = (20 – 10) / 2 * (200 / 100) = 5 * 2 = 10mm.
- Note: In practice, tailstock offsets are usually only a few millimeters, so be meticulous with your calculations.
- Adjust the Tailstock:
- Loosen the clamping bolts at the base of the tailstock.
- Carefully use the adjusting screws on the tailstock to move it by the calculated offset amount from the lathe’s centerline. Some tailstocks have scales to aid in this adjustment, but in reality, test cuts and measurements are the most reliable way.
- Once adjusted, make sure to tighten the tailstock securely to prevent it from shifting during machining.
- Mount the Workpiece and Tool:
- Firmly secure your workpiece between the chuck and the tailstock center. Ensure the center engages well with the workpiece’s center hole and is adequately lubricated.
- Install a sharp left-hand turning tool (if cutting from the large end to the small end) or a right-hand turning tool (if cutting from the small end to the large end). The tool tip must be aligned with the workpiece’s centerline; this is fundamental for accurate tapering.
- Test Cut and Measure:
- Perform a small test cut; don’t take too deep a cut initially.
- Stop the machine and use a micrometer to measure the diameters at both ends of the cut section. Calculate the taper.
- Based on your measurements, fine-tune the tailstock offset until you achieve the desired taper. This might take a few tries, so patience is key.
- Begin the Main Cut:
- Determine the appropriate cutting speed and feed rate. Usually, the feed rate for taper turning shouldn’t be too high to avoid vibration or affect surface finish.
- Use the automatic feed for the cut to ensure a smooth, consistent process.
- Always ensure you have a good supply of coolant to help dissipate heat and clear chips.
Method Two: Compound Slide Swiveling Method (Best for Short, Steep Tapers)
Here’s how to do it:
- Calculate the Angle:
- The half-taper angle (α) can be calculated using trigonometry: tan(α)=(D−d)/(2∗L).
- Then, use the arctangent function to find the angle (α) in degrees.
- Example: If you need to turn a taper with a large end diameter of 30mm, a small end diameter of 20mm, and a taper length of 50mm.
- tan(α)=(30−20)/(2∗50)=10/100=0.1
- α=arctan(0.1)≈5.71∘.
- So, your compound slide needs to be swiveled by about 5.71∘.
- Adjust the Compound Slide:
- Loosen the clamping bolts at the base of the compound slide.
- Rotate the compound slide according to your calculated angle, aligning its scale with the lathe bed’s scale. Most compound slides have precise markings for easy adjustment.
- Securely lock the compound slide in place.
- Mount the Tool:
- Mount your cutting tool in the tool post, ensuring the tool tip is aligned with the workpiece’s centerline.
- Manual Feed Cutting:
- This method uses the manual handwheel of the compound slide for feeding.
- Each depth of cut should not be too large, and ensure the feed is smooth and consistent.
- Again, perform test cuts and measure. Adjust the compound slide’s angle based on your results. Since it’s manual feeding, this process is quite flexible, but it demands a good “feel” from the operator.
- Finishing and Inspection:
- After roughing, reduce the depth of cut and feed rate for finishing passes to achieve a better surface finish.
- Finally, use taper gauges, ring gauges, or a taper master to thoroughly inspect the machined taper and ensure it meets specifications.
Maintenance
You should always keep your CNC machines in top shape. Good maintenance helps you avoid problems and keeps your taper turning process steady. Here are some steps you can follow:
- Check the alignment of the tailstock and workholding fixtures before you start taper turning. This keeps your tapers accurate and stops parts from going out of shape.
- Inspect and replace worn cutting tools often. Dull tools can leave rough marks on your taper.
- Look at the spindle alignment and bearings. If you find wear or looseness, fix it right away to stop vibration and uneven cuts.
- Watch the servo motors and axis movement. This helps you catch backlash or jerky tool motion, which can hurt your taper finish.
- Do daily and regular checks on your CNC machine. Early checks help you find small problems before they become big ones.
- Keep a maintenance log. Write down what you check and fix. This helps you spot patterns and plan future work.
Tip: Preventive maintenance not only keeps your surface finish high but also lowers scrap rates and makes your cnc machines last longer.
Operator Skills
You play a big role in getting a great surface finish in taper turning. Skilled operators know how to set up the machine, choose the right tools, and adjust settings for each job. Here are some ways you can improve your skills:
- Learn how to read and write CNC programming for taper turning. Practice making programs that move the tool smoothly along the taper.
- Watch the machine during taper turning. Listen for odd sounds and look for signs of vibration or tool wear.
- Use measuring tools to check your taper after each run. This helps you catch mistakes early.
- Stay updated on new CNC programming methods and machine features. Training and practice help you get better results.
- Ask for feedback from experienced machinists or use technical support from companies like AFI Industrial Co., Ltd.
Note: Good operator skills lead to fewer mistakes and better taper finishes.
Process Control
You need to control every part of the taper turning process to get the best surface finish. Here are some key steps:
- Set the feed rate low when you want a smooth finish. Lower feed rates make the taper surface finer.
- Adjust the cutting speed based on your material and tool. Higher speeds can help, but you must match them to your setup.
- Use a shallow depth of cut for finishing passes. This keeps the tapered surface even and reduces tool marks.
- Choose the right tool material, like carbide or high-speed steel, for your taper turning jobs.
- Use advanced CNC machines with turret tools and coolant systems. These features help you keep cutting conditions steady.
- Track your results. Write down the settings and outcomes for each taper turning job. This helps you improve your programming and process over time.
Tip: AFI Industrial Co., Ltd. offers technical support and flexible production services. You can use their help to solve problems, improve your programming, and get better taper turning results.
By following these best practices, you can keep your CNC taper turning process strong and reliable. Regular maintenance, skilled operators, and good process control help you make high-quality tapers every time.
You can get a smooth taper surface by following important steps. Pick the right tool for the job. Make sure the machine is lined up correctly. Use feedback systems to find problems with the taper finish early. Skilled workers and advanced CNC machines help control the whole taper process. Top companies use special measuring tools and careful alignment to keep taper quality high. To get better, try training and learn new taper turning methods. AFI Industrial Co., Ltd. can help with your next taper project by offering expert CNC turning solutions.
FAQ
You should use carbide or coated carbide tools for hard metals. High-speed steel works well for softer materials like aluminum or plastic. Always match the tool material to your workpiece for the best surface finish.
You can reduce vibration by using rigid tool holders and supporting long workpieces with a tailstock or steady rest. Make sure the machine setup is tight and secure. This helps you get a smoother surface.
A rough surface often means your tool is dull or your feed rate is too high. Check your tool for wear. Lower the feed rate and use proper coolant. These steps help you get a finer finish.
Flood coolant or minimum quantity lubrication (MQL) gives you the best results. Coolant keeps the cutting area cool and reduces friction. This helps you avoid tool wear and improves the surface finish.
You should use G-code commands like G01 for straight lines. Change both X and Z axes at the same time to create the taper. Always check your program with simulation before running the machine.
Check your tool before every job. If you run long jobs, inspect the tool during the process. Replace worn tools right away. This keeps your surface finish high and prevents defects.
Tool condition matters most. Always use sharp, undamaged tools. Combine this with correct speed, feed, and coolant for the best results.


