You need the correct drill and tap sizes to produce strong holes and threads. Using the correct tap drill size will result in a good fit between the hole and the threads. Selecting the correct drill size will result in accurate holes in over 98% of the holes. This results in strong threads and less extra work. When you work with AFI Industries, you get years of precision machining know-how. Whether you are a professional or an international buyer and engineer of adolescents, these charts and tips will help you.
Key Takeaways
- Pick the right tap drill size. This helps make strong threads. It also stops parts from breaking or being weak.
- Use thread standards like metric, UNC/UNF, and pipe threads. This makes sure parts fit and work together well.
- Look at tap drill size charts and formulas before you drill. This helps you choose the best drill bit for your thread size and pitch.
- Get holes ready for special screws by matching hole size to screw type and material. This stops damage from happening.
- Use the right tools, lubrication, and methods. This helps make clean threads and keeps tools working longer. Check thread quality often.
Table of Contents
Holes and Threads Basics
Why Correct Sizes Matter
When you drill holes and cut threads, you need to use the right sizes. If you pick the wrong size, your holes and threads can fail. For example, if a thread is too shallow, it will not hold strongly. If it is too deep, the material can crack. Studies show that M2 threads need a depth between 1.2 mm and 2 mm, while M10 threads need 6 mm to 10 mm. Staying within these ranges keeps your holes and threads safe and strong. Problems like mountain bike frame failures or engine block cracks often happen when people ignore these numbers.
Tip: Always check the recommended depth for each thread size before you start. This helps you avoid weak joints and broken parts.
You also need to control the shape of the thread. Experts use special tools to measure the pitch diameter and make sure the thread fits well. The ANSI System 22 and Taylor Principle help you keep the thread within safe limits. This makes your holes and threads last longer and work better.
Thread Strength and Fit
The strength of a thread depends on its shape and size. If you use the right thread design, your holes and threads will hold more weight and resist pulling out. Look at the table below to see how different thread shapes affect strength and fit:
| Thread Type | Strength and Fit Highlights |
|---|---|
| Triangle Thread | 31.3% higher pullout strength; best for stable fixation |
| Buttress Thread | Standard design; lowest stability under twisting or pulling |
| Square Thread | Best resistance to sideways movement; strong under heavy loads |
A thread with a smaller pitch and greater depth gives you more pullout strength. This means your holes and threads will not strip or loosen easily. Engineers use computer models to test how different thread shapes spread stress. Triangle and square threads often create less stress in the material, making them a good choice for strong, reliable holes and threads.
Tap Drill Sizes Explained
Tap Drill Size Formula
You need to know the right tap drill sizes before you start tapping. The tap drill size formula helps you get the best fit for your taps. You use this formula for both metric and imperial threads. The formula is simple: Tap Drill Size = Major Diameter – Thread Pitch. The major diameter is the outside width of the thread. The thread pitch is the distance between each thread. For example, if you have an M10 x 1.5 thread, the tap drill size is 10 mm minus 1.5 mm, which gives you 8.5 mm. If you use a 1/4″-20 thread, you subtract the pitch (0.050″) from the major diameter (0.250″), so your tap drill size is 0.200″.
You can follow these steps to find the correct core hole dimensions:
- Identify the thread’s major diameter.
- Find the thread pitch.
- Use the tap drill size formula.
- Check the result with a tap drill chart.
- Pick the closest drill bit size.
- Think about the material. For soft metals, you may use a smaller drill. For hard metals, you may need a slightly larger drill.
- Test the fit on scrap material before final tapping.
This method helps you get the right core hole dimension and recommended hole diameter. You avoid weak threads and broken taps. You also make sure your tapping drill sizes match the taps you use. Using the right drill bit size keeps your threads strong and your parts safe.
| Thread Type | Major Diameter | Pitch | Calculated Tap Drill Size |
|---|---|---|---|
| M5x0.75 | 5 mm | 0.75 mm | 4.25 mm |
| 3/4-10 UNC | 0.75 inch | 0.1 inch | 0.65 inch |
| M10x1.5 | 10 mm | 1.5 mm | 8.5 mm |
This table shows how you use the formula for different thread types. You can see how the core hole drilling process depends on the right calculation.
Tip: Always double-check your core hole dimensions before you start drilling. This step saves you time and prevents mistakes.
Clearance Holes
Clearance holes let screws pass through without cutting threads. You need to know the recommended hole diameter for clearance holes. These holes are usually larger than the tap drill sizes. You use clearance holes when you want the screw to move freely in one part and thread into another. For example, if you use an M6 screw, the clearance hole might be 6.5 mm. This size gives enough space for the screw to slide through.
When you plan core hole drilling, always check the core hole dimension for both tapping and clearance. The right drill bit size for clearance holes prevents binding and makes assembly easy. You avoid damaging threads and taps by using the correct sizes. Tapping drill sizes are for making threads, while clearance holes are for letting screws pass through. Both are important for strong, reliable joints.
Thread Standards
Understanding thread standards helps you choose the right thread for your project. You find different standards in use around the world. Each standard has its own rules for thread shape, size, and fit. These standards make sure your parts work together and stay strong.
Metric Threads
You see metric threads used in most countries outside North America. The metric standard thread uses millimeters for all measurements. ISO sets the rules for metric threads and core hole diameter, so you get the same shape and fit every time. The most common metric thread types follow ISO 68-1 and ISO 261. These standards define the V-shaped profile and the pitch for each size. You can use a simple rule to find the tap drill size for metric threads: subtract the pitch from the major diameter. For example, if you have an M8 x 1.25 thread, you use a 6.75 mm drill. You can also use a percentage of the major diameter, about 85% for coarse threads and 90% for fine threads.
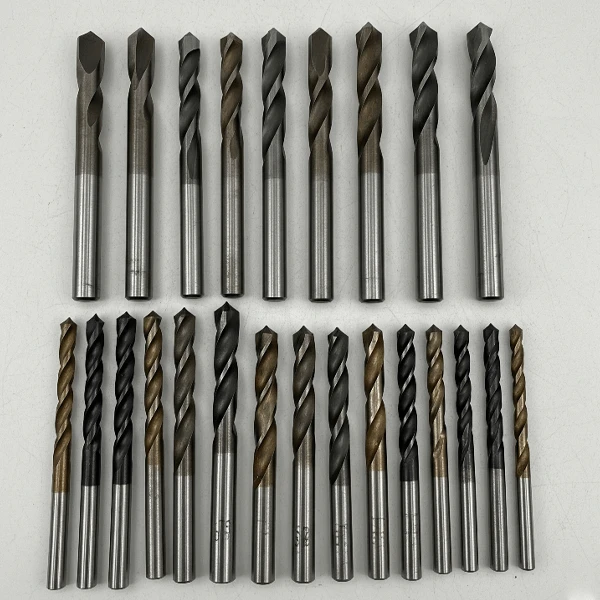
Metric Coarse – M Comparison Chart
| Thread Specification | Nominal diameter (D) mm | Pitch (P) mm | Drill diameter mm | AFI Recommended Drill mm | Similar specifications |
| M1 | 1 | 0.25 | 0.75 | 0.8 | – |
| M1.2 | 1.2 | 0.25 | 0.95 | 1 | – |
| M1.4 | 1.4 | 0.3 | 1.1 | 1.15 | – |
| M1.6 | 1.6 | 0.35 | 1.25 | 1.3 | – |
| M1.7 | 1.7 | 0.35 | 1.35 | 1.4 | – |
| M1.8 | 1.8 | 0.35 | 1.45 | 1.5 | – |
| M2 | 2 | 0.4 | 1.6 | 1.65 | – |
| M2.2 | 2.2 | 0.45 | 1.75 | 1.8 | – |
| M2.5 | 2.5 | 0.45 | 2.05 | 2.1 | – |
| M3 | 3 | 0.5 | 2.5 | 2.6 | – |
| M3.5 | 3.5 | 0.6 | 2.9 | 3 | – |
| M4 | 4 | 0.7 | 3.3 | 3.4 | – |
| M4.5 | 4.5 | 0.75 | 3.70 – 3.75 | 3.85 | – |
| M5 | 5 | 0.8 | 4.2 | 4.3 | – |
| M6 | 6 | 1 | 5 | 5.1 | – |
| M7 | 7 | 1 | 6 | 6.1 | – |
| M8 | 8 | 1.25 | 6.75 – 6.80 | 6.9 | 17/64″ (6.75) |
| M9 | 9 | 1.25 | 7.75 – 7.80 | 7.9 | – |
| M10 | 10 | 1.5 | 8.5 | 8.6 | – |
| M11 | 11 | 1.5 | 9.5 | 9.6 | – |
| M12 | 12 | 1.75 | 10.25 | 10.35 | – |
| M14 | 14 | 2 | 12 | 12.2 | 15/32″ (11.91) |
| M16 | 16 | 2 | 14 | 14.2 | 35/64″ (13.89) |
| M18 | 18 | 2.5 | 15.5 | 15.7 | 39/64″ (15.48) |
| M20 | 20 | 2.5 | 17.5 | 17.7 | 11/16″ (17.46) |
| M22 | 22 | 2.5 | 19.5 | 19.7 | 49/64″ (19.45) |
| M24 | 24 | 3 | 21 | 21.2 | 53/64″ (21.03) |
| M27 | 27 | 3 | 24 | 24.2 | 15/16″ (23.81) |
| M30 | 30 | 3.5 | 26.5 | 26.7 | 1-3/64″ (26.99) |
| M33 | 33 | 3.5 | 29.5 | 29.8 | 1-5/32″ (29.37) |
| M36 | 36 | 4 | 32 | 32.3 | 1-1/4″ (31.75) |
| M39 | 39 | 4 | 35 | 35.3 | 1-3/8″ (34.93) |
| M42 | 42 | 4.5 | 37.5 | 37.8 | 1-15/32″ (37.31) |
| M45 | 45 | 4.5 | 40.5 | 40.8 | 1-19/32″ (40.48) |
| M48 | 48 | 5 | 43 | 43.3 | 1-11/16″ (42.86) |
| M52 | 52 | 5 | 47 | 47.3 | 1-27/32″ (47.23) |
| M56 | 56 | 5.5 | 50.5 | 50.8 | 1-63/64″ (50.40) |
| M60 | 60 | 5.5 | 54.5 | 54.8 | 2-5/64″ (54.37) |
| M64 | 64 | 6 | 58 | 58.3 | 2-9/32″ (58.34) |
Metric Fine – MF Comparison Chart
| Thread Specification | Nominal diameter (D) mm | Pitch (P) mm | Drill diameter mm | AFI Recommended Drill mm | Similar specifications |
| M8x1 | 8 | 1 | 7 | 7.1 | – |
| M10x1 | 10 | 1 | 9 | 9.1 | – |
| M10x1.25 | 10 | 1.25 | 8.75 | 8.85 | 11/32″ (8.73) |
| M12x1 | 12 | 1 | 11 | 11.1 | – |
| M12x1.25 | 12 | 1.25 | 10.75 | 10.85 | 27/64″ (10.72) |
| M12x1.5 | 12 | 1.5 | 10.5 | 10.6 | – |
| M14x1 | 14 | 1 | 13 | 13.1 | – |
| M14x1.5 | 14 | 1.5 | 12.5 | 12.6 | – |
| M16x1 | 16 | 1 | 15 | 15.1 | – |
| M16x1.5 | 16 | 1.5 | 14.5 | 14.5 | – |
| M18x1 | 18 | 1 | 17 | 17.1 | – |
| M18x1.5 | 18 | 1.5 | 16.5 | 16.6 | – |
| M18x2 | 18 | 2 | 16 | 16.2 | – |
| M20x1 | 20 | 1 | 19 | 19.1 | – |
| M20x1.5 | 20 | 1.5 | 18.5 | 18.6 | – |
| M20x2 | 20 | 2 | 18 | 18.2 | – |
| M22x1 | 22 | 1 | 21 | 21.1 | – |
| M22x1.5 | 22 | 1.5 | 20.5 | 20.6 | – |
| M22x2 | 22 | 2 | 20 | 20.2 | – |
| M24x1 | 24 | 1 | 23 | 23.1 | – |
| M24x1.5 | 24 | 1.5 | 22.5 | 22.6 | – |
| M24x2 | 24 | 2 | 22 | 22.2 | – |
| M27x1 | 27 | 1 | 26 | 26.1 | – |
| M27x1.5 | 27 | 1.5 | 25.5 | 25.6 | – |
| M27x2 | 27 | 2 | 25 | 25.2 | – |
| M30x1 | 30 | 1 | 29 | 29.1 | – |
| M30x1.5 | 30 | 1.5 | 28.5 | 28.6 | – |
| M30x2 | 30 | 2 | 28 | 28.2 | – |
| M30x3 | 30 | 3 | 27 | 27.3 |
You find metric threads in cars, electronics, and machinery. ISO standards help you match parts from different suppliers. Metric threads give you a reliable fit and easy measurement.
Unified Threads (UNC/UNF)
Unified threads are common in the United States and Canada. You measure these threads in inch units. The American coarse thread and American fine thread Standard (UTS) covers both UNC (coarse) and UNF (fine) threads. UNC threads have fewer threads per inch, while UNF threads have more. This difference changes the strength and fit of the thread. For example, a 1/2 UNC screw threads per inch has 13 threads, while a 1/2 UNF screw threads per inch has 20 threads. You use UNC threads for general work and UNF threads for precision jobs.
Unified National Coarse – UNC Comparison Chart
| Thread Specification | Nominal diameter (D) inch | Teeth per inch (n) | Pitch (P) mm (≈25.4/n) | Drilling diameter mm | AFI Recommended Drilling mm | U.S. Drill Bits/Inch |
| #0 | 0.06 | 80 | 0.3175 | 1.3 | 1.4 | #55 (1.30) |
| #1 | 0.073 | 72 | 0.3528 | 1.55 | 1.65 | #52 (1.55) |
| #2 | 0.086 | 64 | 0.3969 | 1.8 | 1.9 | #48 (1.80) |
| #3 | 0.099 | 56 | 0.4536 | 2.1 | 2.2 | #43 (2.10) |
| #4 | 0.112 | 48 | 0.5292 | 2.30 – 2.35 | 2.45 | #41 (2.35) |
| #5 | 0.125 | 44 | 0.5773 | 2.55 – 2.60 | 2.7 | #38 (2.60) |
| #6 | 0.138 | 40 | 0.635 | 2.85 | 2.95 | #33 (2.85) |
| #8 | 0.164 | 36 | 0.7056 | 3.45 – 3.50 | 3.6 | #30 (3.50) |
| #10 | 0.19 | 32 | 0.7938 | 3.90 – 3.95 (3.9 for 75%) | 4.0/4.1 | #30 (3.50) / #29 (3.65) / #28 (3.70) / #21 (4.00) |
| 1/4″ | 0.25 | 20 | 1.27 | 5.10 – 5.15 (5.1 for 75%) | 5.2/5.3 | #F (5.10) / #7 (5.15) / 13/64″ (5.16) |
| 5/16″ | 0.3125 | 18 | 1.4111 | 6.60 – 6.70 (6.6 for 75%) | 6.7/6.8 | #I (6.35) / #29 (6.65) / 17/64″ (6.75) |
| 3/8″ | 0.375 | 16 | 1.5875 | 8.00 – 8.10 (8.0 for 75%) | 8.1/8.2 | #Q (8.00) / 5/16″ (7.94) / #P (8.05) |
| 7/16″ | 0.4375 | 14 | 1.8143 | 9.60 – 9.70 | 9.75/9.85 | U (9.40) / 3/8″ (9.53) / #29 (9.65) |
| 1/2″ | 0.5 | 13 | 1.9538 | 10.90 – 11.00 (10.9 for 75%) | 11/11.1 | 27/64″ (10.72) / #Q (11.00) |
| 9/16″ | 0.5625 | 12 | 2.1167 | 12.30 – 12.40 | 12.4/12.5 | 31/64″ (12.30) / 12.40mm |
| 5/8″ | 0.625 | 11 | 2.3091 | 13.60 – 13.70 (13.6 for 75%) | 13.7/13.8 | 17/32″ (13.49) / #Q (13.50) / 13.60mm |
| 3/4″ | 0.75 | 10 | 2.54 | 16.50 – 16.60 (16.5 for 75%) | 16.6/16.7 | 21/32″ (16.67) / 16.50mm |
| 7/8″ | 0.875 | 9 | 2.8222 | 19.50 – 19.60 | 19.6/19.7 | 49/64″ (19.45) / 19.50mm |
| 1″ | 1 | 8 | 3.175 | 22.40 – 22.50 (22.4 for 75%) | 22.5/22.6 | 45/64″ (22.23) / 22.50mm |
| 1-1/8″ | 1.125 | 7 | 3.6286 | 25.00 – 25.10 | 25.1/25.2 | 1″ (25.40) / 25.00mm |
| 1-1/4″ | 1.25 | 7 | 3.6286 | 28.00 – 28.10 | 28.1/28.2 | 1-3/32″ (27.78) / 28.00mm |
| 1-3/8″ | 1.375 | 6 | 4.2333 | 30.80 – 30.90 | 30.9/31.0 | 1-1/4″ (31.75) / 30.80mm |
| 1-1/2″ | 1.5 | 6 | 4.2333 | 33.60 – 33.70 | 33.7/33.8 | 1-5/16″ (33.34) / 33.60mm |
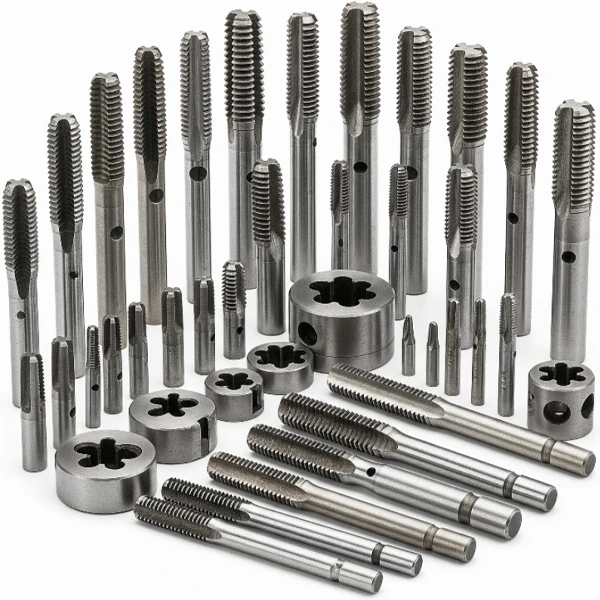
Unified National Fine – UNF Comparison Chart
| Thread Specification | Nominal diameter (D) inch | Teeth per inch (n) | Pitch (P) mm (≈25.4/n) | Drilling diameter mm | AFI Recommended Drilling mm | U.S. Drill Bits/Inch |
| #0 | 0.06 | 80 | 0.3175 | 1.3 | 1.4 | #55 (1.30) |
| #1 | 0.073 | 72 | 0.3528 | 1.55 | 1.65 | #52 (1.55) |
| #2 | 0.086 | 64 | 0.3969 | 1.8 | 1.9 | #48 (1.80) |
| #3 | 0.099 | 56 | 0.4536 | 2.1 | 2.2 | #43 (2.10) |
| #4 | 0.112 | 48 | 0.5292 | 2.30 – 2.35 | 2.45 | #41 (2.35) |
| #5 | 0.125 | 44 | 0.5773 | 2.55 – 2.60 | 2.7 | #38 (2.60) |
| #6 | 0.138 | 40 | 0.635 | 2.85 | 2.95 | #33 (2.85) |
| #8 | 0.164 | 36 | 0.7056 | 3.45 – 3.50 | 3.6 | #30 (3.50) |
| #10 | 0.19 | 32 | 0.7938 | 3.90 – 3.95 (3.9 for 75%) | 3.90 / 4.00 | #30 (3.50) / #29 (3.65) / #28 (3.70) / #21 (4.00) |
| 1/4″ | 0.25 | 28 | 0.9071 | 5.40 – 5.45 (5.4 for 75%) | 5.40 / 5.45 | #4 (5.31) / 7/32″ (5.56) / 5.40mm |
| 5/16″ | 0.3125 | 24 | 1.0583 | 6.70 – 6.80 (6.7 for 75%) | 6.70 / 6.80 | #H (6.35) / 17/64″ (6.75) |
| 3/8″ | 0.375 | 24 | 1.0583 | 8.70 – 8.80 (8.7 for 75%) | 8.70 / 8.80 | #S (8.33) / 11/32″ (8.73) |
| 7/16″ | 0.4375 | 20 | 1.27 | 10.20 – 10.30 | 10.20 / 10.30 | #16 (9.93) / 25/64″ (9.92) / #15 (10.00) / 10.20mm |
| 1/2″ | 0.5 | 20 | 1.27 | 11.70 – 11.80 (11.7 for 75%) | 11.70 / 11.80 | #R (11.51) / 15/32″ (11.91) / 11.70mm |
| 9/16″ | 0.5625 | 18 | 1.4111 | 13.20 – 13.30 | 13.20 / 13.30 | 33/64″ (13.10) / #T (13.29) |
| 5/8″ | 0.625 | 18 | 1.4111 | 14.70 – 14.80 (14.7 for 75%) | 14.70 / 14.80 | #V (14.68) / 37/64″ (14.68) |
| 3/4″ | 0.75 | 16 | 1.5875 | 17.40 – 17.50 (17.4 for 75%) | 17.40 / 17.50 | #Y (17.07) / 11/16″ (17.46) / 17.50mm |
| 7/8″ | 0.875 | 14 | 1.8143 | 20.30 – 20.40 | 20.30 / 20.40 | 51/64″ (20.24) / 20.30mm |
| 1″ | 1 | 12 | 2.1167 | 23.10 – 23.20 (23.1 for 75%) | 20.30 / 20.41 | 45/64″ (22.23) / #W (22.86) / 23.10mm |
You find unified threads in applications, vehicles, and heavy equipment. The ASME B1.1 standard guides you when you select these thread. This standard ensures your inch thread types fit and hold as expected.
Pipe Threads
Pipe threads help you join pipes and fittings. You use them for standard taps, water, gas, and oil lines. The most common pipe thread standards are NPT (National Pipe Taper) and BSP (British Standard Pipe). NPT threads have a 60° angle and a taper, which helps seal the joint. BSP threads use a 55° angle and come in both parallel and tapered forms. You find NPT threads mostly in North America and BSP threads in Europe and Asia.
| Tap Size | Recommended Drill Size |
|---|---|
| 1/8-27 | R (special drill size) |
| 1/4-18 | 7/16 inch |
| 3/8-18 | 37/64 inch |
| 1/2-14 | 23/32 inch |
| 3/4-14 | 59/64 inch |
| 1″-11.5 | 1-5/32 inch |
NPT threads seal by compression, so you do not always need extra sealant. BSP threads can be parallel or tapered, which changes how you seal the joint. ISO and ASME both set standards for pipe threads, making sure you get a safe and tight fit.
Note: International standards like ISO 68-1, ISO 261, and ASME B1.20.1 help you match threads across different industries and countries.
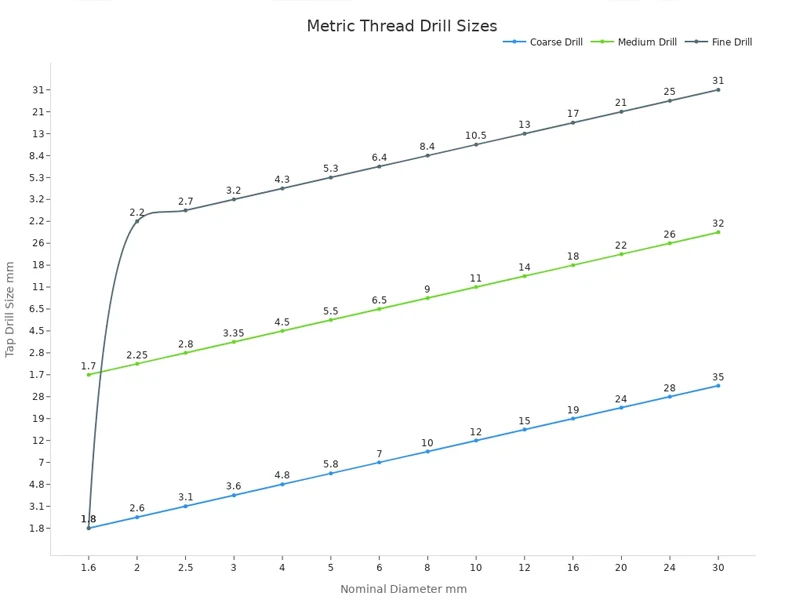
Tap Drill Sizes Charts
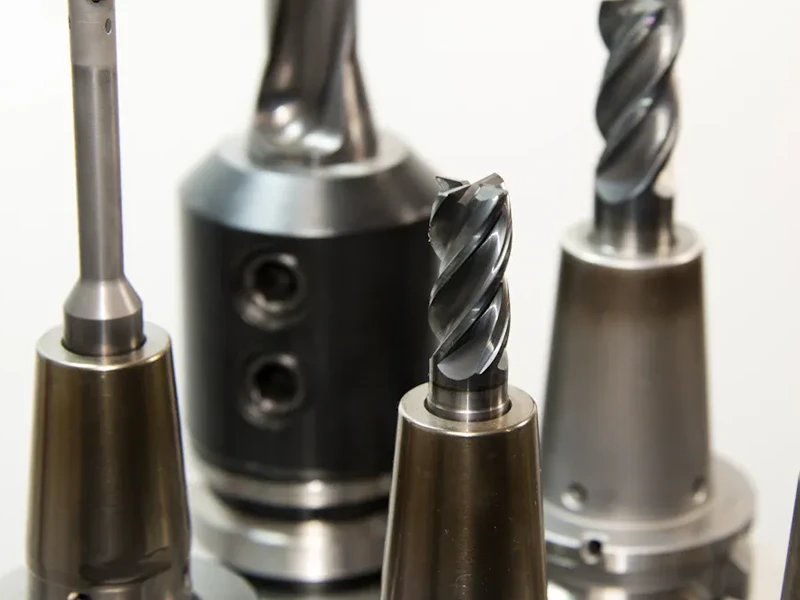
Choosing the right tap drill sizes helps you create strong, reliable threads. You need to match the core hole dimensions to the thread type and size. This section gives you easy-to-read tables for metric, UNC/UNF, and pipe threads. You can use this pilot hole size chart to select the best drill for your taps and avoid common mistakes. AFI Industrial Co., Ltd. uses these standards in its precision machining services, so you know you get accurate threading every time.
Metric Tap Drill Sizes
Metric threads follow international standards like ISO 724 and ISO 261. These standards give you the correct core hole dimensions for metric fine threads. You find metric threads in many machines, cars, and electronics. The tables below show the most common metric tap drill sizes. You can use this thread data to pick the right drill for your taps and get the best bolts and nuts fasteners fit.
| Thread Size (Metric) | Thread Pitch (mm) | Tap Drill Size (mm) | Clearance Drill Size (mm) |
|---|---|---|---|
| M3 | 0.5 | 2.5 | 3.4 |
| M4 | 0.7 | 3.3 | 4.5 |
| M5 | 0.8 | 4.2 | 5.5 |
| M6 | 1.0 | 5.0 | 6.6 |
| M8 | 1.25 | 6.8 | 9.0 |
| M10 | 1.5 | 8.5 | 11.0 |
| M12 | 1.75 | 10.2 | 13.5 |
| M16 | 2.0 | 14.0 | 17.5 |
You see that each metric thread has a matching tap drill size. For example, if you want to tap an M10 thread, you use an 8.5 mm drill. This matches the tap drill standard and gives you the right core hole dimensions. You can also check the clearance drill size if you need a hole for a bolt to pass through without threading.
Tip: Always use the correct tap drill size for your taps. This keeps your threads strong and prevents tap breakage.
AFI Industrial uses advanced machines and strict quality. We will use thread gauges to check the size to make sure every metric thread meets the exact size. You get reliable results for every project.
UNC/UNF Tap Drill Sizes
UNC and UNF threads use inch measurements. UNC stands for Unified National Coarse, and UNF stands for Unified National Fine. You find these threads in many American and Canadian products. The tap drill size depends on the thread type and diameter. Using the right tap drill size helps you get the best core hole sizes, dimension,s and strong threads.
| Thread Size (Inch) | Threads Per Inch (TPI) | Tap Drill Size (Inch) | Tap Drill Size (mm) |
|---|---|---|---|
| 1/4-20 UNC | 20 | 0.201 | 5.1 |
| 5/16-18 UNC | 18 | 0.257 | 6.5 |
| 3/8-16 UNC | 16 | 0.312 | 7.9 |
| 1/2-13 UNC | 13 | 0.421 | 10.7 |
| 1/4-28 UNF | 28 | 0.213 | 5.4 |
| 5/16-24 UNF | 24 | 0.272 | 6.9 |
| 3/8-24 UNF | 24 | 0.332 | 8.4 |
| 1/2-20 UNF | 20 | 0.462 | 11.7 |
You can see that each thread size has a matching tap drill size. For example, a 1/4-20 UNC thread needs a 0.201 inch drill. This gives you the right core hole dimensions for your taps. Using the correct size helps you avoid weak threads and tool damage.
Note: Always check the tap drill chart before drilling. This step saves you time and keeps your threads accurate.
AFI Industrial’s team uses these core hole size tables and technical data to make sure every UNC and UNF thread meets the highest standards. You get precise threads and strong assemblies.
Pipe Thread Tap Drill Sizes
Pipe threads help you connect pipes and fittings. You need the right tap drill sizes to get a tight seal and strong connection. Most pipe threads use inch measurements. The table below shows the recommended tap drill sizes for common pipe threads.
| Pipe Thread Size | Threads Per Inch (TPI) | Tap Drill Size (Inch) | Tap Drill Size (mm) |
|---|---|---|---|
| 1/8-27 NPT | 27 | 0.339 | 8.6 |
| 1/4-18 NPT | 18 | 0.438 | 11.1 |
| 3/8-18 NPT | 18 | 0.562 | 14.3 |
| 1/2-14 NPT | 14 | 0.734 | 18.7 |
| 3/4-14 NPT | 14 | 0.938 | 23.8 |
| 1-11.5 NPT | 11.5 | 1.188 | 30.2 |
- Recommended tap drill sizes help you get the right thread percentage, usually between 55% and 65%.
- Using the largest drill that gives you this percentage makes tapping easier and extends tool life.
- Avoid drilling smaller than recommended. This does not make the thread stronger but increases the risk of tap breakage.
- The quality of the taps and cutting fluid affects the surface finish more than the drill size.
You can trust AFI Industrial to follow these industry standards. Their experience and advanced equipment ensure every pipe thread meets the correct core hole dimensions and tap drill sizes.
Tip: Always use the recommended tap drill size for your taps. This keeps your threads strong and your tools safe.
You can rely on these charts for your next project. AFI Industrial’s precision machining services use these tap drill sizes and core hole dimensions to deliver high-quality threads every time.
Holes for Specialty Screws
Specialty screws need special attention when you prepare holes. The right core hole dimensions help you get strong, safe connections. You must match the screw size and the recommended hole diameter to avoid problems like stripping or splitting. Let’s look at how to choose the best holes for self-tapping, thread-forming, and wood screws.
Self-Tapping Screws
Self-tapping screws cut their own threads as you drive them in. You need to drill a pilot hole that matches the screw’s core diameter. This pilot hole size helps the screw form threads without breaking or causing damage. Studies show that self-tapping screws create higher stress and deformation along the screw length compared to self-drilling screws. For example, a #10 self-tapping screw works well with a 5/32 inch drill bit in soft materials, but you may need a 3/16 inch bit for harder materials. Always check the screw size and test on scrap material to find the recommended hole diameter for the material. Using the right core hole dimensions lowers the risk of fatigue and loosening.
| Screw Type | Max Stress (MPa) | Max Deformation (mm) |
|---|---|---|
| Self-tapping | 562.71 | 0.136 |
| Self-drilling | 144.94 | 0.01066 |
Thread-Forming Screws
Thread-forming screws press threads into the material instead of cutting them. You need to drill holes with exact core hole dimensions for the screw size. If the hole is too small, you get high drive torque and risk breaking the screw. If the hole is too large, the threads may strip. Experts recommend testing different hole sizes in your material to find the best fit. The recommended hole diameter for the material depends on the thickness and how you prepare the hole. Proper pilot hole size helps you get strong, reliable threads and reduces assembly problems.
Wood Screws
Wood screws need careful hole preparation to prevent splitting and to hold tight. For screws up to 6 mm in diameter, drill pilot holes about 70–75% of the screw size. For larger screws, use 80–85% of the screw size. If you drill a hole smaller than needed, the wood may split. If the hole is too large, the screw will not hold well. Always use a sharp drill bit and a slow feed rate to make smooth holes. This improves the screw’s grip and increases withdrawal resistance.
- For hardwoods, use a drill bit slightly smaller than the screw’s core diameter.
- Make the pilot hole depth just less than the screw length for best results.
Tip: Always match the core hole dimensions to the screw size and material for the strongest hold.
Using Charts
Selecting the Right Size
When you use a tap drill size chart, you make sure each thread fits perfectly. Start by finding the thread size and pitch you need for your project. Look at the chart to match the thread with the correct drill size. For example, if you want to cut an M3 × 0.5 thread, the chart shows you need a 2.5mm drill. This step helps you avoid a hole that is too tight or too loose.
You can also use a simple formula to check your drill size:Drill size = 7/8 × (tap size) – 1/32
This formula works well for many standard threads. Always compare your result with the chart to confirm the recommended hole diameter.
Tip: Test the drill and tap on a scrap piece before working on your final part. This practice helps you see if the thread fits well and if the recommended hole diameter gives you the best result.
Avoiding Common Mistakes
You can prevent many problems by following a few best practices when using tap drill size charts:
- Use enough lubrication, especially for harder materials. This step keeps the tap from wearing out early and gives you a smooth thread.
- Set the correct tap speed. If you go too fast or too slow, you might break the tap or get poor thread quality.
- Keep the tap straight. Misalignment can strip the thread or cause uneven wear. Use a guide if you need help.
- Always check the chart for the recommended hole diameter. Using the wrong drill size can make the thread too tight or too loose, which weakens the joint.
- Follow industry standards for every thread you cut. Standards help you get safe, strong, and reliable results.
| Thread Size | Major Diameter | Pitch | Recommended Drill Size |
|---|---|---|---|
| M3 × 0.5 | 3 mm | 0.5 | 2.5 mm |
| M5 × 0.8 | 5 mm | 0.8 | 4.2 mm |
By using the chart and following these tips, you make sure every thread meets the recommended hole diameter and holds up under stress. You protect your tools and your workpiece, and you get a strong, safe connection every time.
Drilling Tips
Tool Selection
Choosing the right tools is the first step to successful drilling and threading. You need to match the drill bit size to the material and the type of thread you want to create. Using the wrong drill or tools can lead to poor thread quality and even damage your workpiece. For example, single-lip threading tools work best for internal threads, while custom tools help with smooth external threads. Always check that your drill bit size fits the thread standard you are using.
Here are some important safety and technique steps to follow:
- Pick the correct type and size of drill and drill bits for your job.
- Wear safety goggles and gloves to protect yourself.
- Tighten the drill chuck well to hold the drill bit securely.
- Clamp your workpiece so it does not move.
- Let the drill do the work—do not push too hard.
- Mark your drilling spot for better accuracy.
- Use a drill guide for straight holes.
- Keep your tools clean and sharp for the best results.
Selecting high-quality drill rods and bits helps prevent breakage and keeps your threads accurate. In tough materials like titanium, you may need special coatings or shapes for your drill bits to avoid tool wear and ensure a clean thread.
Lubrication and Technique
Lubrication plays a big role in making clean threads and extending tool life. When you use the right lubricant, you reduce heat and friction. This keeps your drill bit size accurate and helps the thread form smoothly. For steel, add lubricant every three to four holes. For other materials, apply it before each hole. Cooling fans can also help remove heat during drilling.
- Lubrication stops build-up on the drill and makes your tools last longer.
- Tapping fluids help you cut threads with less wear.
- Drilling to the correct drill bit size before threading avoids misalignment.
- Regularly check and replace worn taps to keep thread quality high.
Always set up your machine and tools properly. This helps you avoid errors and get strong, even threads.
Checking Thread Quality
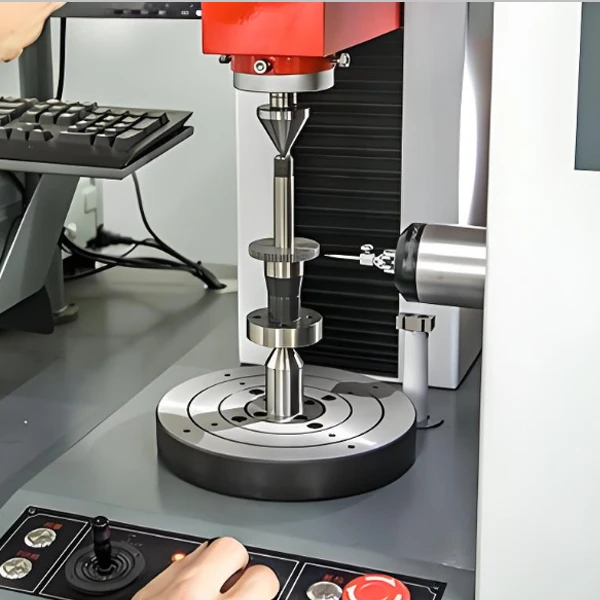
After drilling and threading, you need to check your work. Use thread gauges and micrometers to measure the thread’s size and angle. In-process gauging lets you make quick adjustments if needed. You can also use optical comparators to check the thread profile and pitch.
- Use through and stop gauges to test thread fit.
- Inspect threads for damage, missing teeth, or burrs.
- Keep records of your inspections and any fixes you make.
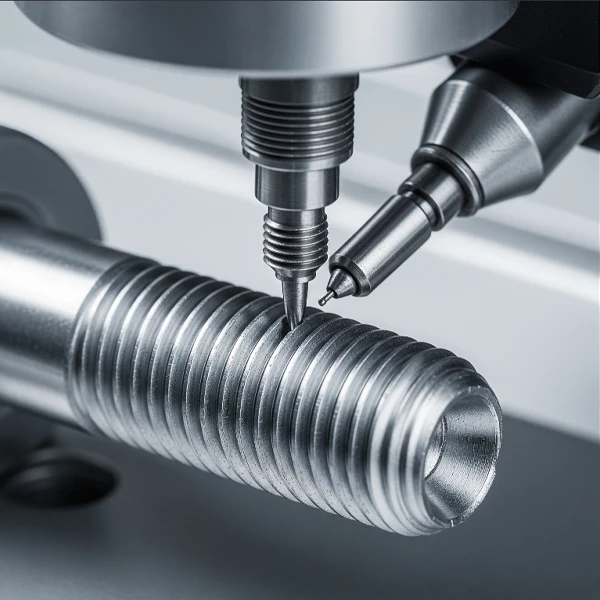
High-quality threads distribute load evenly and last longer. Following these steps ensures your threads meet industry standards and perform well in real-world use.
When you pick the right tap drill size, your threads stay strong. This helps you avoid weak spots and keeps your tools safe.
- Save these charts so you can find them fast for your next job.
- You can count on AFI Industrial Co., Ltd. for expert threading and careful machining.
Remember: Good holes and threads begin with the right facts and a trusted team.
FAQ
If you use the wrong tap drill size, your threads may strip or break. The screw might not fit well. Always check the chart before drilling. This step helps you get strong, safe threads.
You find the thread size and pitch. Then, check the tap drill size chart. Pick the drill bit that matches the chart. Test on scrap material first. This helps you avoid mistakes.
You should not mix metric and imperial threads. The sizes and pitches do not match. Mixing them can cause loose fits or damage. Always use the same thread standard for all parts.
Clearance holes let screws pass through one part without threading. This helps with easy assembly and prevents thread damage. Use the chart to find the right clearance hole size for your screw.
AFI Industrial uses advanced machines and strict quality checks. Their team measures every thread with precise tools. You get parts that meet international standards and fit perfectly every time.

